How to Create a Task
Create tasks, assign them to your team, and schedule work directly in Swivl. This article walks you through the two-step task creation process from start to finish.
Overview
Tasks in Swivl let you organize and assign work to your field team. Each task captures the customer details, job information, schedule, and assignee, giving your team everything they need to get the job done.
Who can access this
Role | Access Level |
|---|---|
Super Admin | Can create, edit, and manage all tasks |
Admin | Can create, edit, and manage all tasks |
Lead Technician | Can create and manage tasks for their team |
Technician | Can view and update their own assigned tasks |
How to Create a Task

Step 1: Task Details
This step is required before you can proceed with task creation.
Customer & Location
- Customer Name: select the customer contact from your list.
- Job Number: select the job associated with this task. The job dropdown is only available after selecting a customer.
- Job Site Address: select the job site address.
- Building/Unit: optional, enter the building or unit number if applicable.
- Requested By: optional, select who requested the task.
- Site Contact: optional, select the site contact for this task.
Task Info
- Task Name: enter a clear task title (e.g., Kitchen Renovation). This field is required.
- Task Description: describe the job scope, tasks, and any special notes. You can use the Generate button to auto-generate a description using AI, or Rewrite to regenerate it.
Additional Options
- Check Send Email to Site Contact to notify the site contact when the task is created.
- Attach supporting files under Media and Documents , upload images, videos, or documents. Supported formats(max 100MB per file).


Click Save & Close to save the task, or proceed to Step 2 to schedule and assign it.
Step 2: Scheduling and Assigning
This step is optional you can complete it at any time.
Whom to Assign This Task?
Choose one of the following options:
- Assign to Technician: assign the task to one of your technicians.
- Assign to Subcontractor: assign the task to a subcontractor.
- Request Bids from Subcontractors: send the task out for subcontractors to bid on.
- Schedule without Assigning: schedule the task without assigning it to anyone yet.
- Skip for Later: save the task without scheduling or assigning.
Choose a Date and Time
Set the Start Date and Time and End Date and Time for the task.
Assign Tasks to Technicians from the List
- Search for a technician by name.
- Each technician shows their current availability:
- Available- free during the selected time slot.
- Available Soon- becomes free after a specific time.
- Busy- currently has another task scheduled.
Click Assign Task to assign, or Suggest New Time to let AI recommend a better time slot.
Safety & Compliance Checklist
- Enable the toggle to attach a safety checklist to this task. The checklist will appear when the technician tries to close the task.
Click Save & Close to save the task.


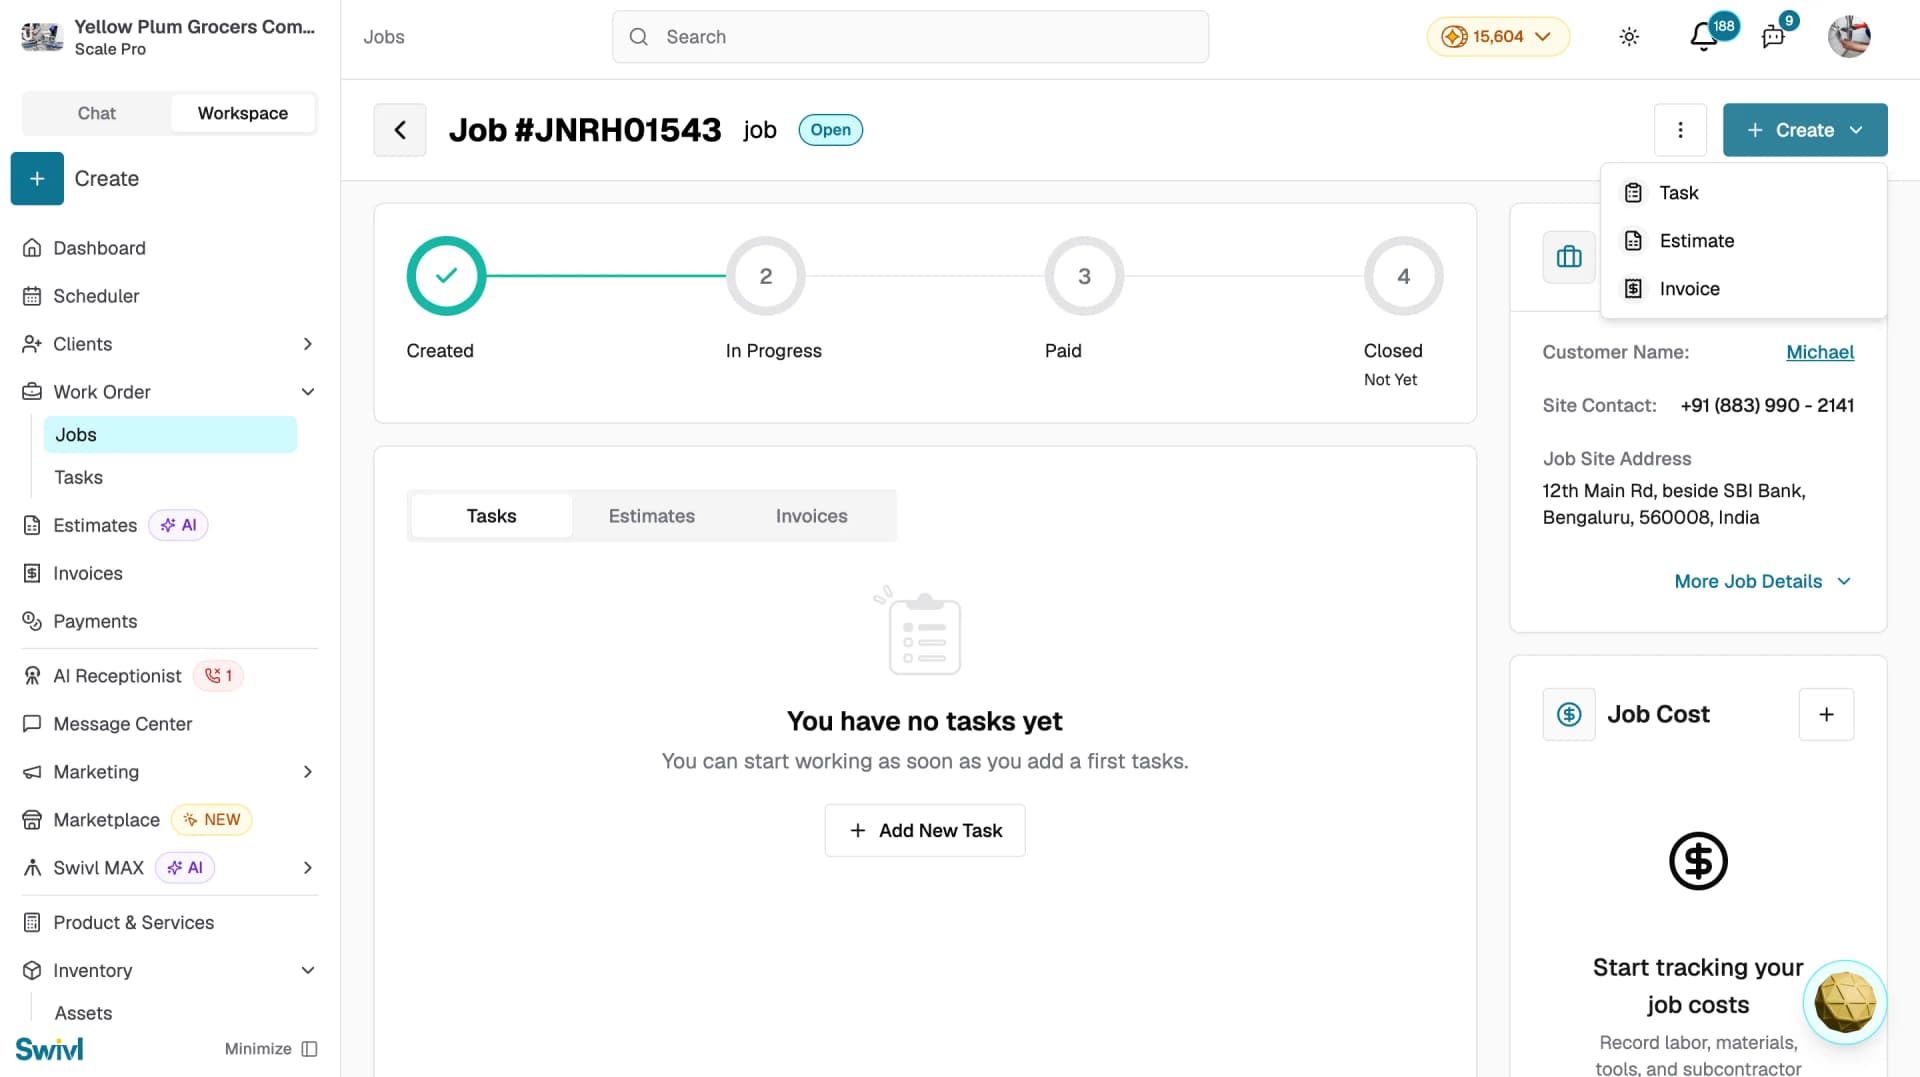
Creating a Task from a Job
You can also create and assign a task directly from within a job.
- Go to Work Order → Jobs and open the job.
- Click the Tasks tab.
- Click + Add New Task or + Create → Task from the top-right.
- Follow the same two-step process to fill in the task details and assign it.
Tips
- Use the Generate button in the Task Description field to quickly create a detailed description using AI, saving you time on manual entry.
- Check technician availability before assigning the list shows who is Available, Available Soon, or Busy so you can assign work without conflicts.
- If you are not ready to assign the task yet, select Skip for Later, you can always come back and assign it from the Task Scheduler.
- Enable the Safety & Compliance Checklist for tasks that involve hazardous work, it ensures technicians follow safety protocols before closing the task.
- Attach relevant photos or documents in Step 1 so technicians have everything they need before arriving on site.
- You can also create a task directly from the Task Scheduler by clicking on a time slot on the calendar.