
Creating an Estimate from a job
Create and send estimates to customers before work begins. When linked to a job, customer and job details are pre-filled automatically and approved estimates can be converted directly into invoices.
Overview
Estimates let you send pricing proposals to customers before work begins. When created from a job, customer and job details are automatically pre-filled. Once approved, estimates can be converted into invoices.
Who can access this
- Super Admin: can create estimates from any job.
- Admin: can create estimates from any job.
- Lead Technicians and Technicians cannot create estimates.
How to create an estimate from a job
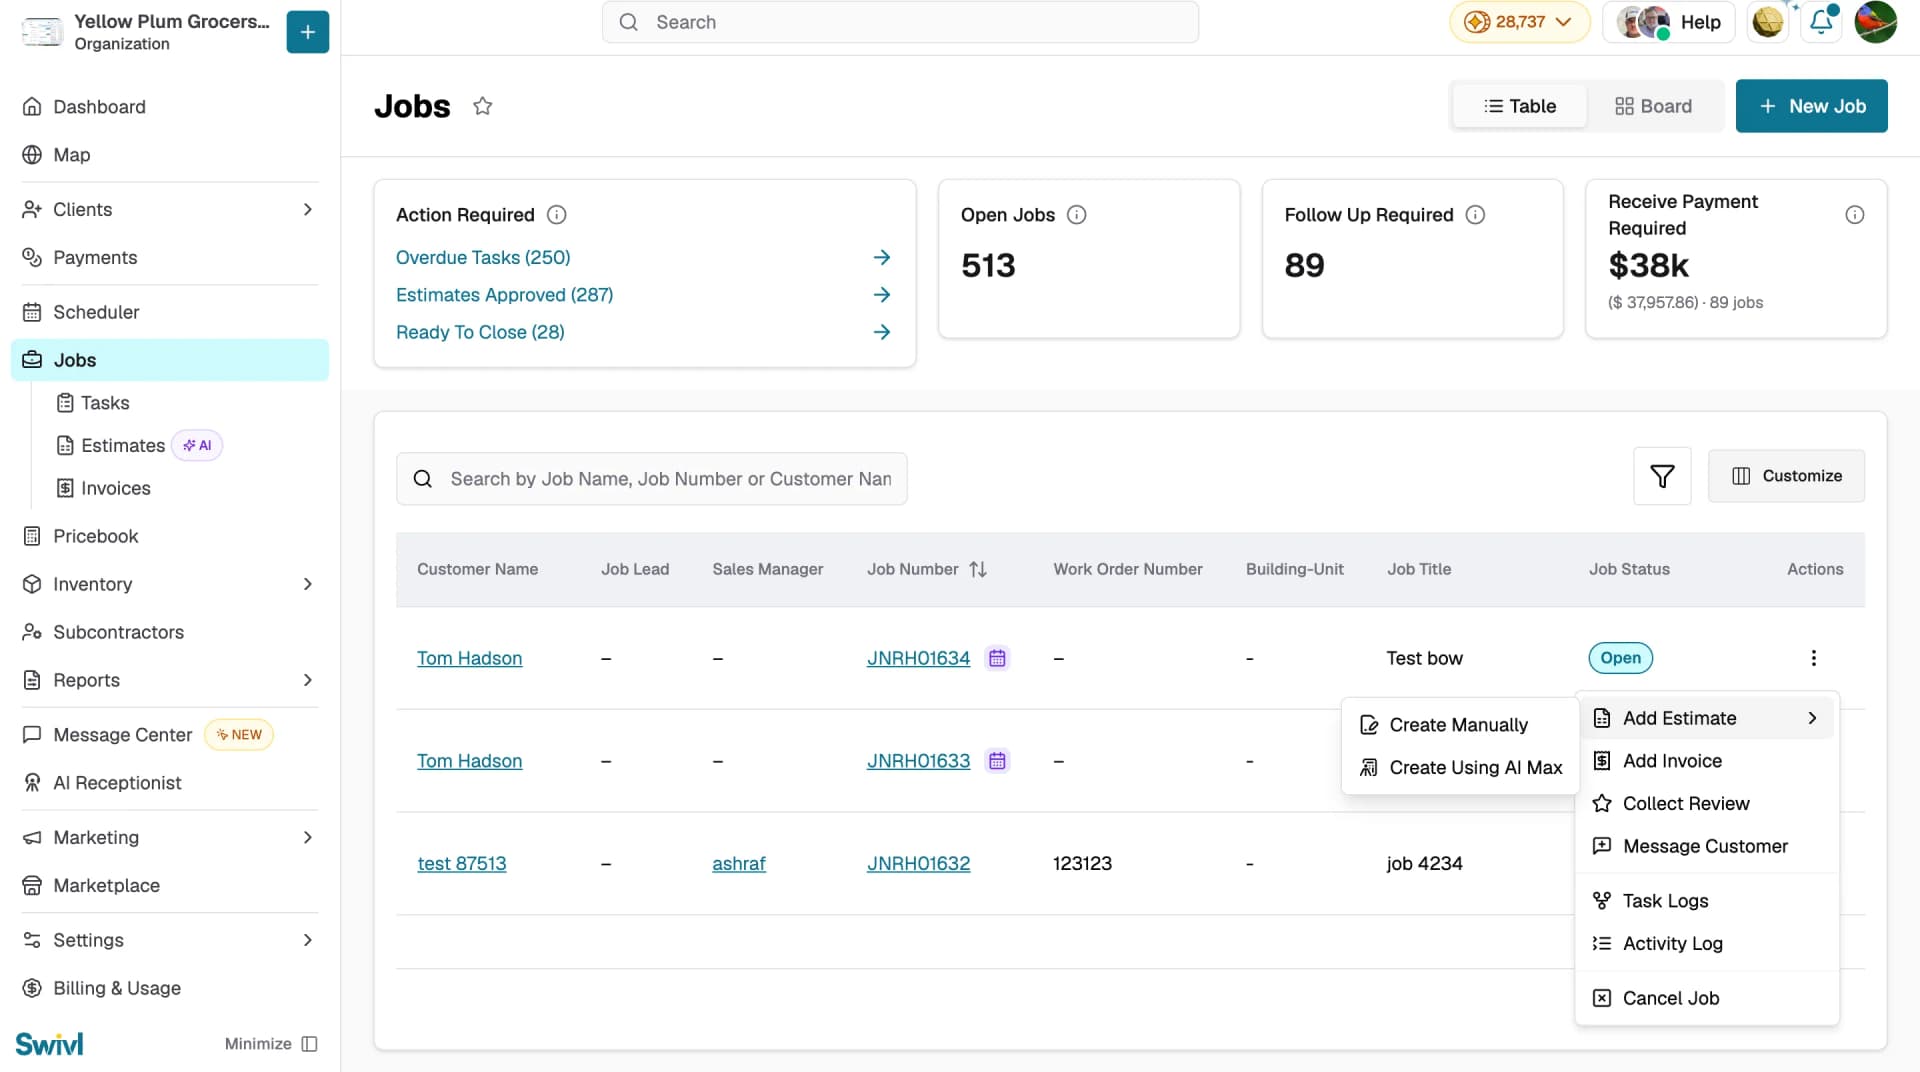
From the jobs list:
- Navigate to Jobs in the sidebar
- Find the job in the table
- Click the Actions menu (three-dot icon) on the job row
- Select Create Estimate
- Choose how to create it:
- Create Manually: open the standard estimate form
- Create Using AI Max: use the AI Estimator to generate an estimate from a plain-language description
- A Choose Estimate Details dialog opens showing the Customer Name, Job Number, and Job Description, all pre-filled from the job. Click Save and Go On to continue, or Cancel to exit.
From the job detail page:
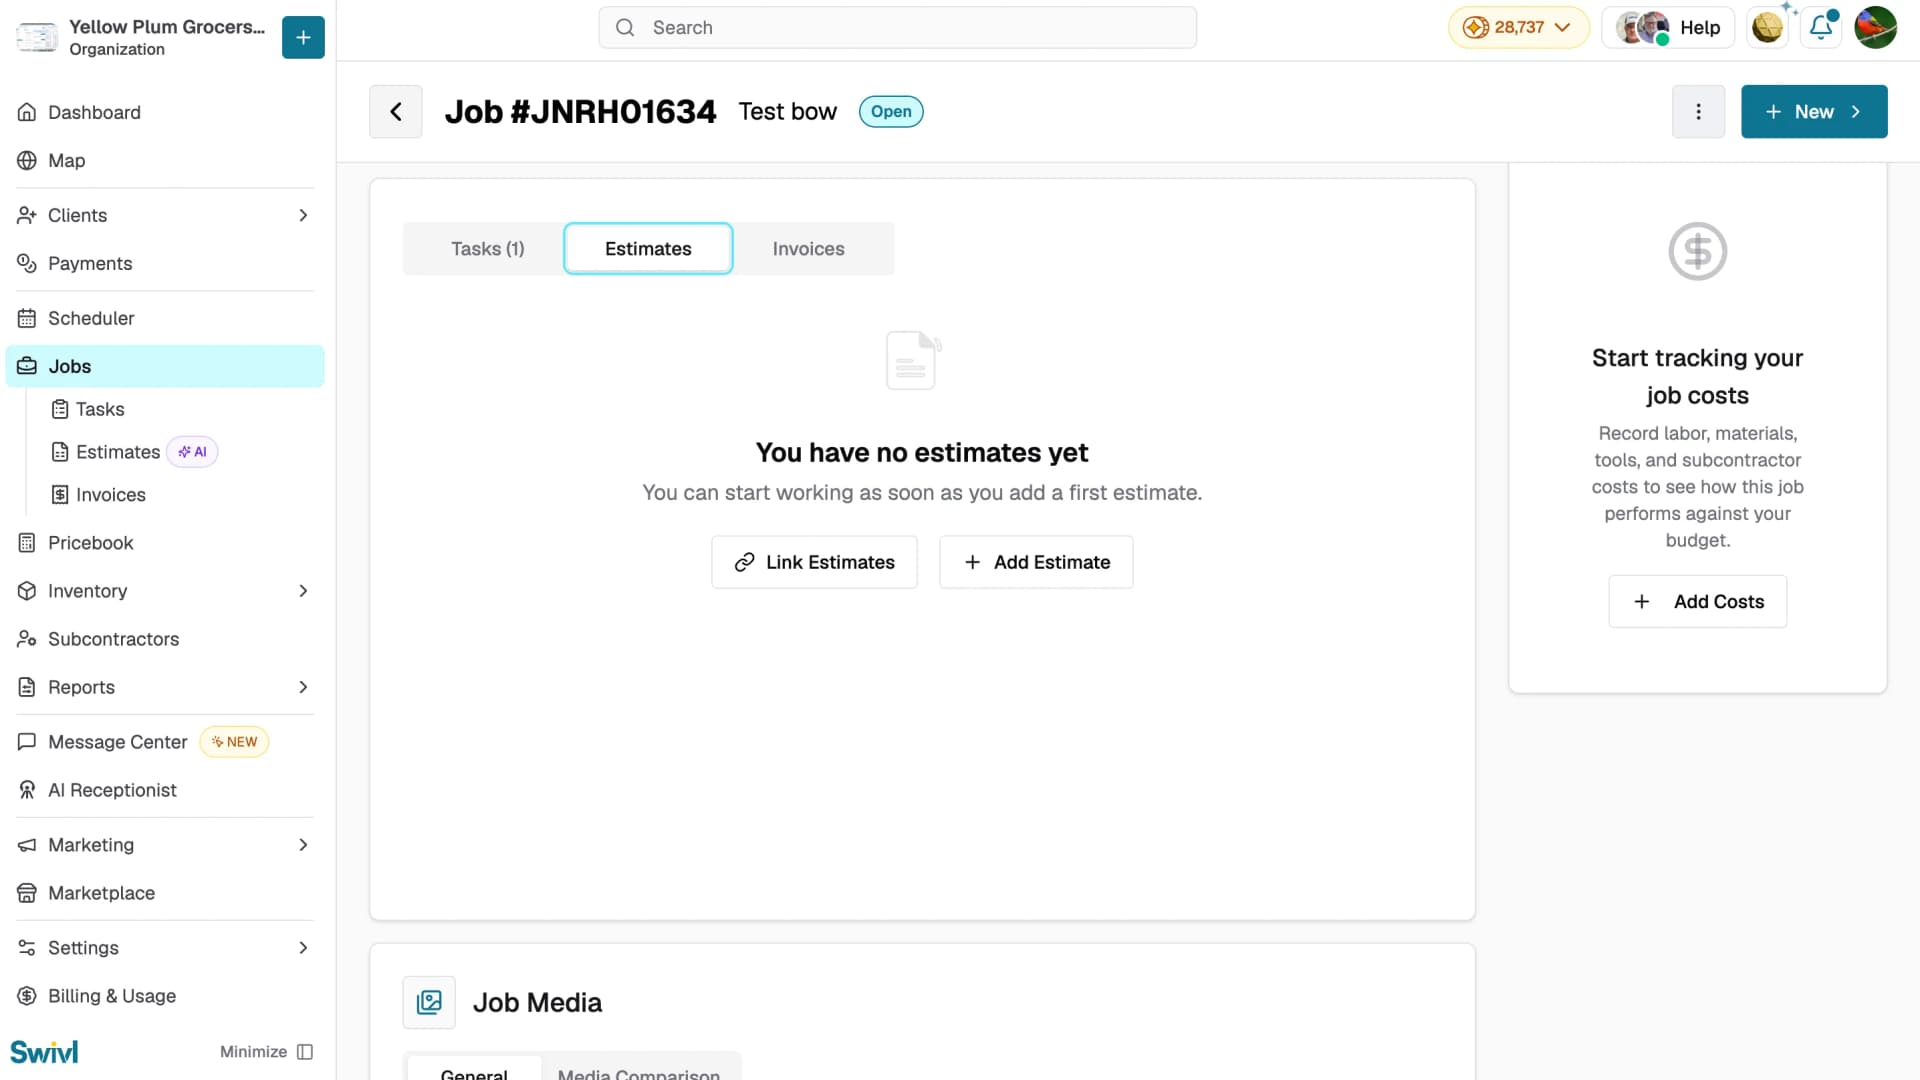
- Open the job detail page
- Click the Estimates tab
- Click + Add Estimate to create a new estimate linked to this job
- To attach an estimate that already exists, click Link Estimates instead
From the job detail header:
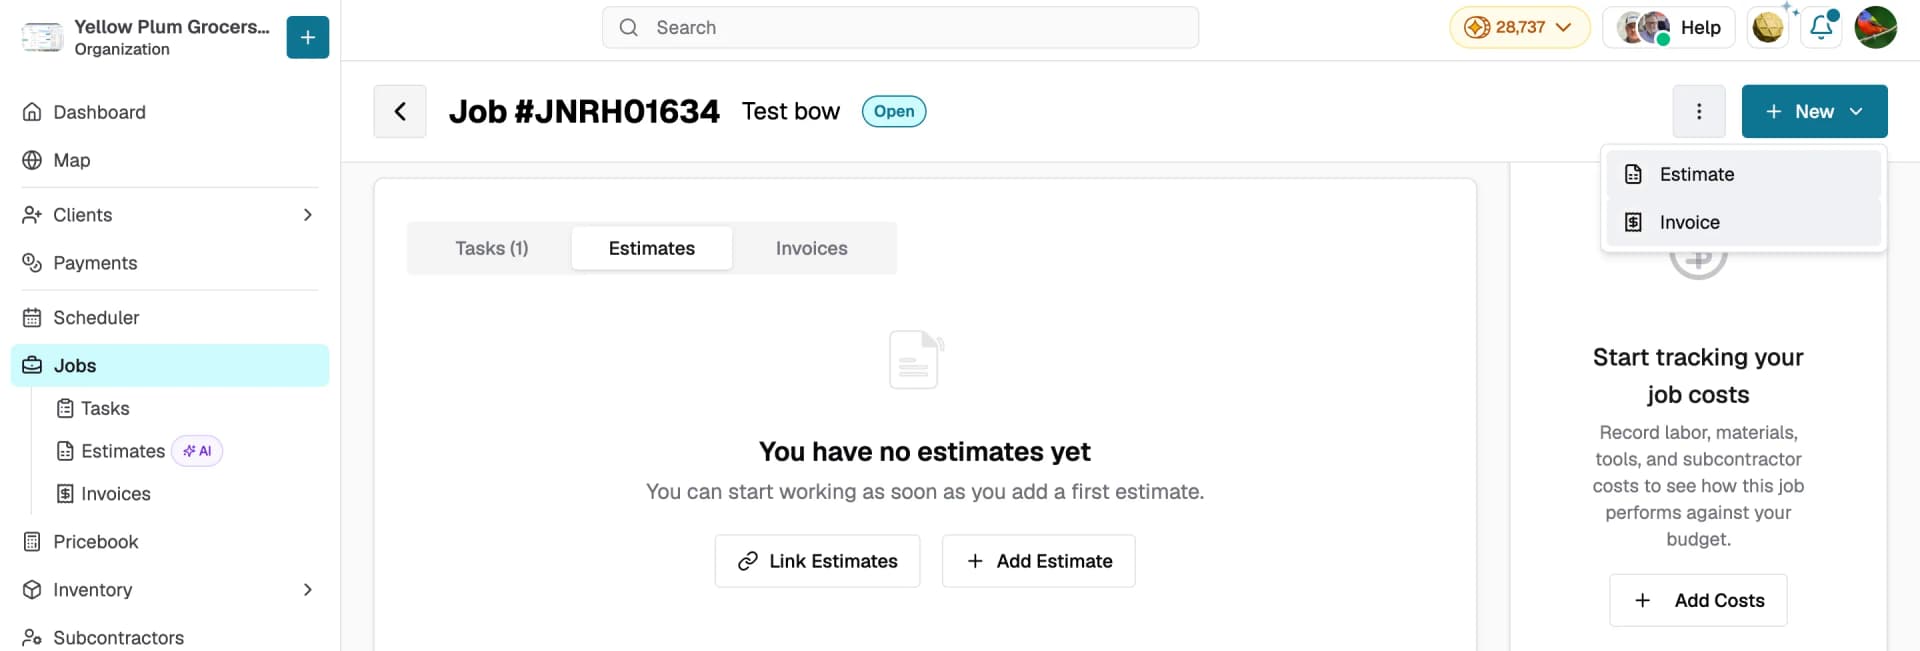
- Open the job detail page
- Click the + New button in the top right corner
- Select Estimate
- Choose Create Manually or Create Using AI Max
Using AI Max for estimates
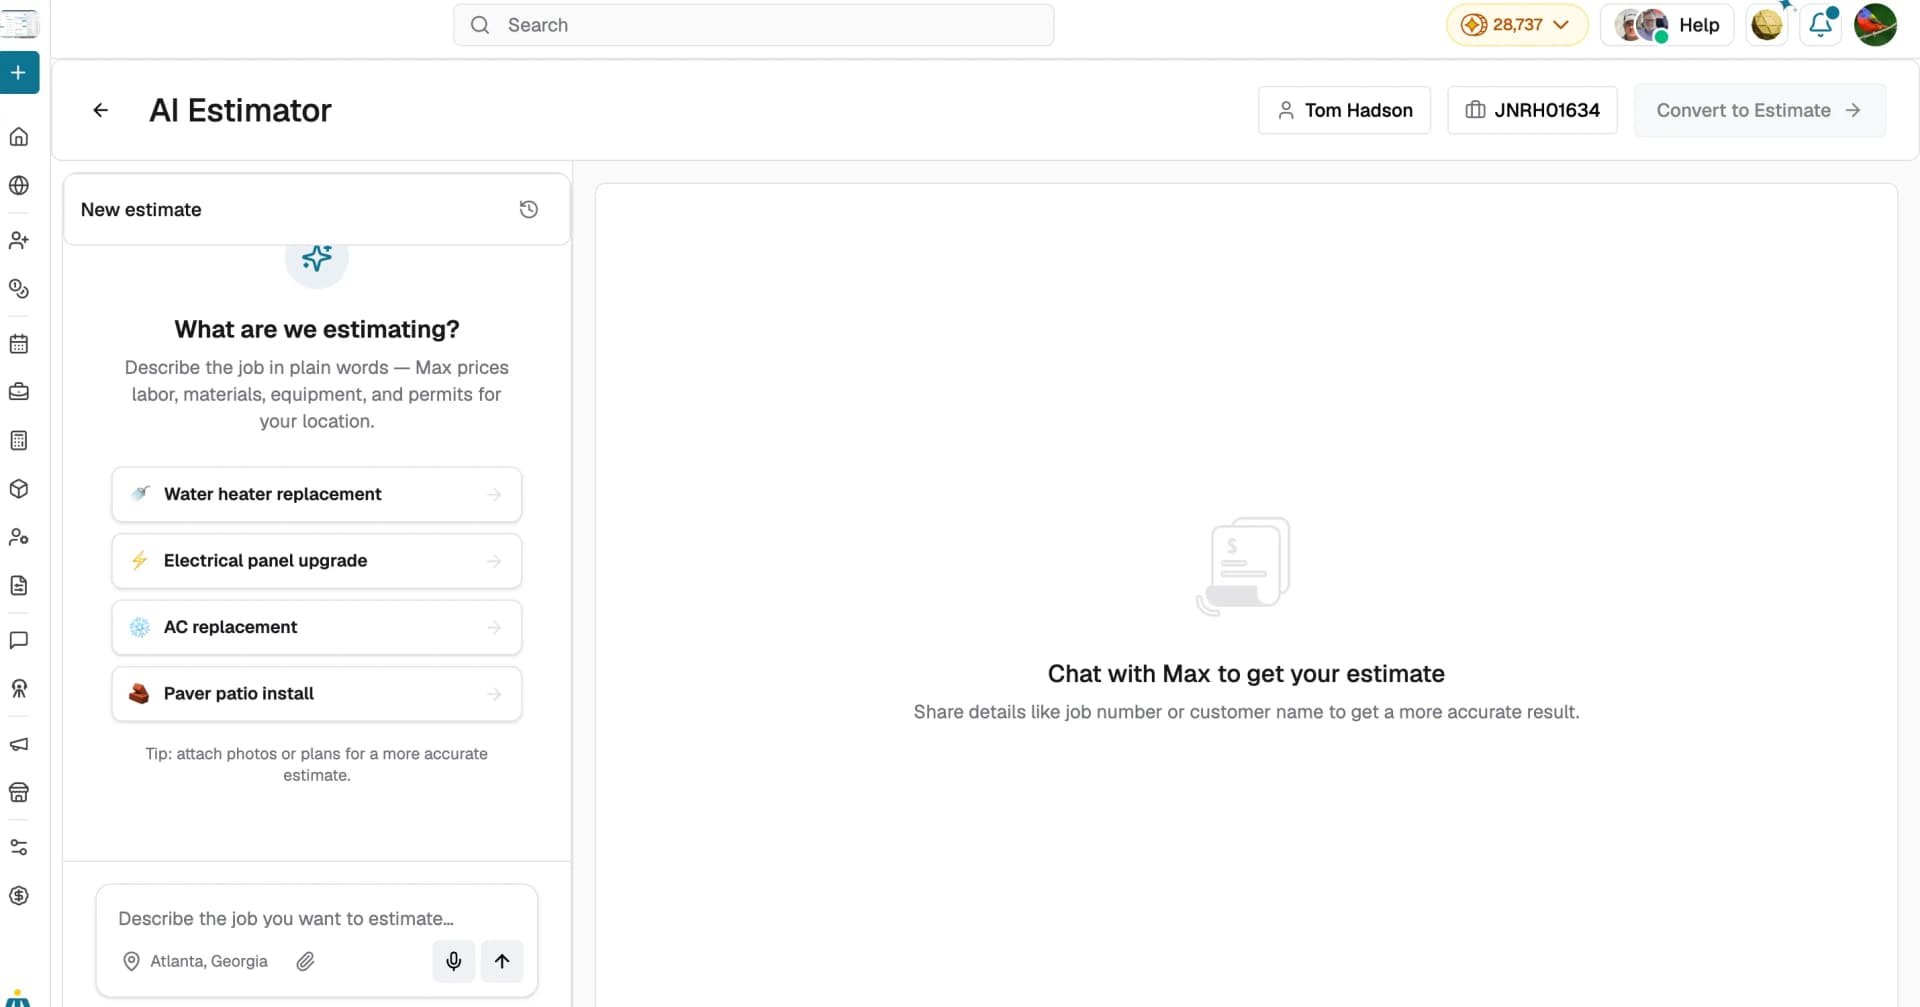
Choosing Create Using AI Max opens the AI Estimator, with the customer and job number shown at the top so Max has the right context.
- Describe the job in plain words in the message box — for example, "water heater replacement" or "paver patio install". Max prices labour, materials, equipment, and permits for your location.
- Attach photos or plans using the paperclip icon for a more accurate estimate, or use the microphone to dictate.
- Review the generated line items in the panel on the right and refine them by chatting with Max.
- When you're happy with it, click Convert to Estimate to turn it into a formal estimate.
The generated line items are a starting point, always review and adjust them before sending.
The estimate creation process
Estimate creation follows a multi-step form:
- Step 1: Customer & Job Details - review the customer name, billing address, and optionally link the estimate to a job
- Step 2: Products & Services - add line items with quantity, rate, tax, and discount
- Step 3: Recurring Service - toggle on if the work repeats on a schedule and configure the frequency and billing details
- Step 4: Terms - set the estimate date, expiration date, and an optional customer message
- Step 5: Media and Documents - upload or import media from the linked job
After completing these steps, you can Save Draft or click Review & Send to send the estimate to the customer.After completing these steps, you can save the estimate as a draft or proceed to the Review & Send page to preview and send it to the customer for approval.
Estimate statuses
Status | Meaning |
|---|---|
Draft | Estimate created but not yet sent |
Approved | Customer has approved the estimate |
Deposit Paid | A deposit has been received for the estimate |
Expired | The estimate has passed its expiration date |
Void | The estimate has been voided |
What happens after approval
When a customer approves an estimate:
- The estimate status changes to Approved
- You can create tasks and invoices directly from the approved estimate
- The approved amount appears in the job's financial summary
- The job appears under Estimates Approved in the Action Required card on the Jobs page
Tips
- You can create multiple estimates per job useful when offering different pricing options to a customer
- Estimates link back to the parent job so all financial data rolls up to the job level
- Use Link Estimates to attach an existing estimate to a job after the fact
- Use the Duplicate feature on an existing estimate to quickly create a revised version
- Customers can approve, decline, or request changes on estimates through a shared link