
Templates Library Overview
Templates Library lets you create reusable checklists your team can follow on every job. Build them yourself or generate one with AI, then activate them for your team to use.
Overview
Templates Library is where you create and manage reusable templates that help your team complete jobs consistently. Instead of rewriting the same steps for every service call, you build a template once and your team follows the same checklist every time.
Templates can be generated with AI describe the type of work, and Swivl builds a structured checklist you can then refine.
Who Can Access This
Role | Access / Permissions |
|---|---|
Super Admin | Full access create, edit, and publish templates |
Admin | No access |
Lead Technician | No access |
Technician | No access |
Accessing the Templates Library
- Go to Settings → Templates Library.
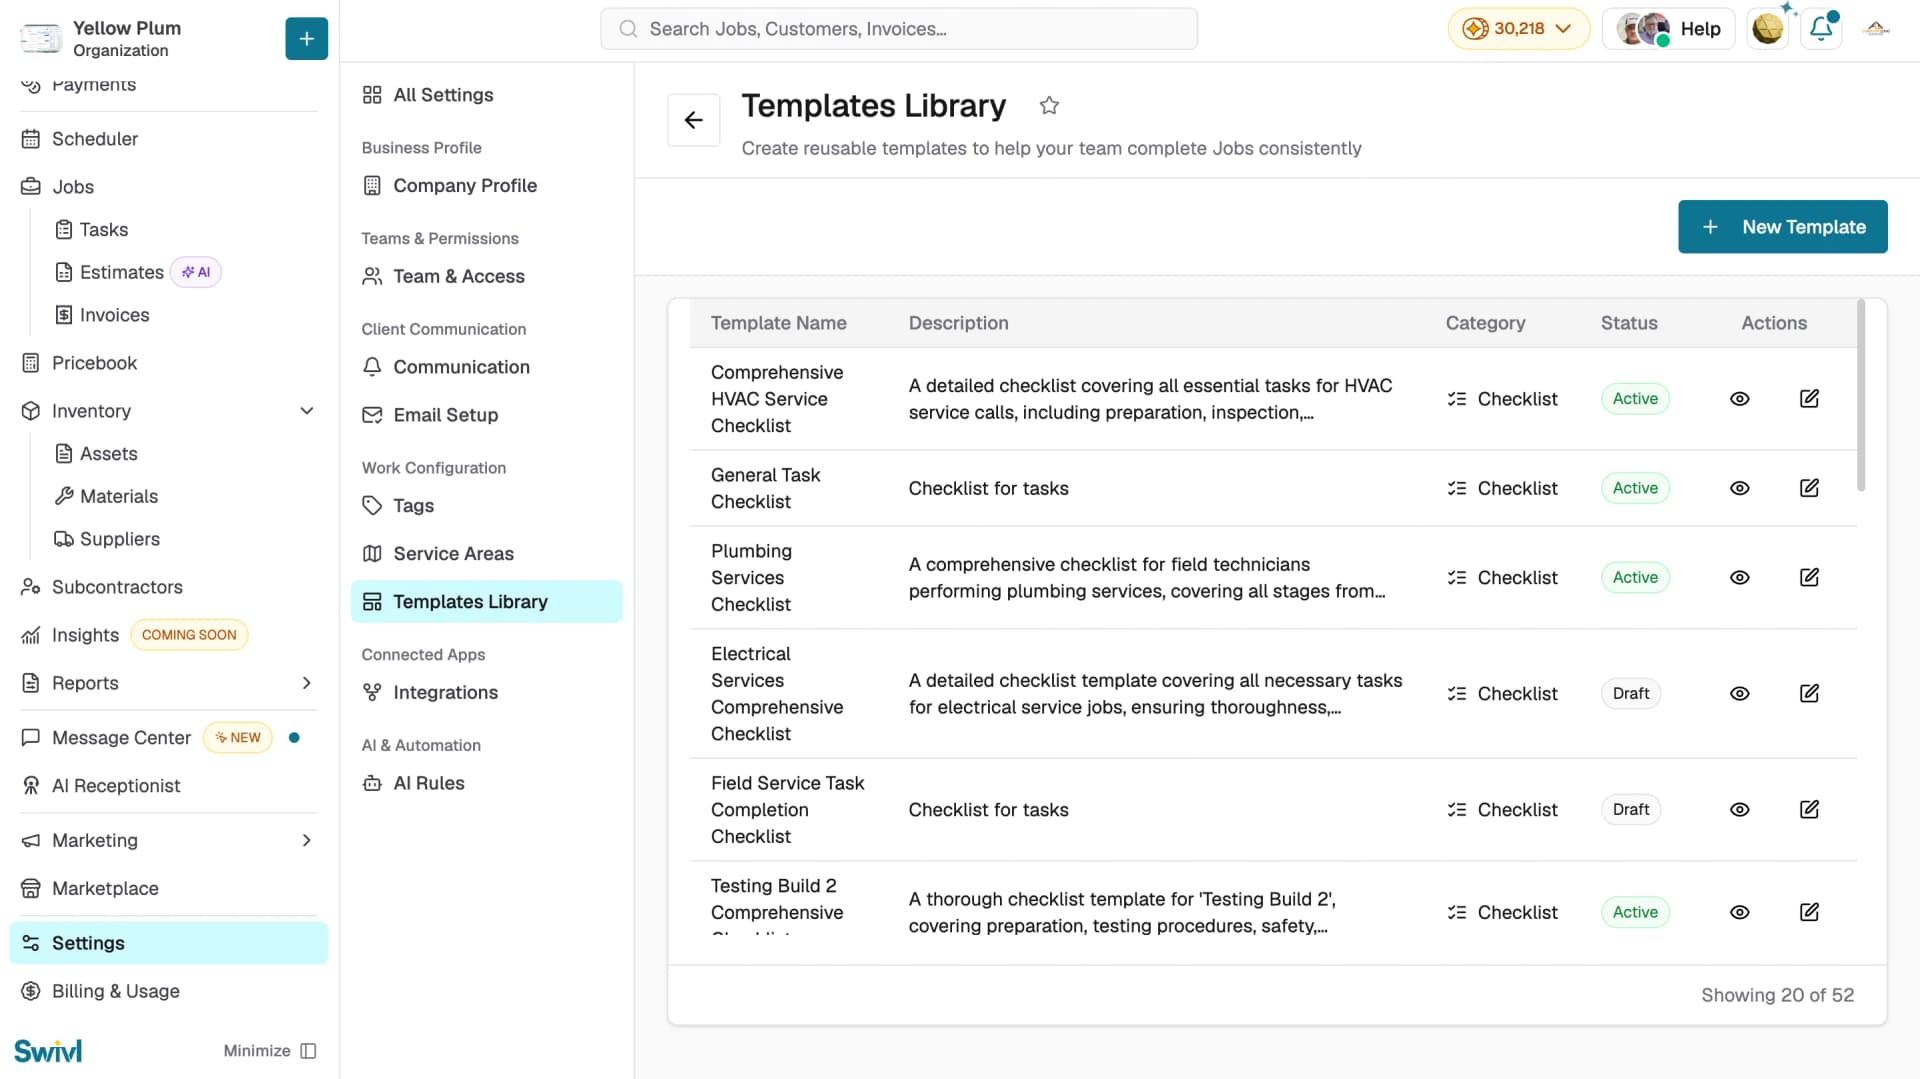
- The library opens with all your templates listed.
- Each row shows the Template Name, Description, Category, and Status.
- Use the icons in the Actions column to preview or edit a template.
Understanding the templates list
Every template has a category and a status.
Category is the type of template. Checklist is available now. Post Job Report is coming soon.
Status:
Status | What it means |
|---|---|
Active | The template is published and available for your team to use |
Draft | The template is saved but not yet published |
Creating a template
- Go to Settings → Templates Library.
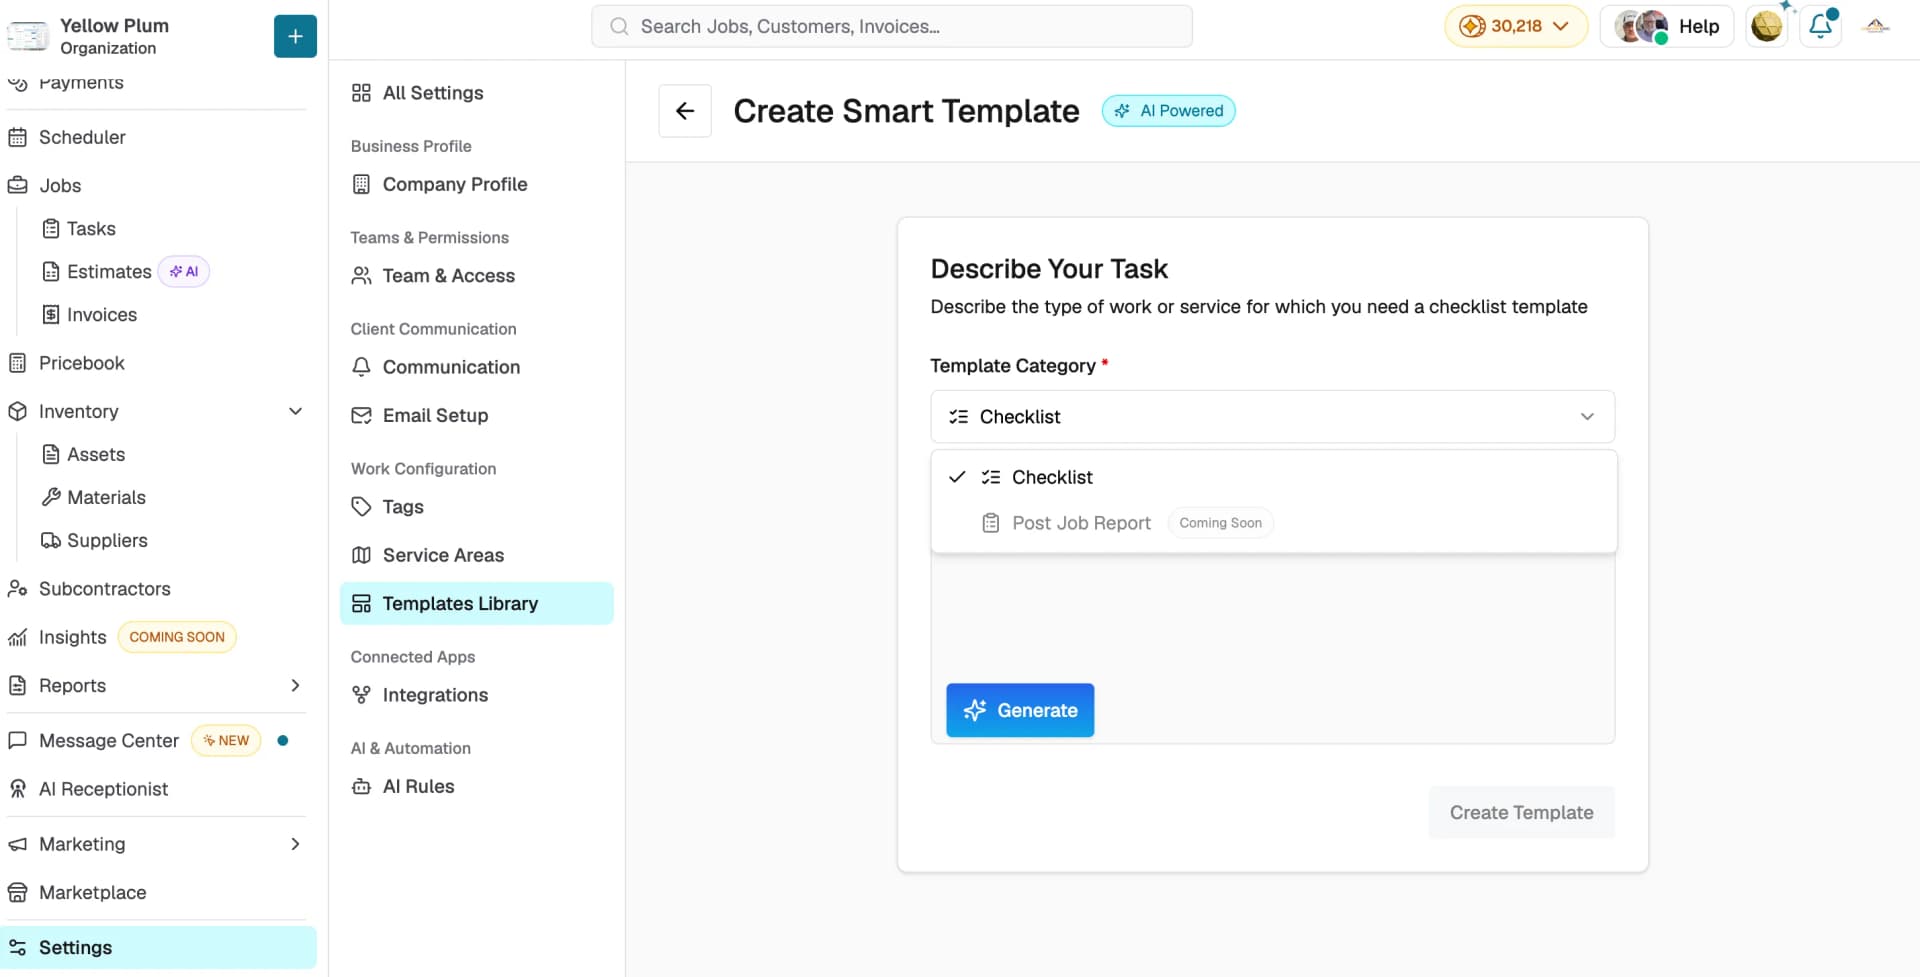
- Click + New Template. The Create Smart Template page opens.
- Select a Template Category. Choose Checklist.
- Describe the type of work or service you need a checklist for example, "AC installation, repair, and maintenance."
- Click Generate. Swivl builds a checklist based on your description.
- Review the result, then click Create Template to save it.
Editing a Template
Click the edit icon next to a template in the library to open it.
Template Details : click Edit to change the Template Title, Template Description, or Template Category.
Checklist: your checklist is organized into sections, and each section holds individual items. The section count appears next to the Checklist heading.
- Click + Add Section to add a new section.
- Click Edit on a section to rename it or change its description.
- Click the trash icon on a section to delete it and everything inside it.
- Drag the handle to the left of any section or item to reorder it.
- Each item shows its response type — for example, Single Select — and whether it's Required. Clear the Required checkbox to make an item optional.
- Click the edit icon on an item to change its label, description, response type, or options.
- Click the trash icon on an item to remove it.
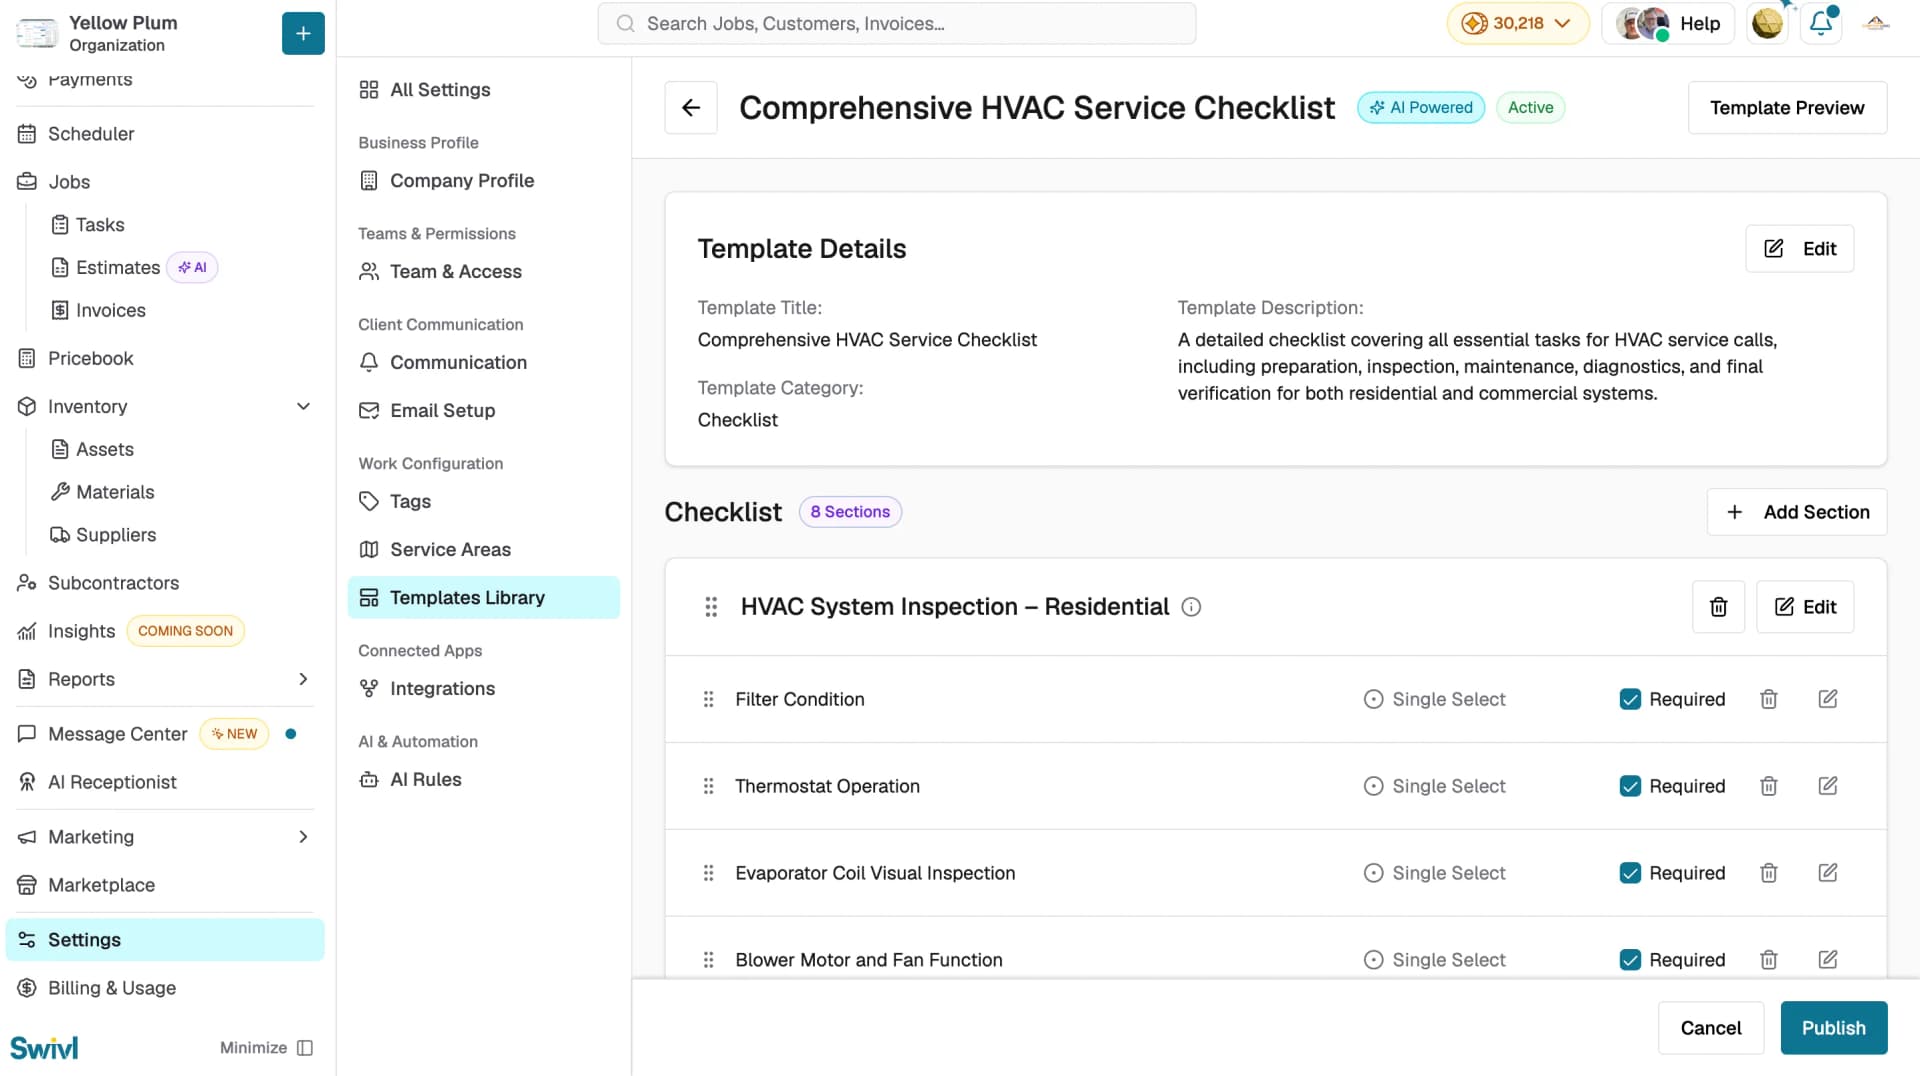
When you're done, click Publish to make the template available to your team, or Cancel to discard your changes.
Previewing a Template
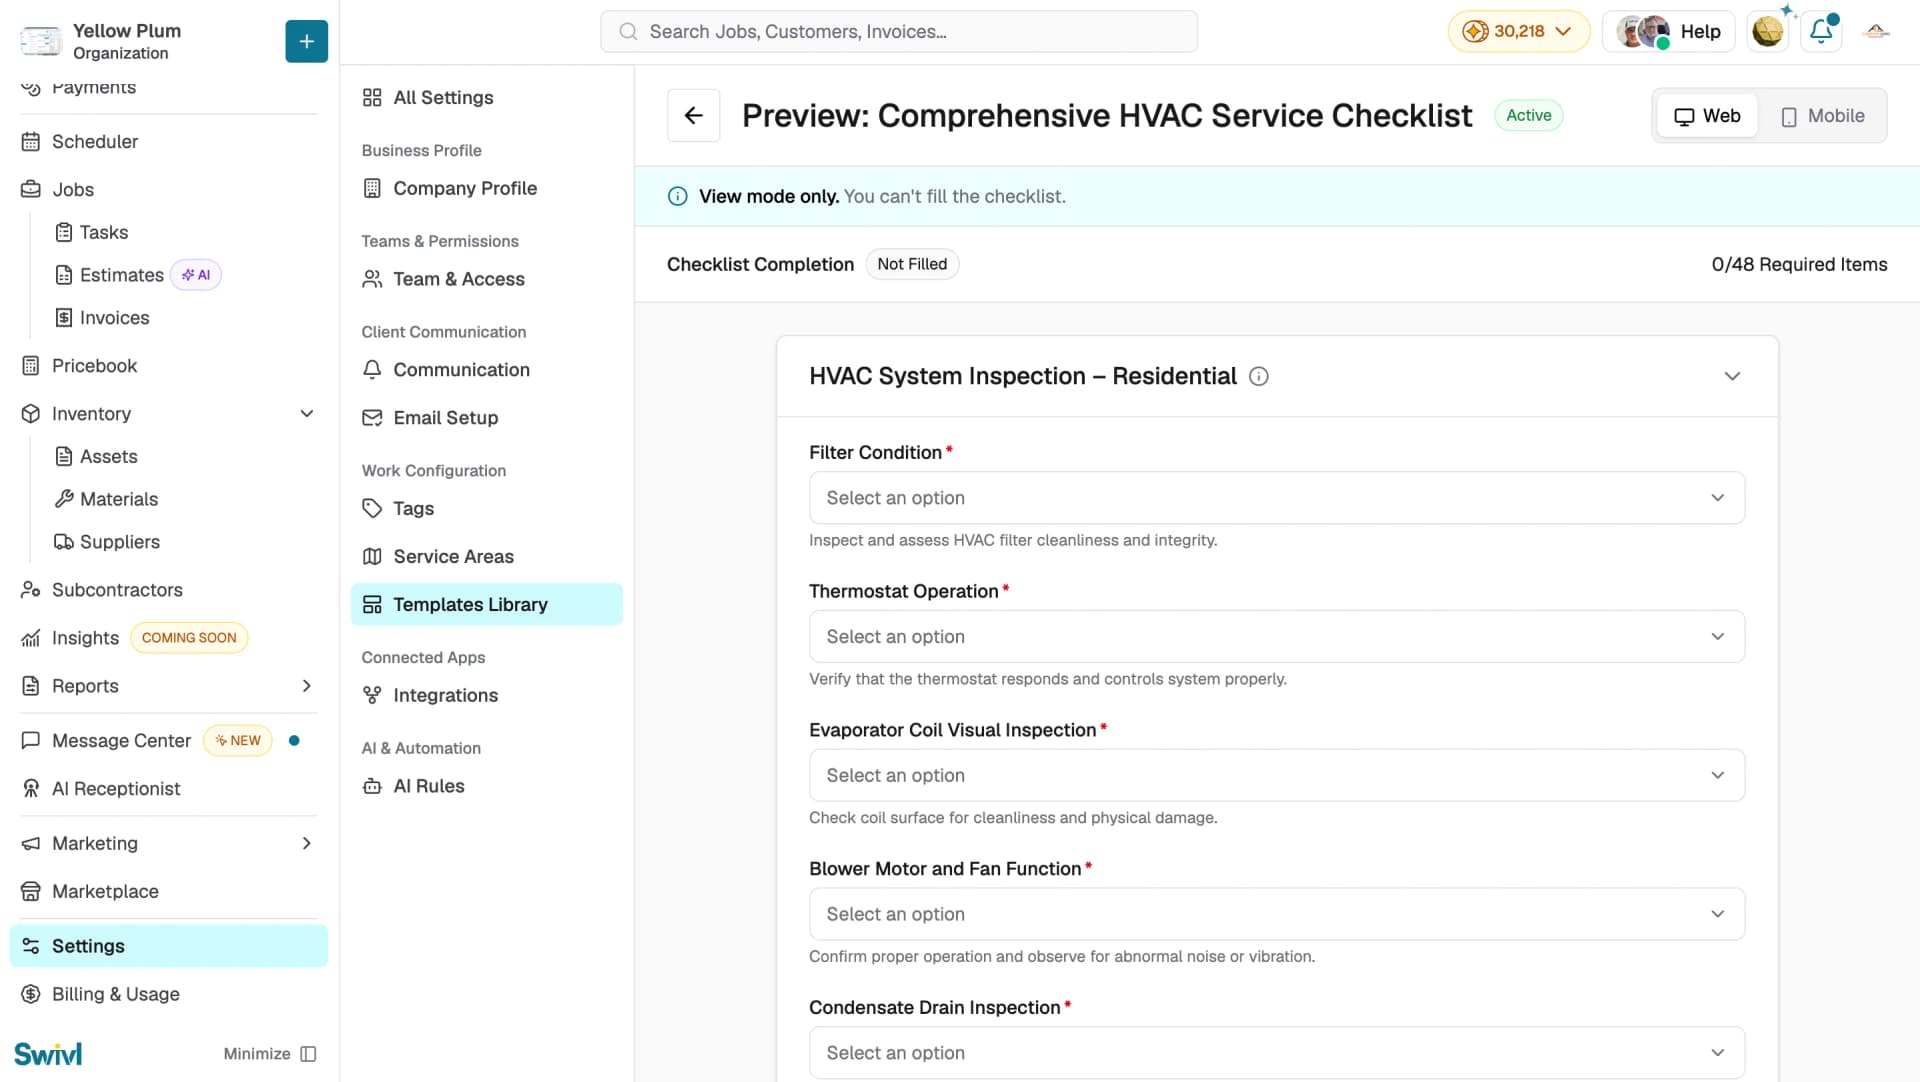
Preview shows you exactly what your team will see before you publish.
- Click the eye icon next to a template in the library, or click Template Preview while editing.
- Use the Web and Mobile toggle in the top right to check how the checklist looks on each device.
- Checklist Completion at the top shows the fill status and the number of required items for example, 0/48 Required Items.
- Preview is view mode only. You can see every field but can't fill anything in.
- Click the arrow at the top left to go back.
Tips
- Give templates clear, specific names "Comprehensive HVAC Service Checklist" is easier for your team to find than "Checklist 1."
- Group related steps into sections. A long flat checklist is harder to work through in the field than one broken into stages.
- Mark only the items that genuinely matter as Required. Every required item blocks completion.
- Always check the Mobile preview before publishing. Most technicians fill checklists on a phone or tablet.
- Write a detailed description when generating a smart template. The more context you give, the more relevant the generated checklist.