Google Ads Account Setup
This guide provides a streamlined, 5-step walkthrough for creating a Google Ads Account using Expert Mode. It covers essential prerequisites, how to create an account without being forced into a campaign, critical account settings (including permanent time zone and currency settings), and the final steps for adding billing information to get your campaigns live. *Key highlights include: *Creating a Google Ads account in Expert Mode (without a campaign). *Configuring permanent account settings (Time Zone & Currency). *Finalizing Billing & Payments to enable ad delivery.
Google Ads Account Setup
Setting up a Google Ads account is required before you can use MAX Ads to create and run ads through Swivl. Follow the steps below to get your account ready.
Prerequisites
- You must have a Google account (a Gmail or Google Workspace email for your business).
- We recommend having your business website URL and basic business details ready.
5 Simple Steps to Set Up Your Google Ads Account
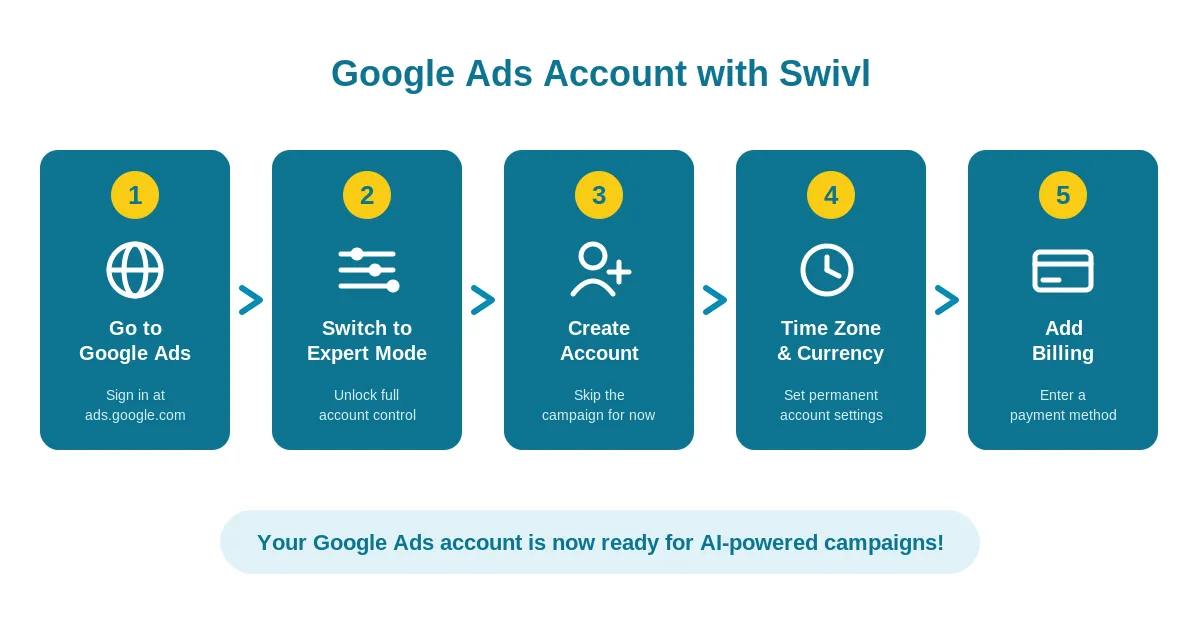
Step 1: Go to Google Ads
Go to ads.google.com and click Start now (top right), then sign in with the Google account you want to use to manage your advertising.
Step 2: Switch to Expert Mode
- After signing in, Google will try to walk you through a guided Smart campaign setup.
- Look for the small link that says Switch to Expert Mode (usually near the bottom of the screen) and click it.
- Expert Mode gives you full control over your account settings and lets you skip building a campaign right away.
Step 3: Create an Account Without a Campaign
- On the next screen, look for the link Create an account without a campaign and click it. This lets you finish account setup without spending any money yet.
- If you do not see this option, click Back or New Campaign until the without-a-campaign link appears.
Step 4: Confirm Your Business Information
A screen will appear asking you to confirm your account details.
- Billing Country: Select the country where your business is based.
- Time Zone: Select your local time zone. Warning: This affects when your daily budget resets and how your reports are recorded, and it is difficult to change later, so choose carefully.
- Currency: Select your billing currency (e.g., USD). Warning: You cannot change this after the account is created.
- Review your selections and click Submit.
Step 5: Confirm and Explore Your Account
- Google will confirm your new account and take you to your account dashboard.
- Click Explore Your Account (or Got it) to enter the main Google Ads interface.
Your Google Ads account is now set up! From here you can add other users to manage the account and assign them access levels (e.g., Admin, Standard, or Read-only) under Admin then Access and security.
Next Steps: Adding Billing Information
You cannot run ads until you tell Google how to charge you.
- In your Google Ads account, click the Admin icon (gear) in the lower-left navigation, then select Billing.
- Go to Settings and confirm your billing country and time zone.
- Click Add Payment Method and securely enter your business details and your credit card, debit card, or bank account information.
- Choose your payment setting (automatic payments are the most common, where you are charged after your ads run) and save.