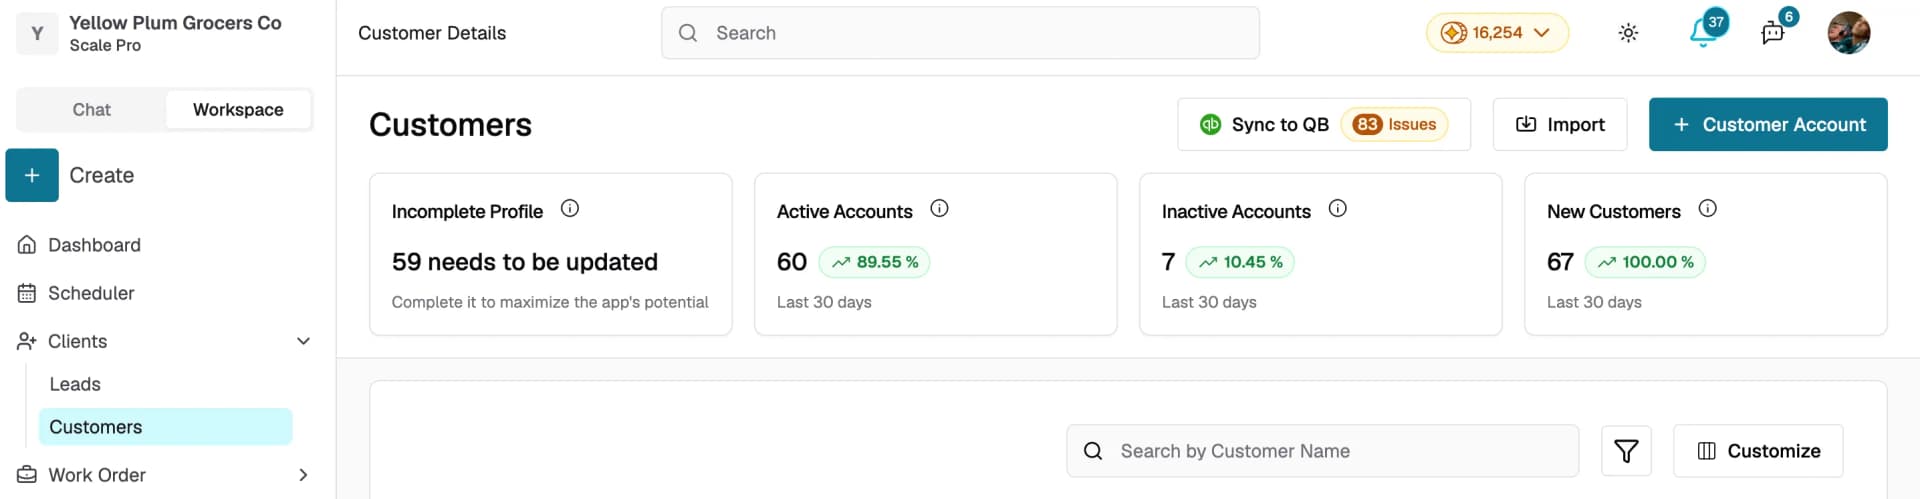
Customers
Adding a Customer Account
Add a customer account to capture all the information you need to schedule work, send invoices, and stay in touch.
Overview
Adding a customer account in Swivl captures all the information you need to schedule work, send invoices, and stay in touch. The form walks you through four sections, primary details, address, contacts, and additional details.
Who can access this
- Super Admin: full access to create new customers.
- Admin: full access to create new customers.
- Lead Technicians and Technicians cannot create customer accounts.
How to add a new customer
- Navigate to Clients → Customers from the left sidebar
- Click + Customer Account at the top right of the page
- Complete the form sections described below
- Click Save at the bottom of the page
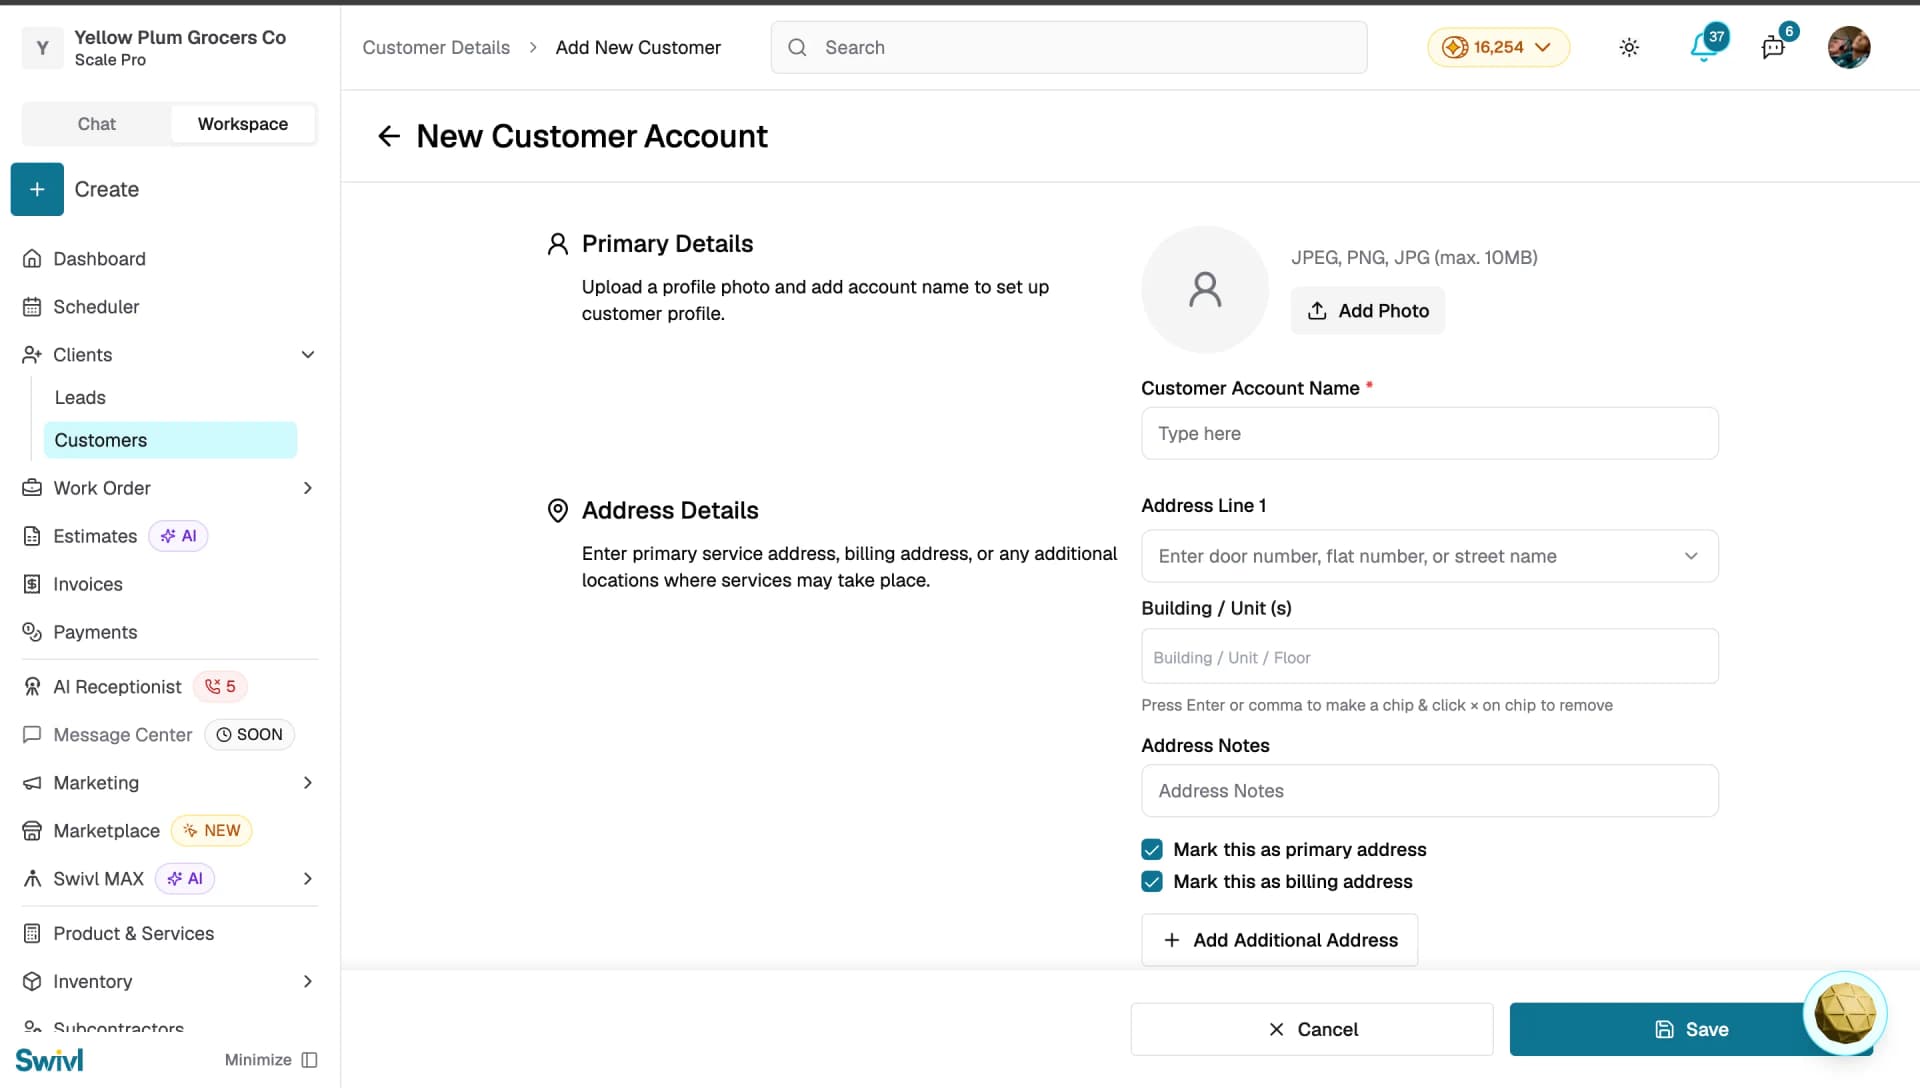
Section 1: Primary Details
- Profile Photo: optionally upload a profile photo (JPEG, PNG, or JPG, max 10MB) to help your team identify the account at a glance
- Customer Account Name: enter the company or individual name. This field is required
Section 2: Address Details
- Address Line 1: start typing and Swivl will auto-suggest addresses. Select a suggestion to automatically fill in the remaining address fields
- Building / Unit: optionally add a unit, suite, or floor number. Press Enter or comma to add multiple entries
- Address Notes: add any special instructions such as gate codes or parking details
- Mark this as primary address: designates this as the main service location
- Mark this as billing address: designates this as the billing address
- Click + Add Additional Address to add more locations for this customer
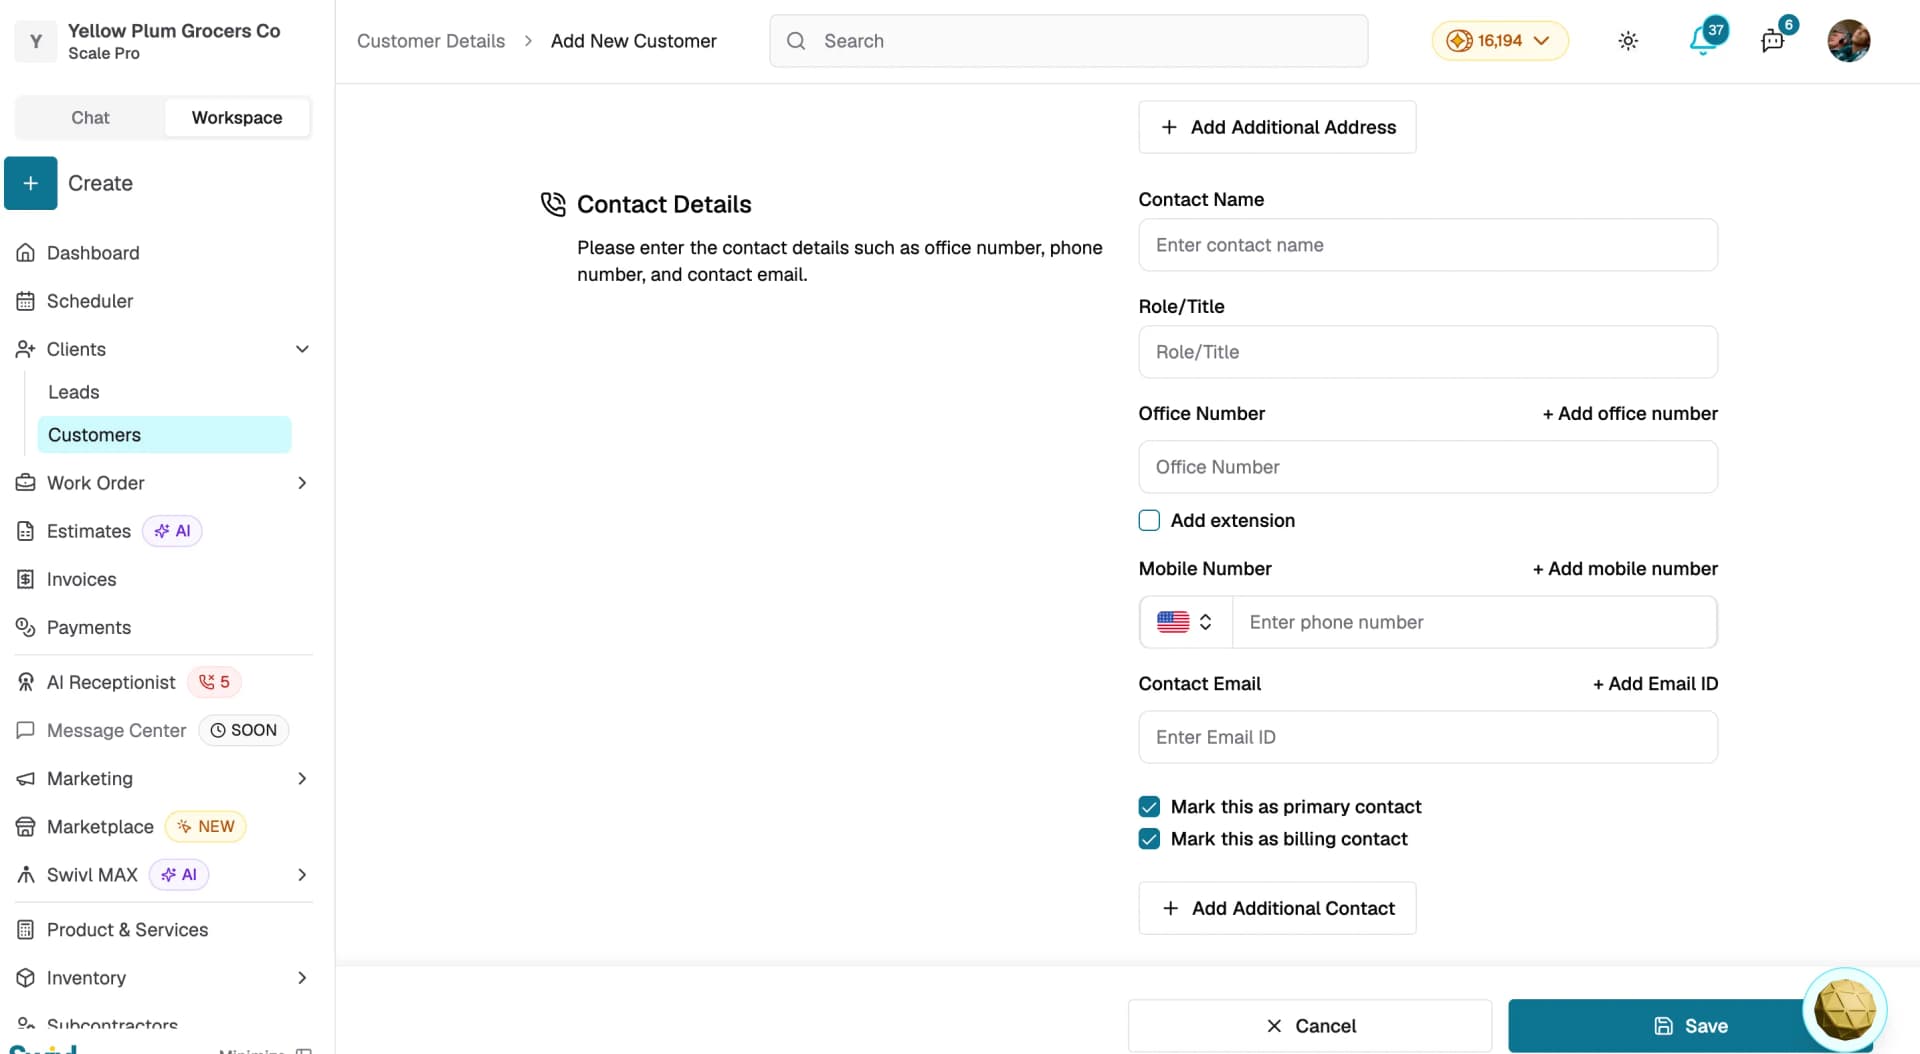
Section 3: Contact Details
- Contact Name: enter the name of the contact person
- Role/Title: optionally add the contact's role or job title
- Office Number: add an office phone number with an optional extension
- Mobile Number: add one or more mobile numbers using the + Add mobile number link
- Contact Email: add one or more email addresses using the + Add Email ID link
- Mark this as primary contact: designates this contact for day-to-day communications
- Mark this as billing contact: designates this contact for billing communications
- Click + Add Additional Contact to add more contacts for this customer
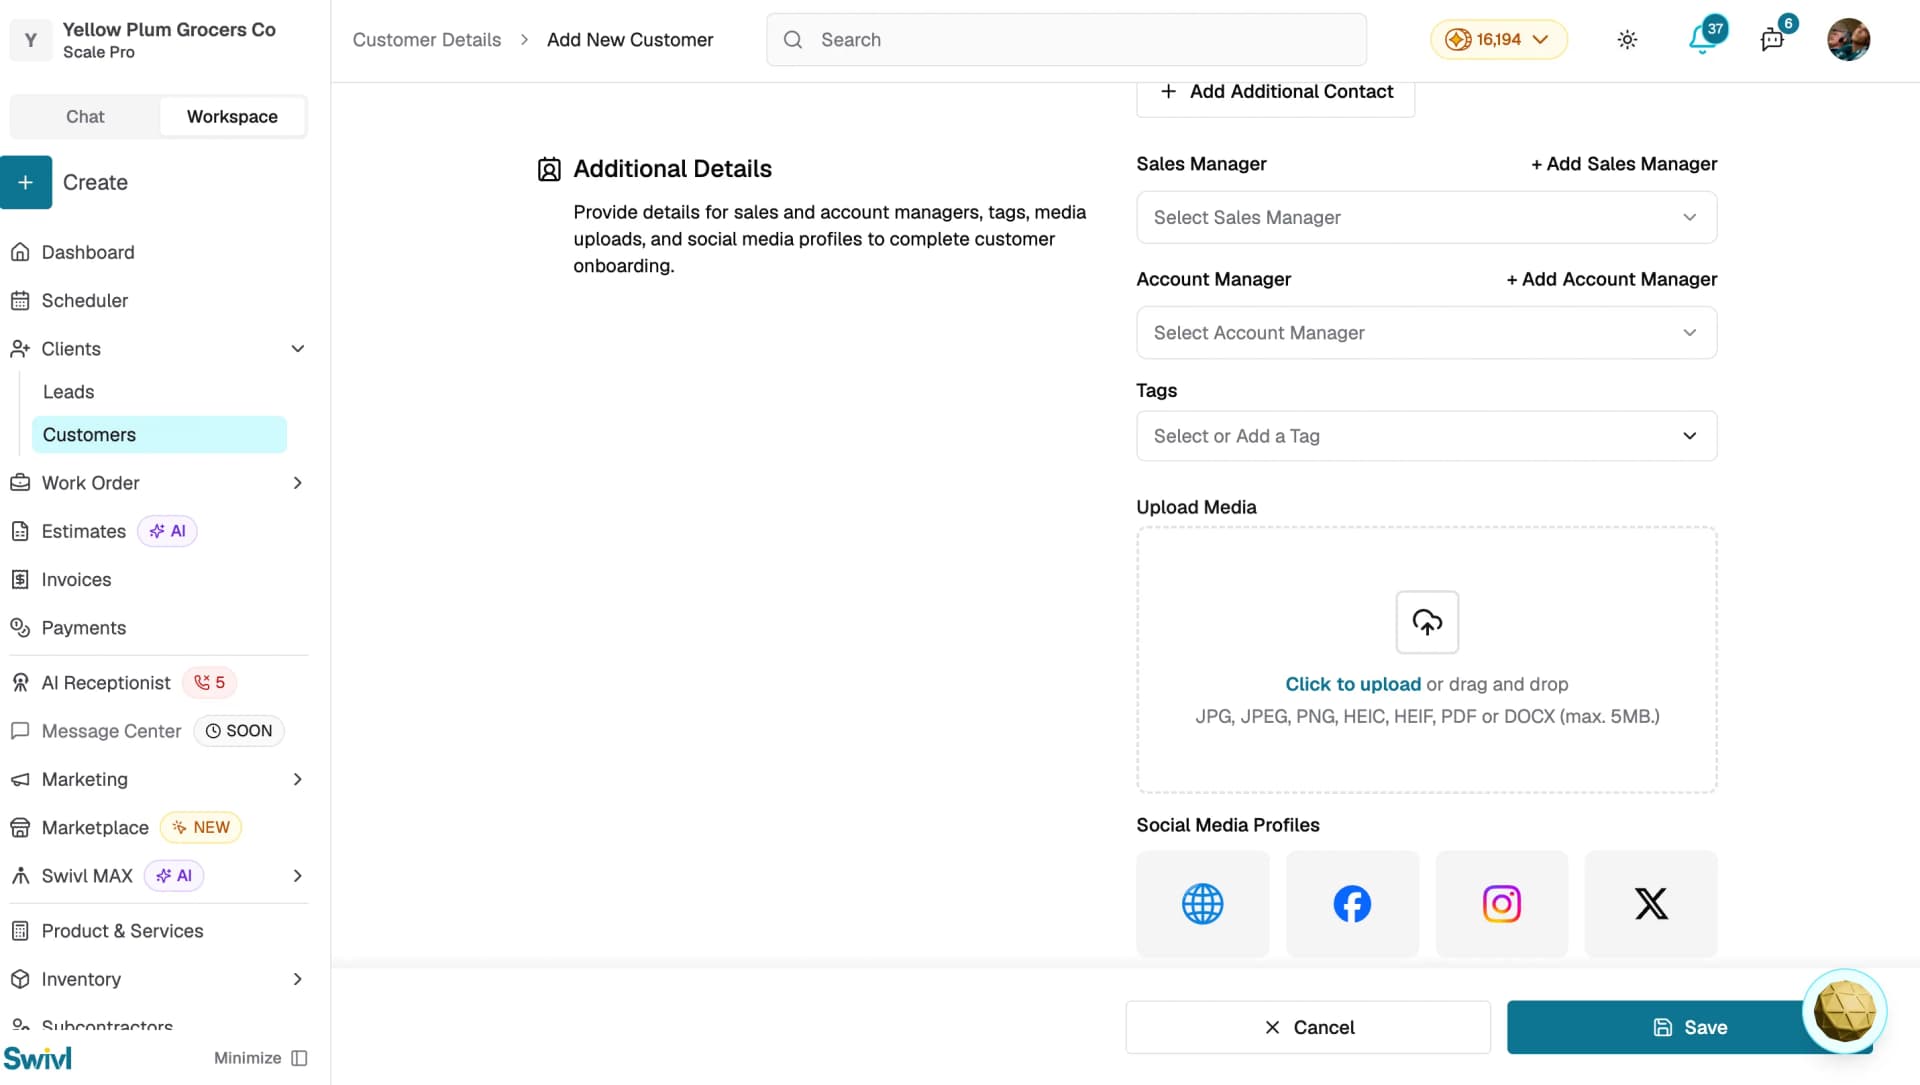
Section 4: Additional Details
- Sales Manager: search and select a team member to assign as sales manager. You can add multiple sales managers
- Account Manager: search and select a team member to assign as account manager. You can add multiple account managers
- Tags: select existing tags or create new ones to categorise this customer
- Upload Media: attach supporting documents such as contracts or photos (JPG, JPEG, PNG, HEIC, HEIF, PDF or DOCX, max 5MB)
- Social Media Profiles: add links to the customer's website, Facebook, Instagram, or X pages
After filling in the form, click Save. You will see a success message and be taken back to the customer list.
Tips
- Pay attention to the duplicate account suggestion that appears when you type a name that already exists, it can save you from creating a duplicate
- You can always come back and add more addresses or contacts later from the customer profile
- Use the Cancel button or the back arrow to discard changes and return to the list without saving