Sending and Resending Invoices
Send invoices to your customers via email or SMS directly from Swivl. Resend at any time if the customer didn't receive it or if you've made updates.
Overview
After creating an invoice, you need to send it to your customer so they can review and pay. Swivl lets you send invoices via email or SMS directly from the invoice page. You can also resend an invoice at any time if the customer did not receive it or if you have made updates.
Who can access this
Role | Access Level |
|---|---|
Super Admin | Can send and resend invoices |
Admin | Can send and resend invoices |
Lead Technician | Cannot send invoices |
Technician | No access |
How to send an invoice
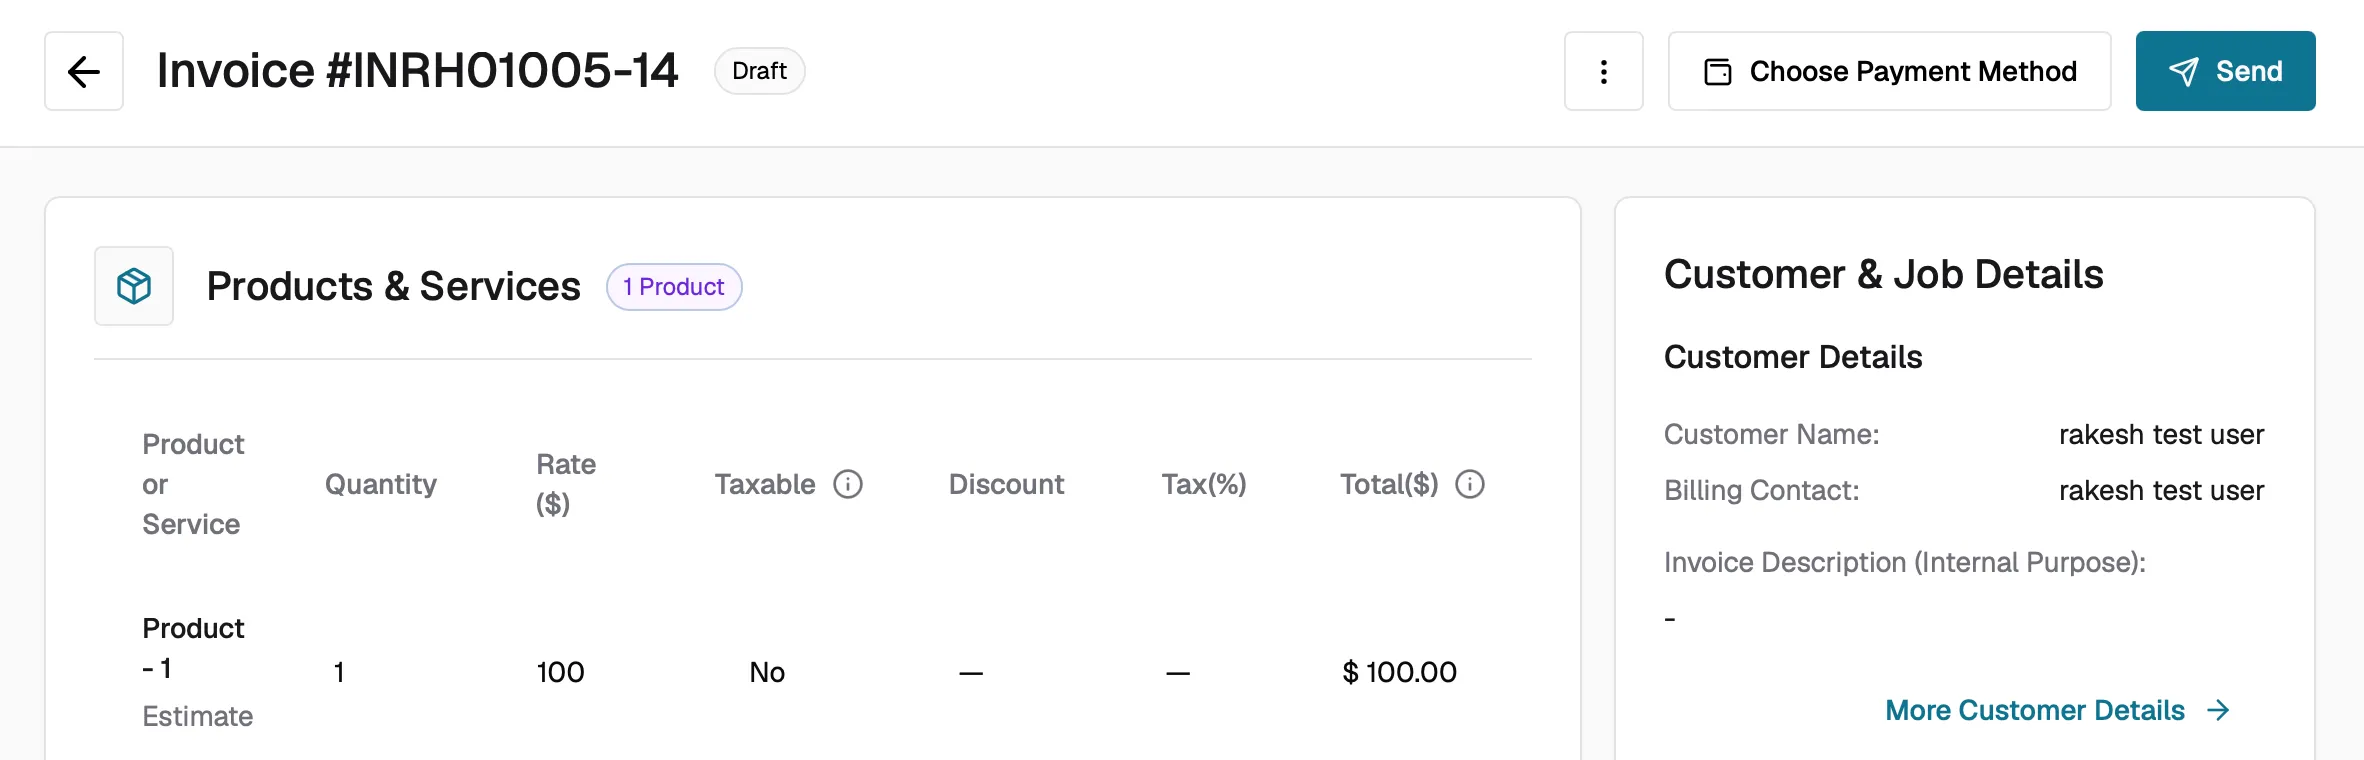
- Navigate to Invoices in the left sidebar and open the invoice you want to send.
- Click the Send button in the top right corner.
- If your company email is not yet verified, you will be prompted to verify it first. Follow the on-screen instructions to confirm.
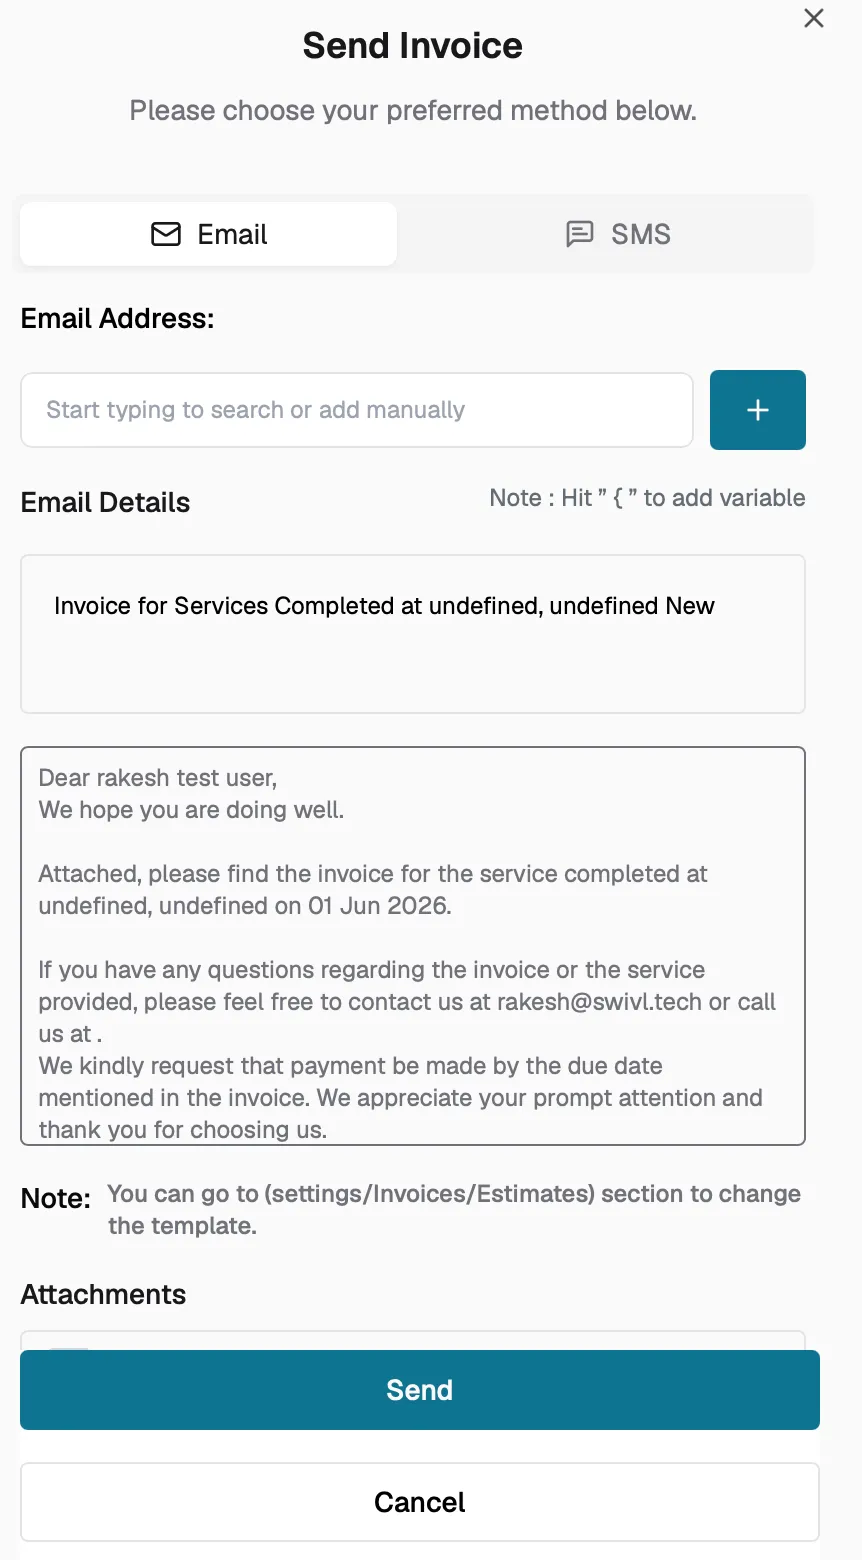
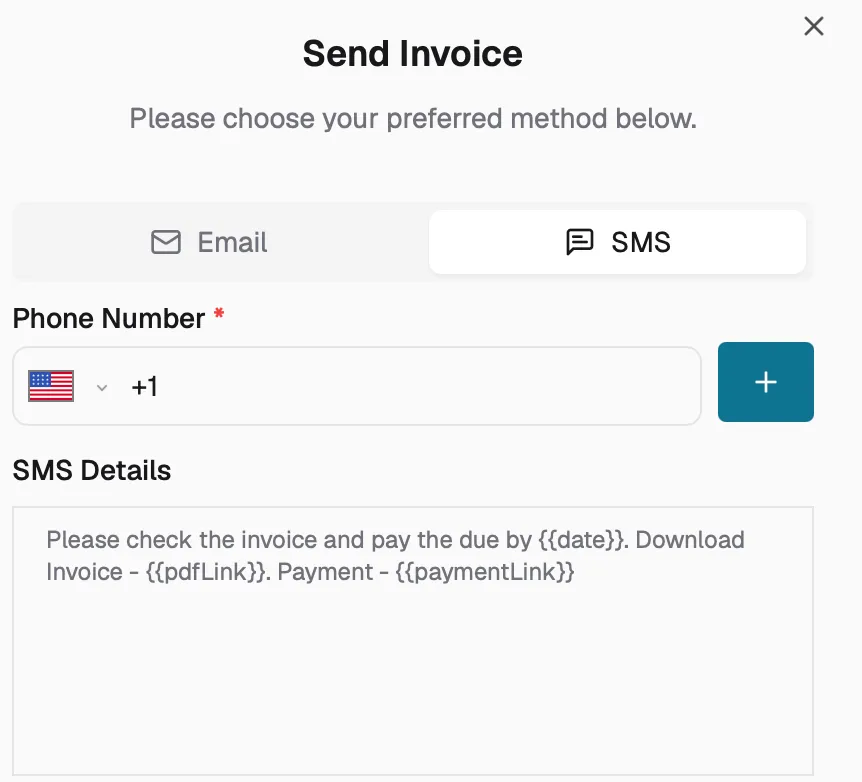
- The Send dialog opens with two tabs Email and SMS.
Sending via email
- The To field is pre-filled with the customer's billing contact email. Add more recipients if needed.
- Review the Subject line it uses your company's default invoice email template.
- Review and customize the Email Body. Placeholders such as customer name, invoice number, and amount are automatically replaced with the correct values.
- A PDF copy of the invoice is attached automatically.
- Click Send.
Sending via SMS
- Enter or confirm the customer's phone number.
- The message includes a link for the customer to view and pay the invoice online.
- Click Send.
Resending an invoice
You can resend an invoice at any time as long as it is not voided. This is useful when:
- The customer did not receive the original email or SMS.
- You have updated line items or corrected details and want to send a fresh copy.
- You want to send a payment reminder as the due date approaches.
To resend, open the invoice and click Send again. The same Email and SMS dialog will appear with the updated invoice information.
Adding a signature
- Open the invoice page.
- Click the three-dot menu in the top right corner.
- Select Add Signature.
- A signature sheet slides open where you or the customer can sign directly on screen.
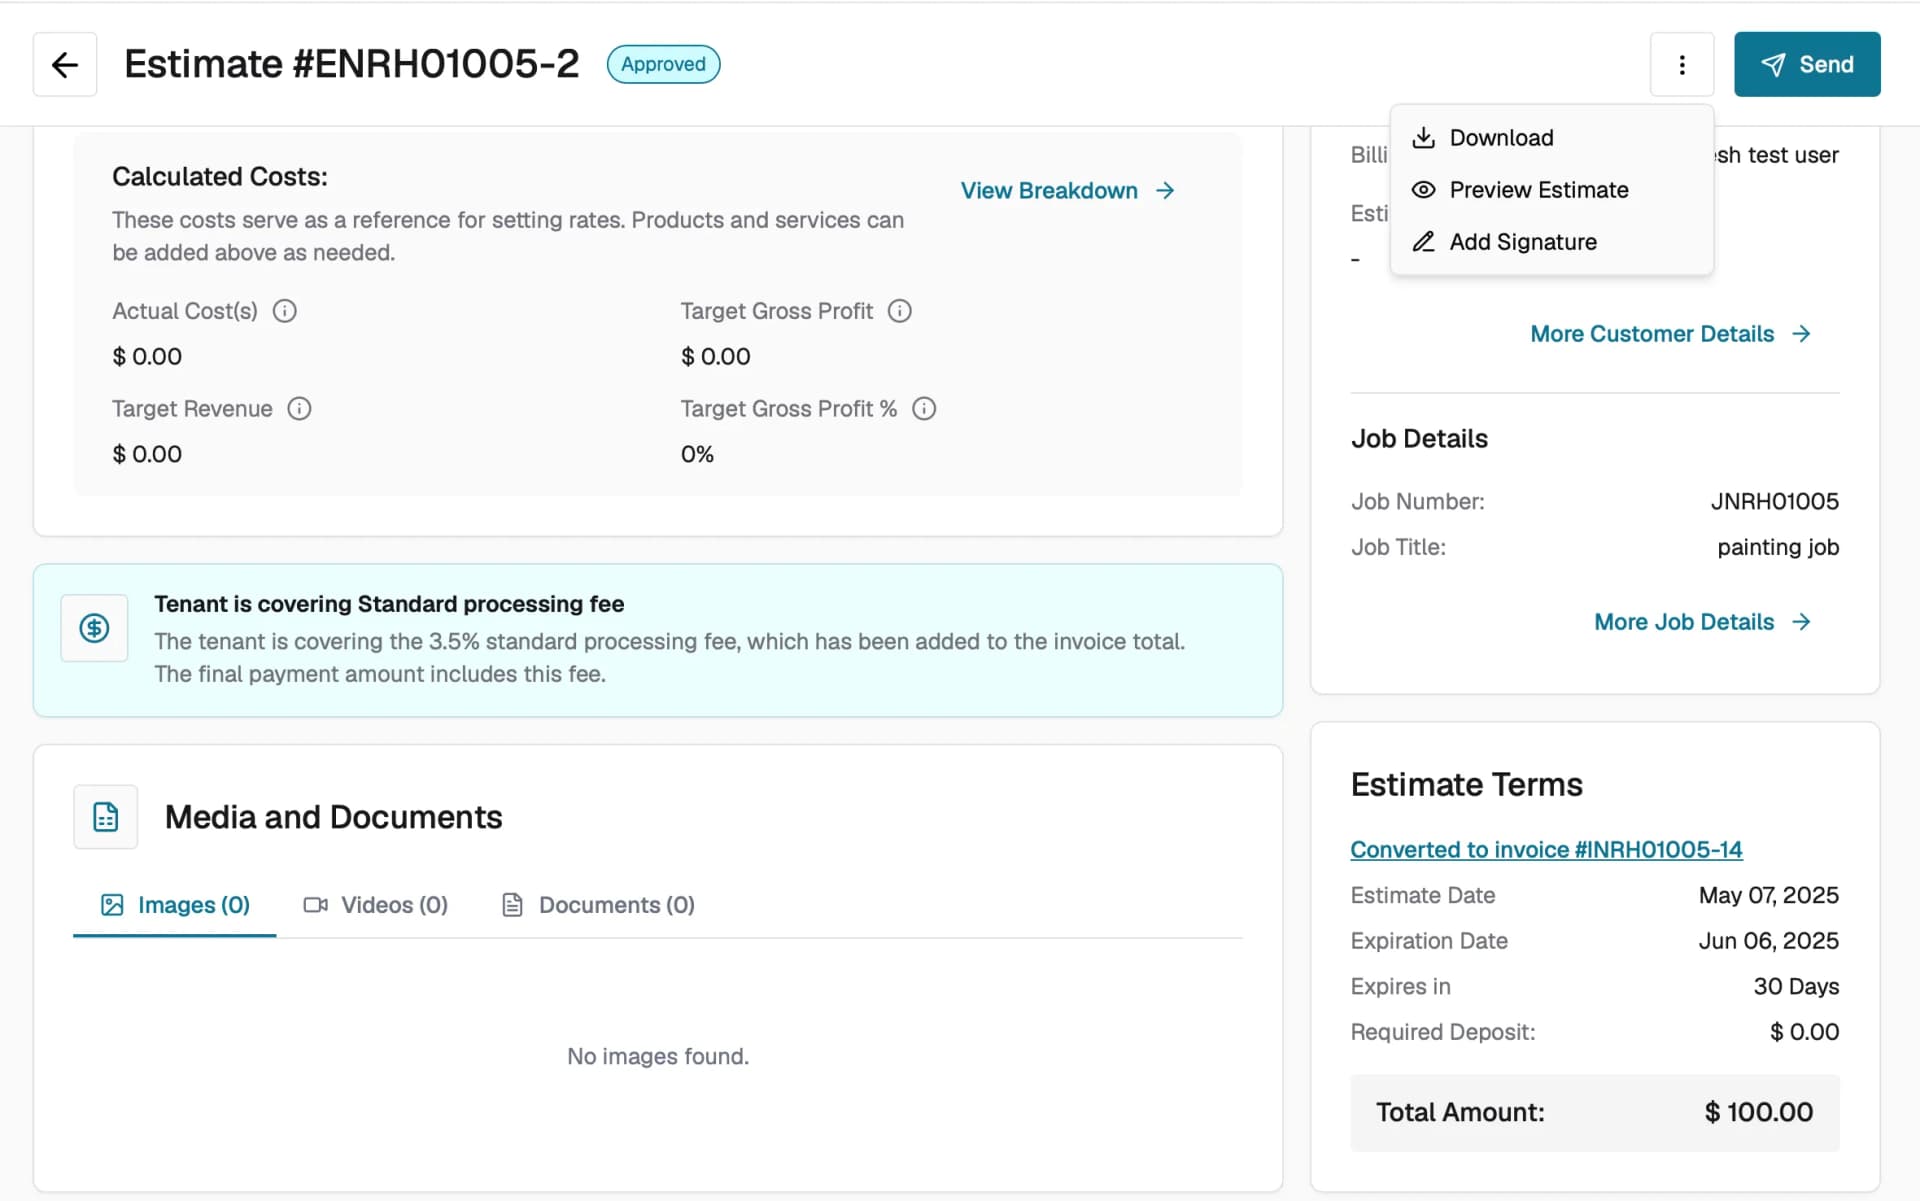
Note: The signature option is available for invoices in Open status and Paid status (only if a signature has not already been added). It is not available for Draft or Void invoices.
What happens after sending
- The invoice status changes from Draft to Open.
- The customer receives a professional invoice document with a link to view and pay it online.
- If Stripe is connected, the customer can pay directly from the online view.
Tips
- Customize your default invoice email template in company settings so every invoice has consistent messaging.
- Verify your company email once after that, all future sends will go through without the verification step.
- Use the Download button to save a PDF copy for your own records before sending.
- You can send the same invoice multiple times as a payment reminder.