
Message Center Overview
Message Center brings your customer communication into Swivl. Send SMS and emails, use ready-made templates, drop internal notes, and manage every conversation from one inbox.
Overview
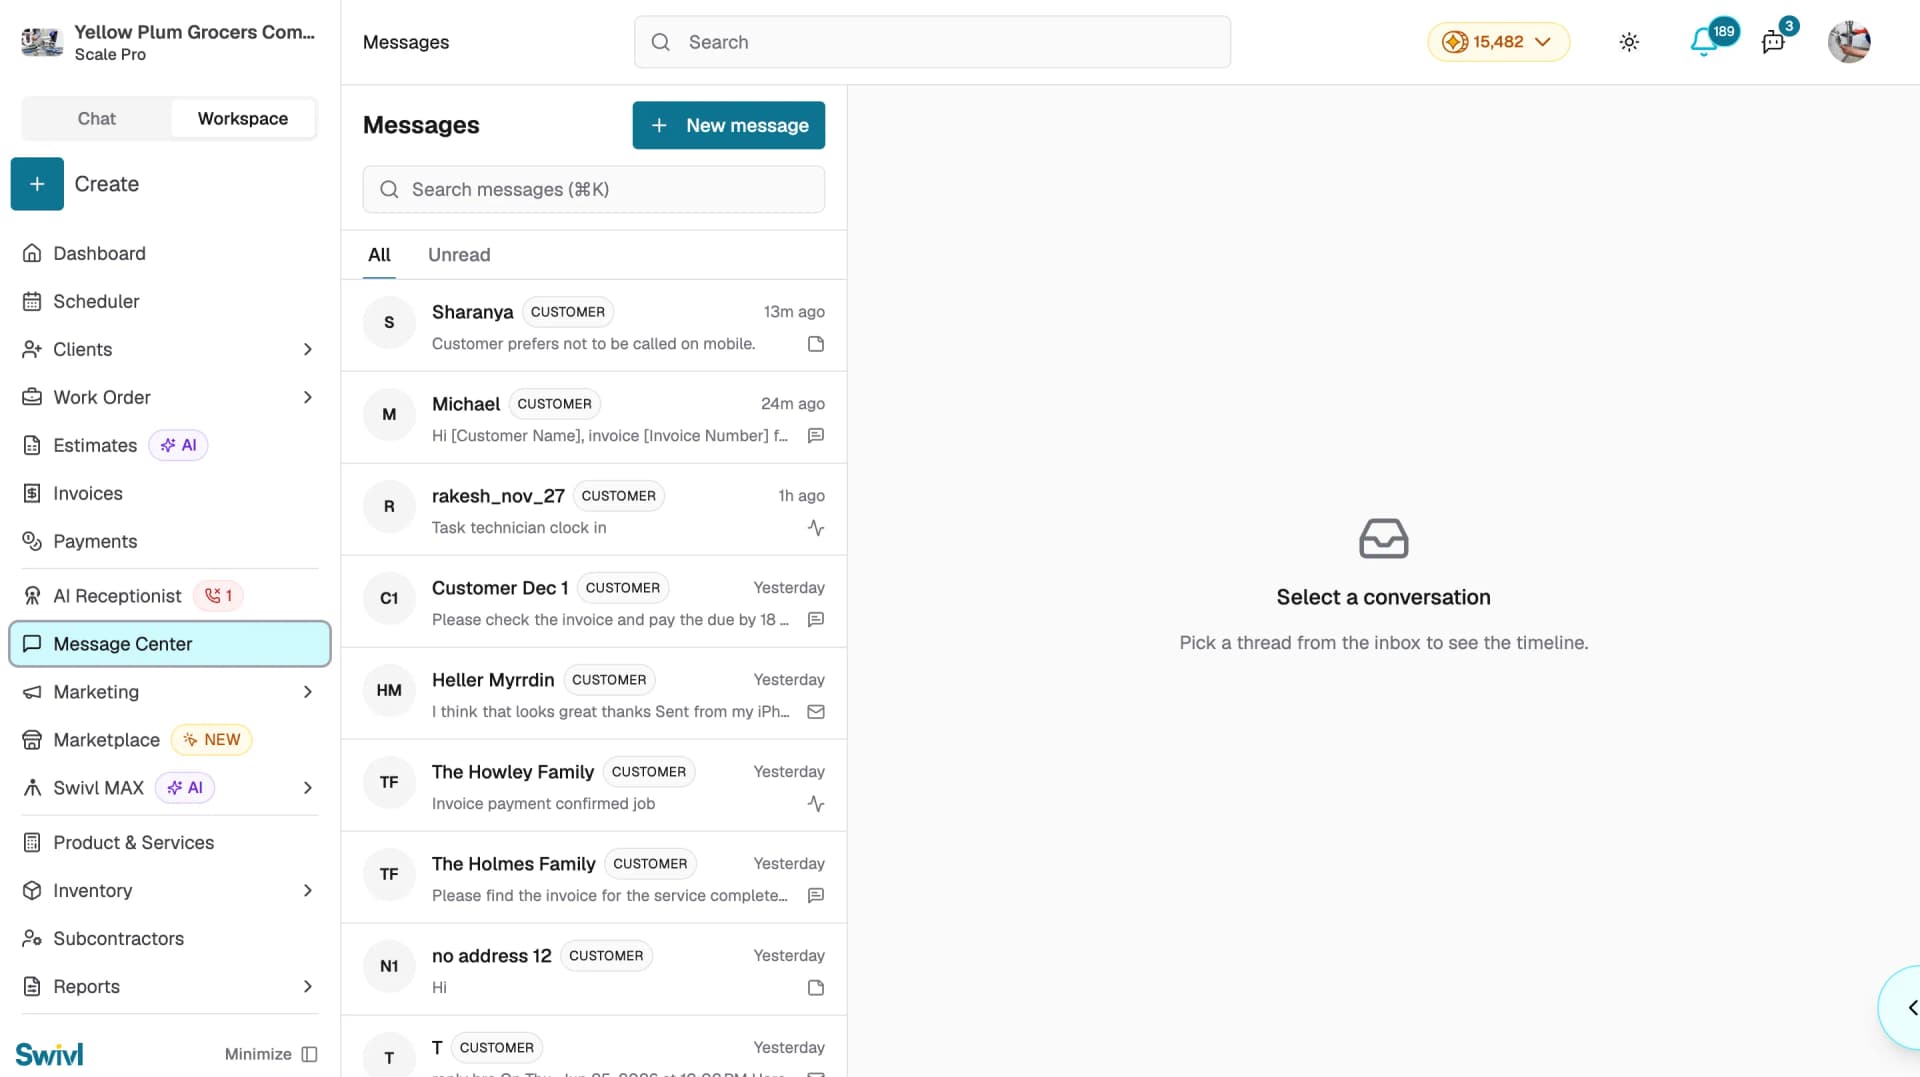
Message Center is your team's shared inbox for all customer communication. Send SMS and emails, see replies, and keep every conversation linked to the right customer, job, estimate, or invoice so your whole team always has the full picture.
Who Can Access This
Role | Access / Permissions |
|---|---|
Super Admin | Full access to all conversations |
Admin | Full access to all conversations |
Lead Technician | Can view and message customers and tasks assigned to them |
Technician | Can view and message customers and tasks assigned to them |
Accessing Message Center
- Go to Message Center in the left sidebar.
- Your inbox opens with all customer conversations listed on the left.
- Click any conversation to open it.
- Use the All and Unread tabs to filter your inbox.
- Use Search messages to find a specific conversation quickly.
Sending a message
You can send an SMS or email to any customer directly from Message Center or from the customer's profile page.
From Message Center
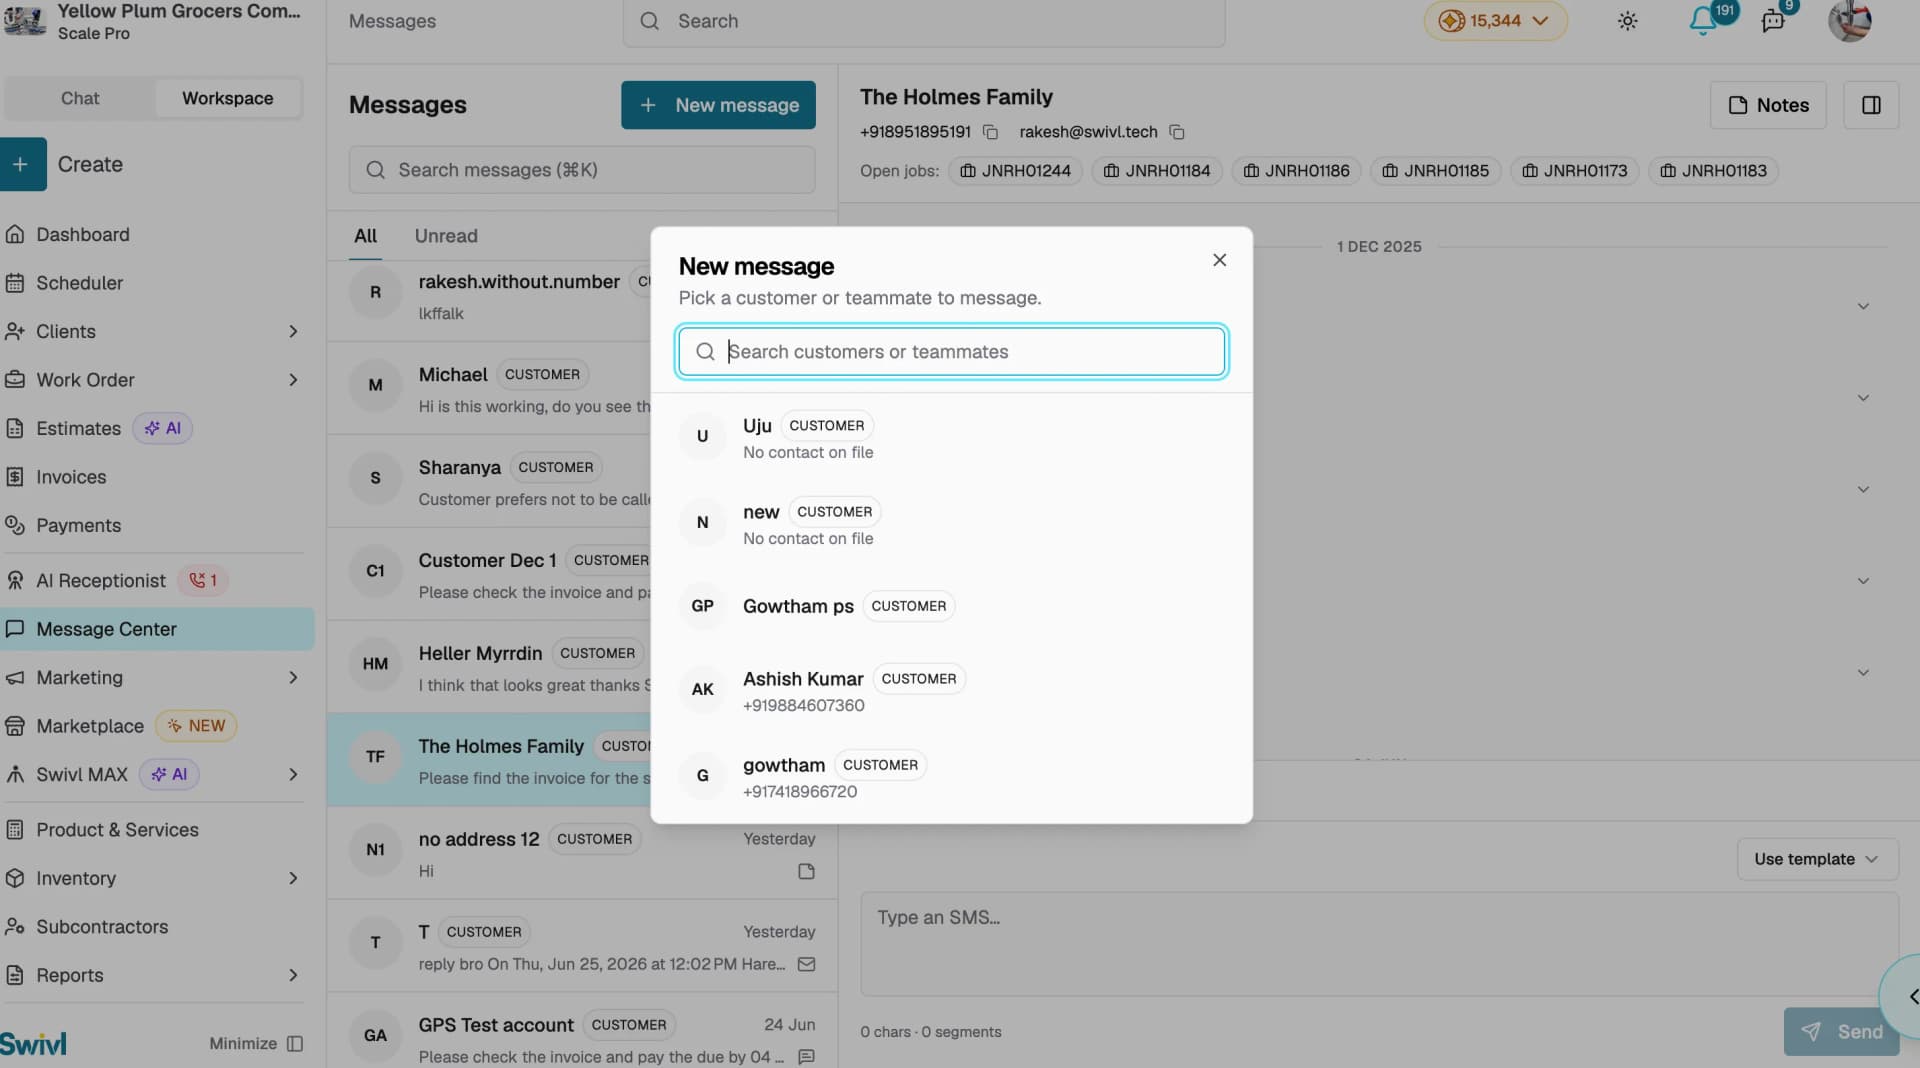
- Click + New message to start a new conversation.
- In the New message model, search for and select a customer or teammate to message.
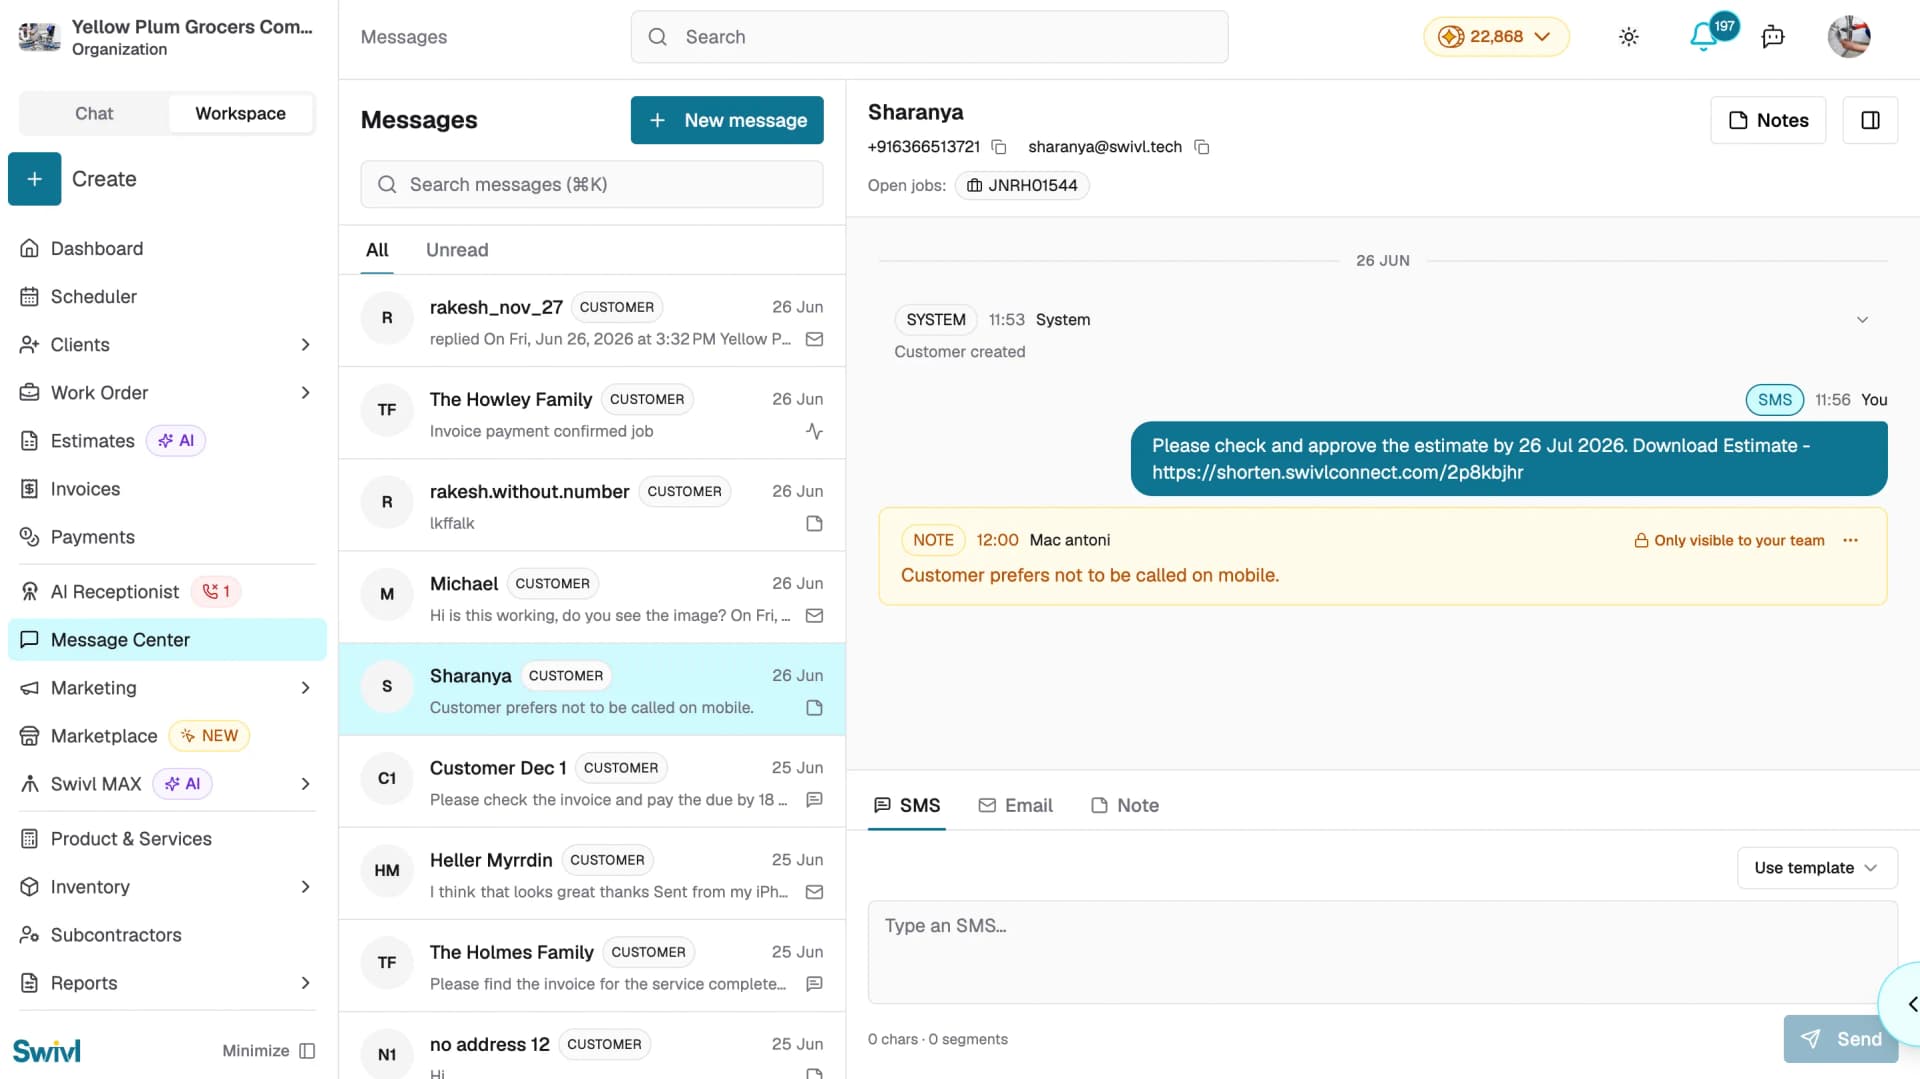
Choose a message type from the tabs at the bottom.
SMS
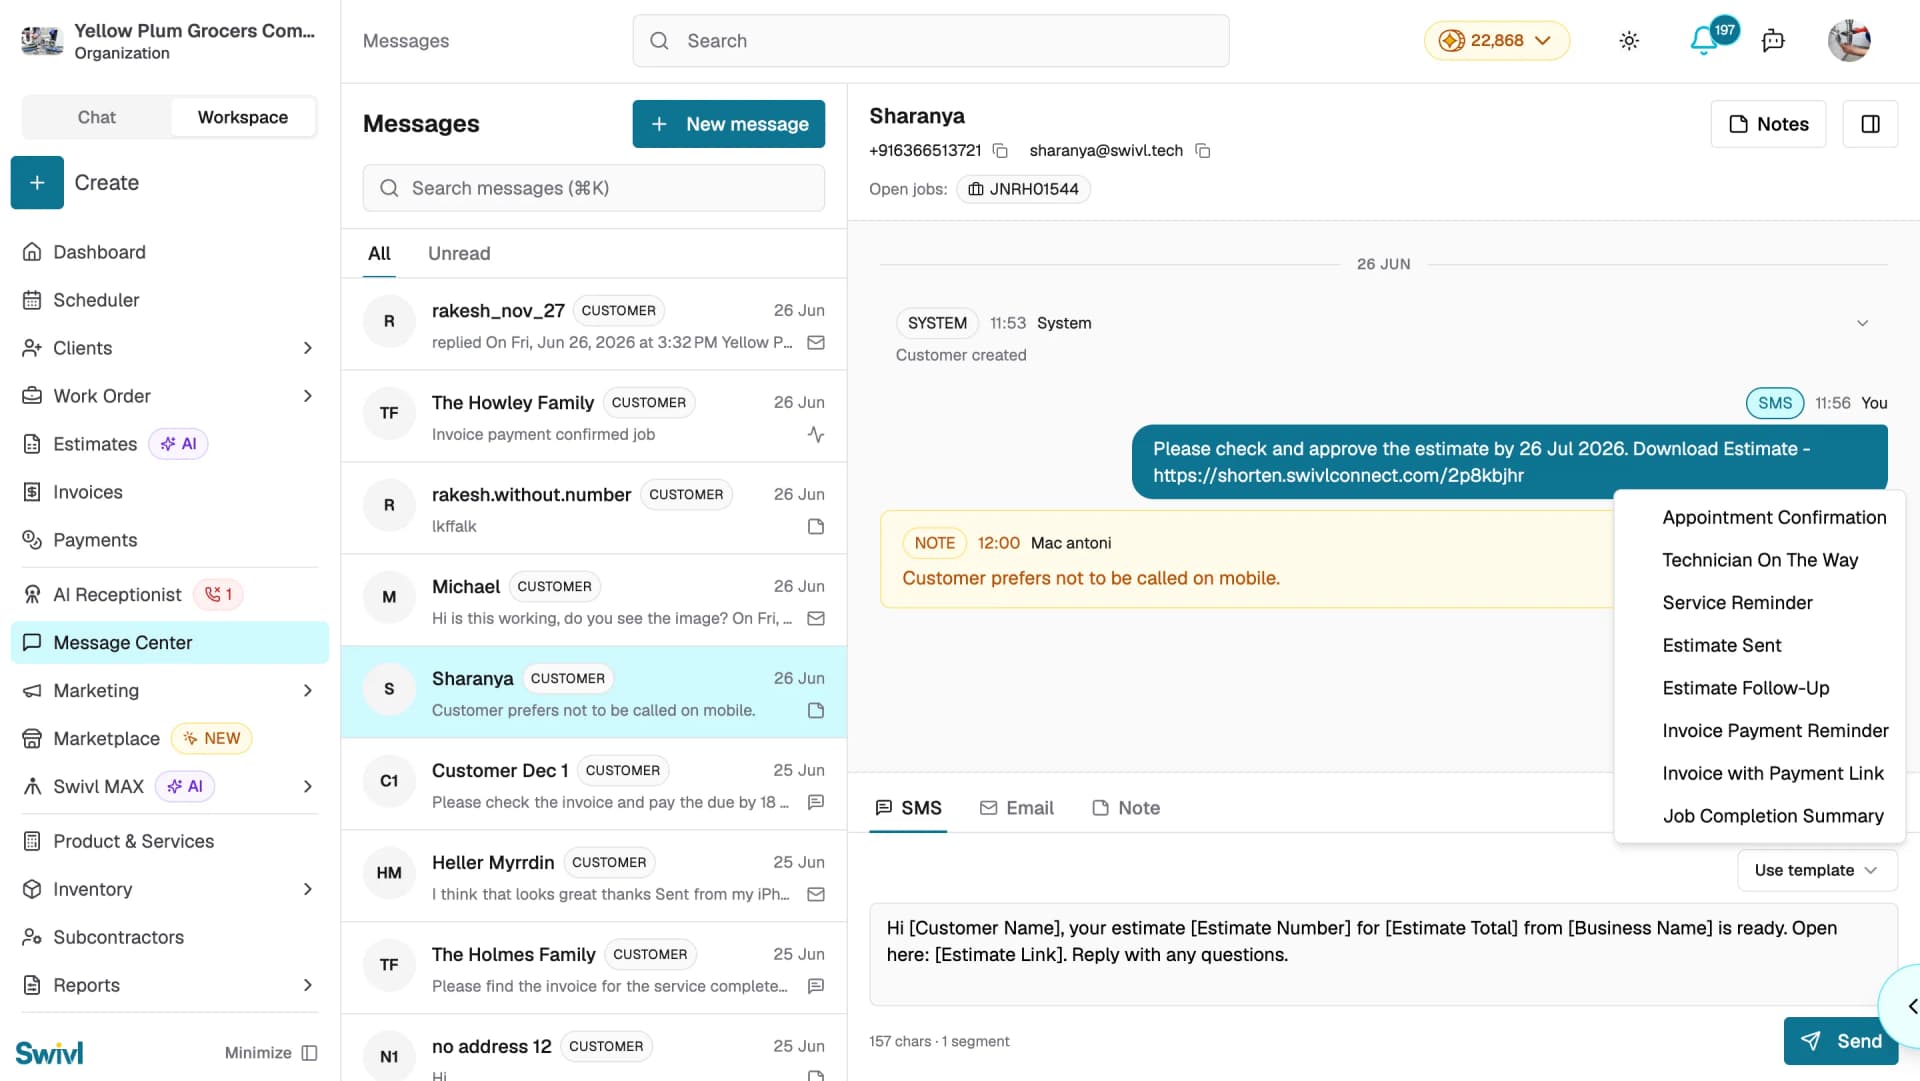
Sends a text to the customer's phone number. The character and segment count is shown at the bottom of the compose area. You can type your message manually or click Use template to pick from ready-made messages like Appointment Confirmation, Service Reminder, Invoice Payment Reminder, and more. Click Send when ready.
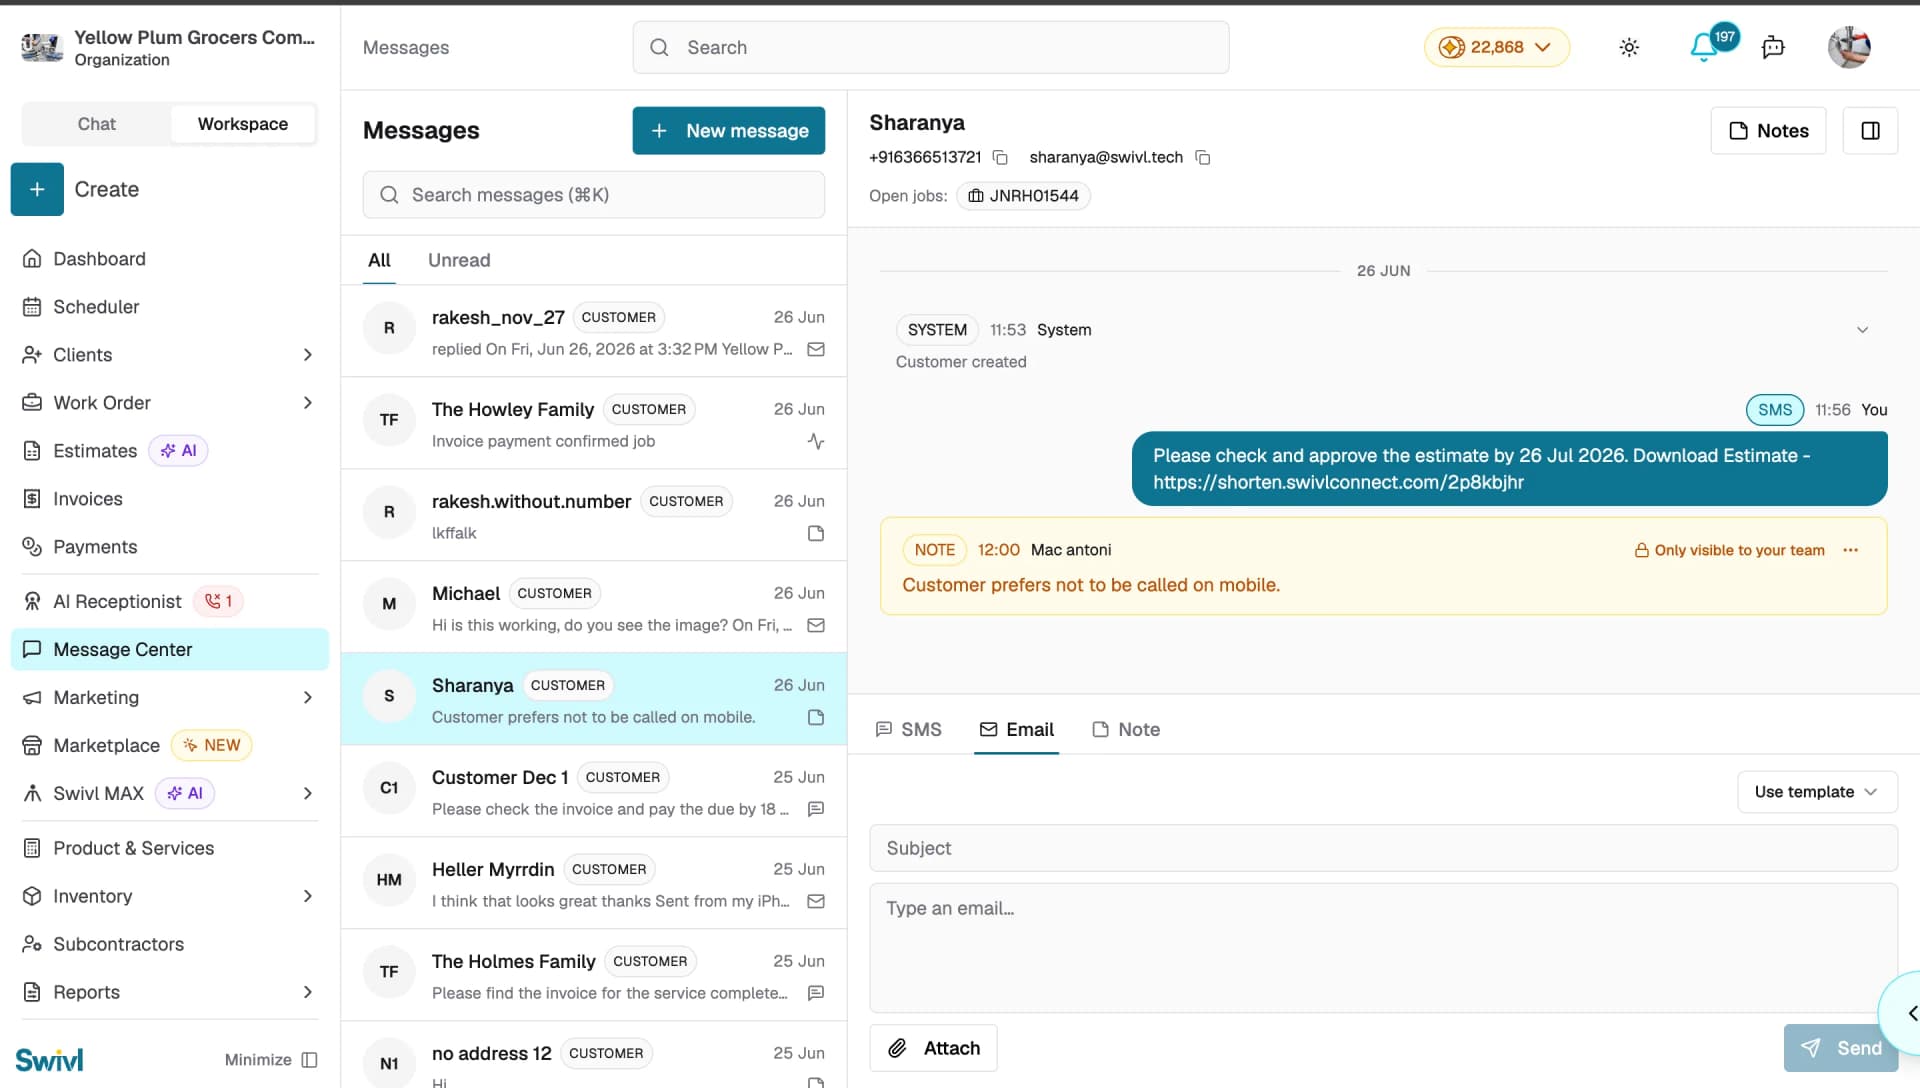
Sends an email to the customer's email address. Add a Subject line and attach files using the Attach button if needed. You can type your message manually or click Use template to pick from ready-made messages like Estimate Sent, Estimate Follow-Up, Job Completion Summary, and more. Click Send when ready.
Using Templates
Templates save you time on messages you send frequently. Instead of typing the same message repeatedly, select a template and it fills in the message for you ready to send in seconds.Templates are available for both SMS and Email.
To use a template:
- In the message compose area, click Use template.
- Select a template from the list.
- Job Completion Summary
- The template populates the message field edit if needed and click Send.
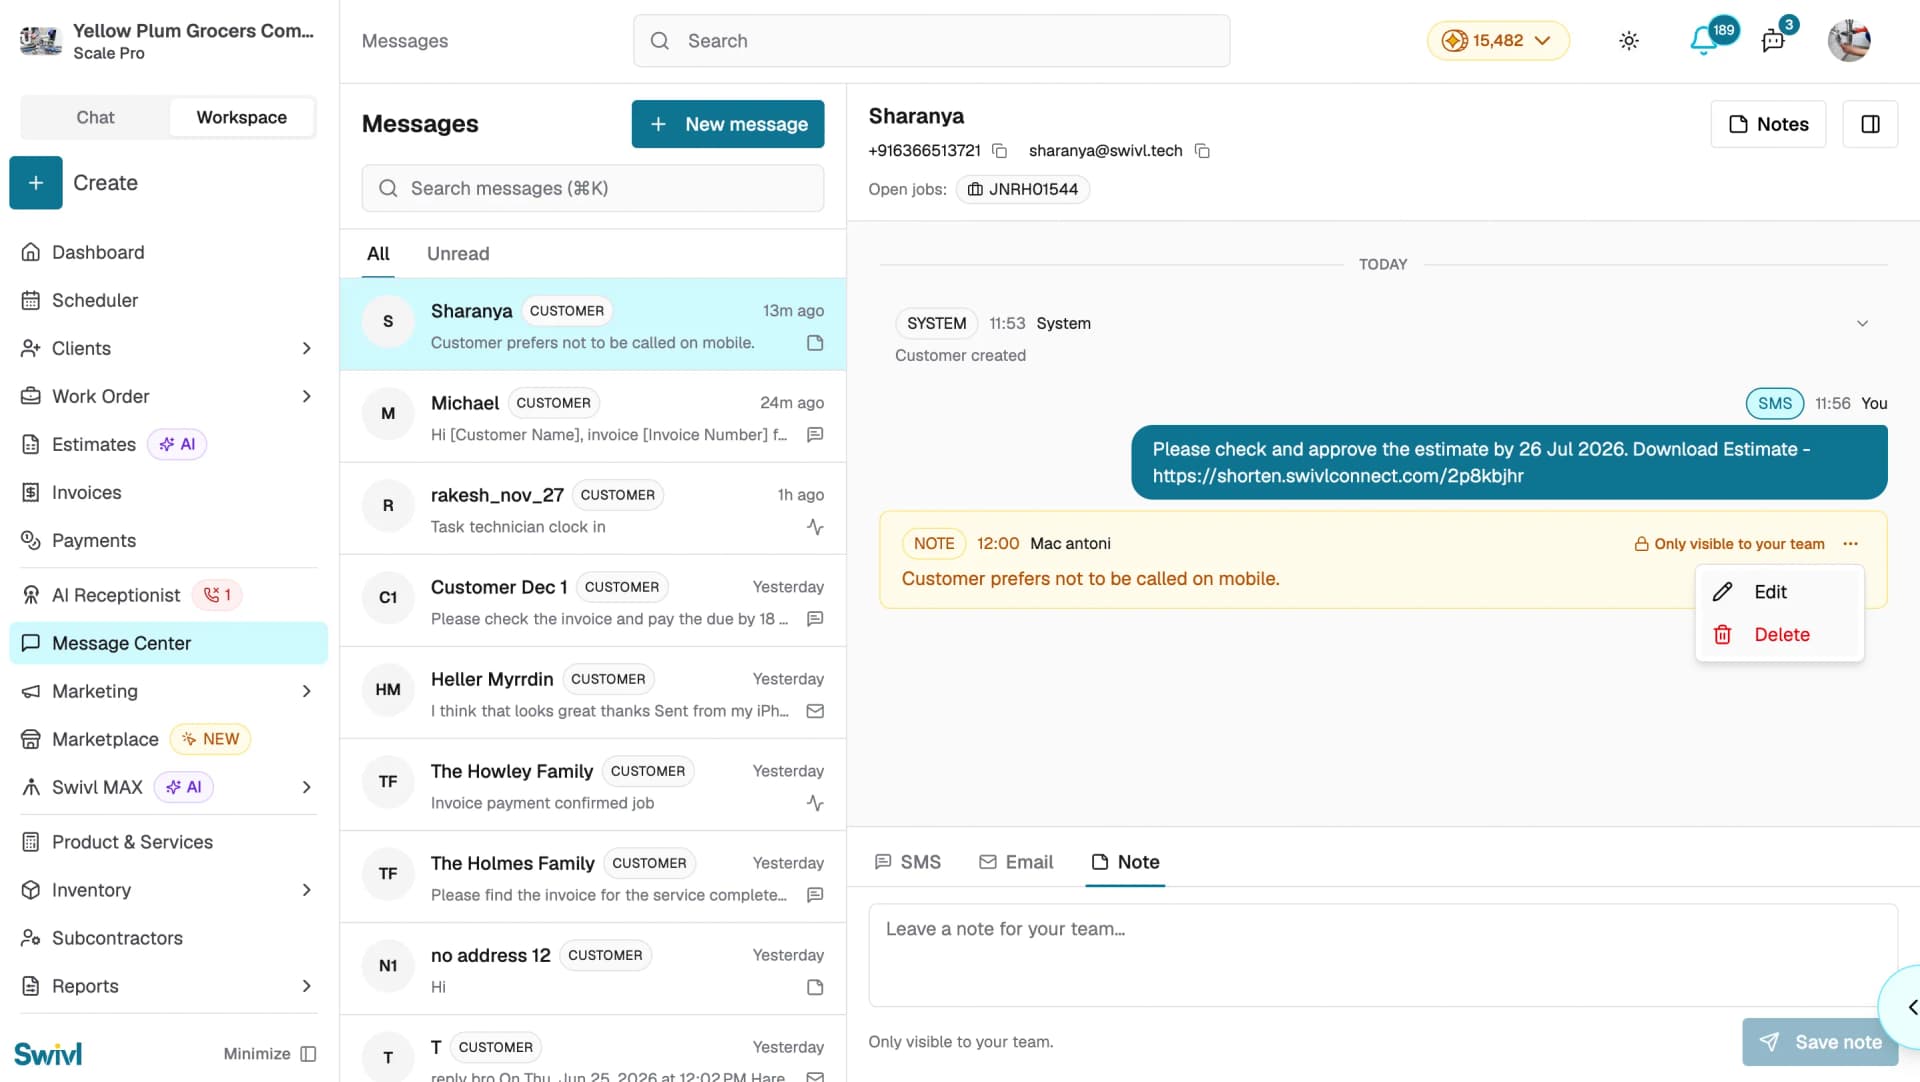
Note
Use it to leave context for your team. Notes are marked only visible to your team in the conversation thread. Type your note and click Save note.
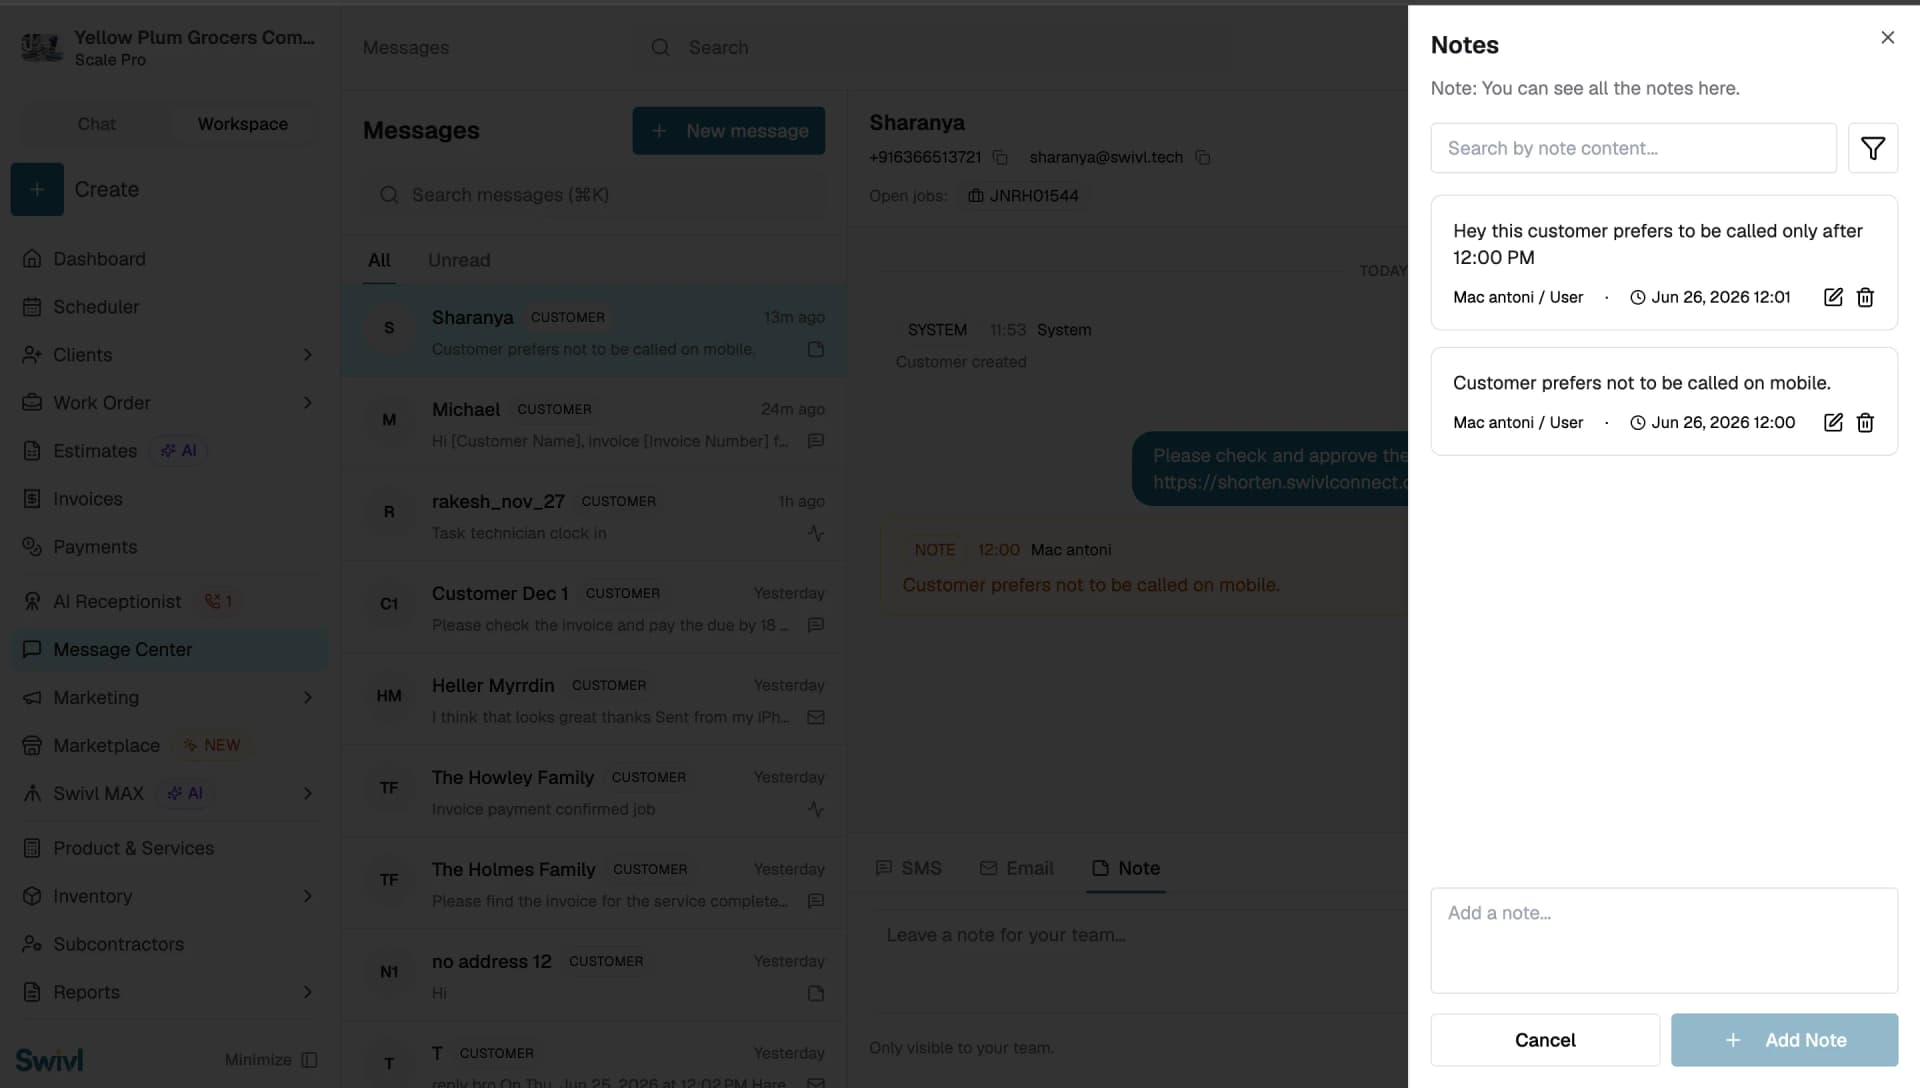
Viewing All Notes
Click Notes in the top-right corner of any conversation to open the Notes panel. Any note you add is saved to the global notes for that customer visible to your whole team but never to the customer.
The Notes panel shows all notes left for that customer across all conversations, with the author and timestamp. You can search notes by content, add a new note using + Add Note, or edit and delete existing ones.
Activity Updates
Swivl automatically adds system messages to the conversation thread when key actions happen such as when a customer is created, an estimate is sent, or a review is requested. These help your team track what's happened without having to check multiple pages.

Customer Contact Details
At the top of every conversation you can see the customer's phone number and email address. Click the copy icon next to either to copy them quickly useful when you need to reach out outside of Swivl or share details with your team.

Once sent, the message appears in the conversation thread and any reply from the customer comes back into the same inbox automatically.
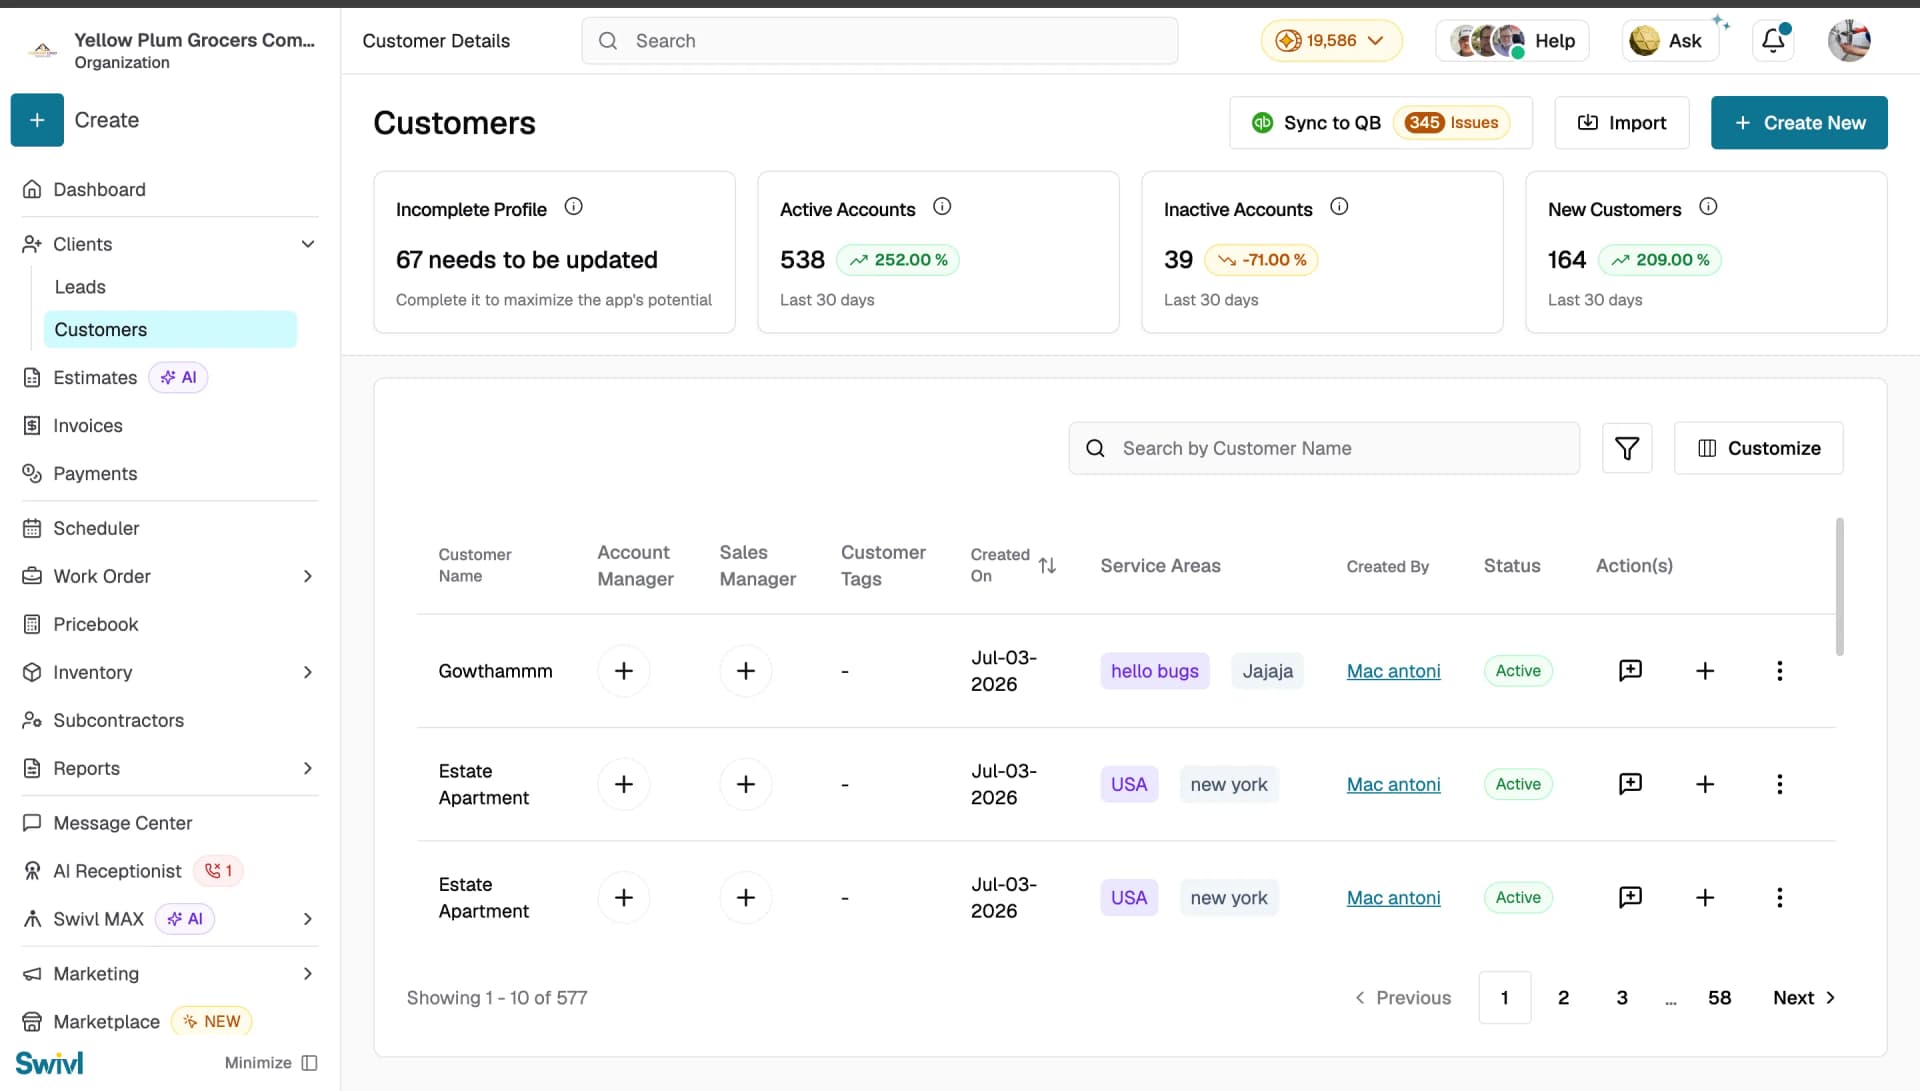
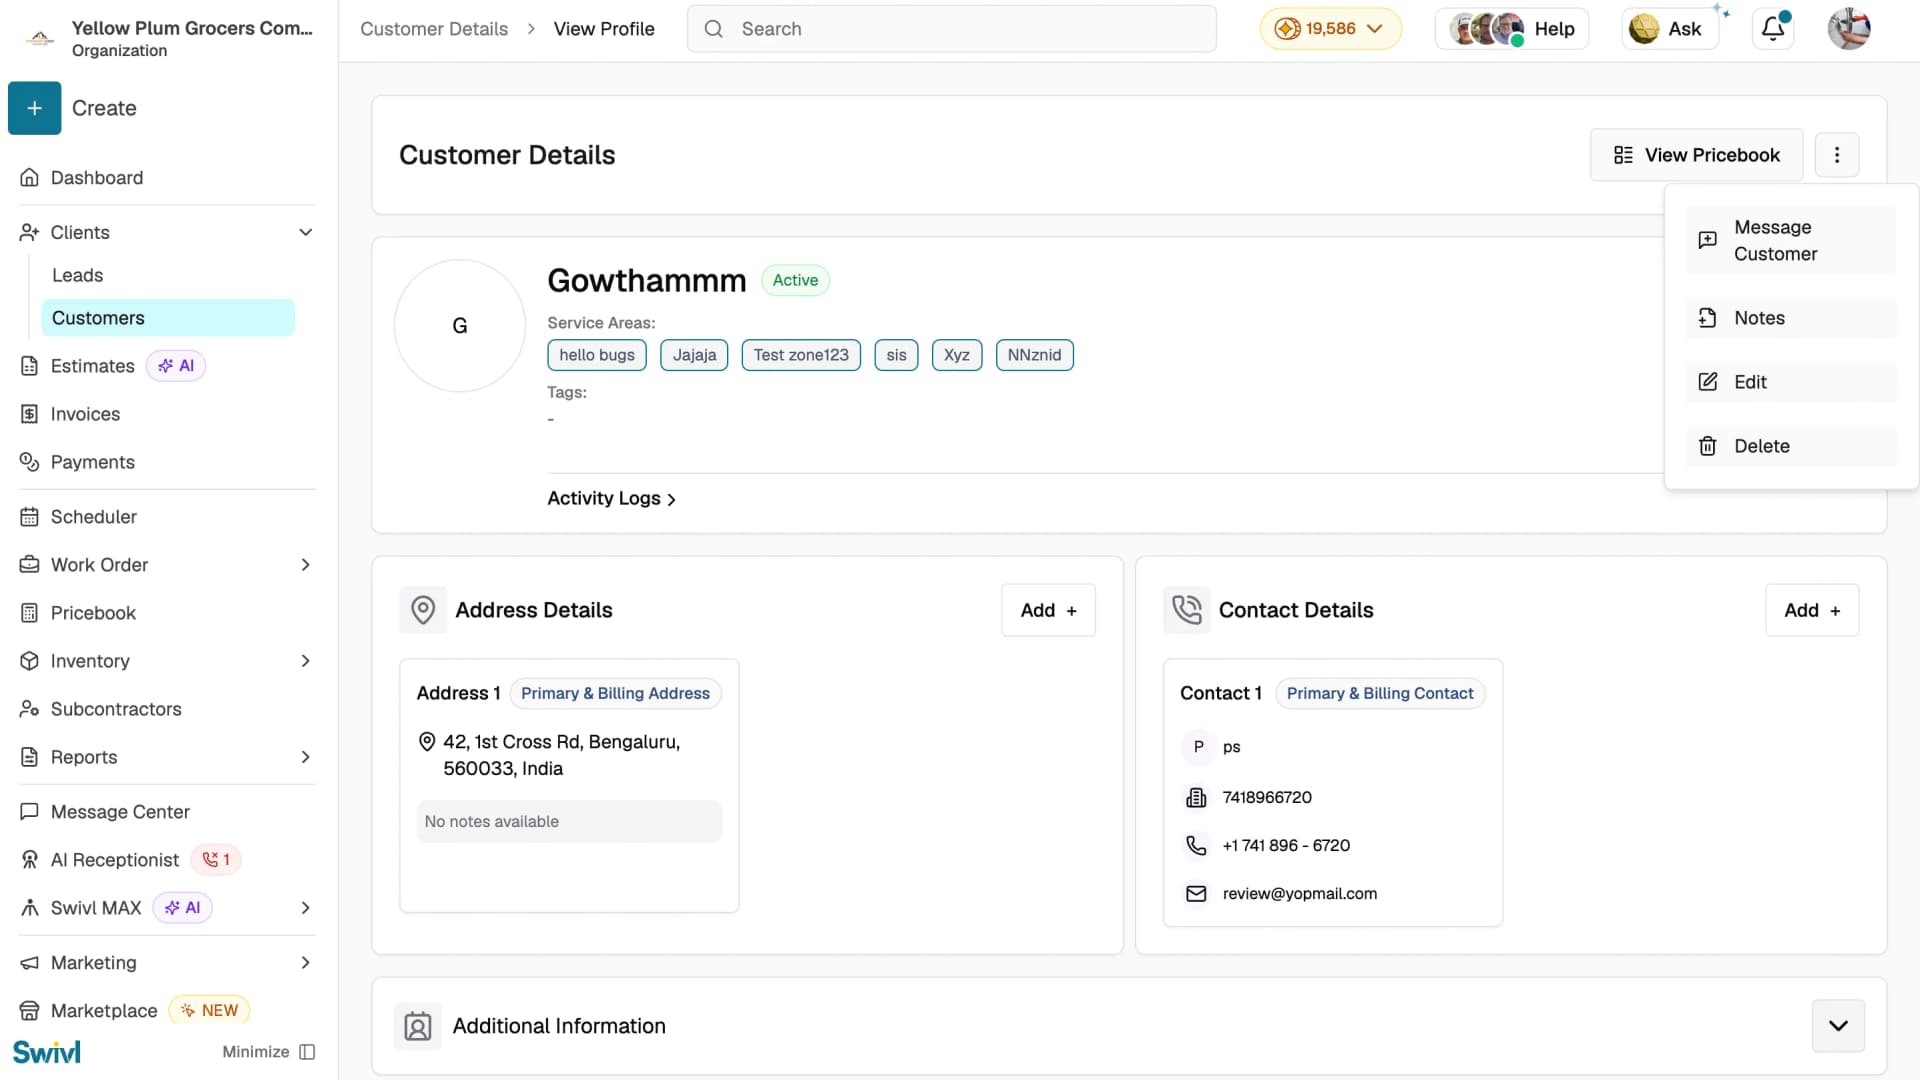
From a Customer page
- Go to Clients → Customers.
- Click the message icon next to any customer in the list to message them directly or open the customer's profile, click the ⋮ menu next to View Pricebook, and select Message Customer.
- Choose SMS or Email, type your message, and click Send.
From a Task page
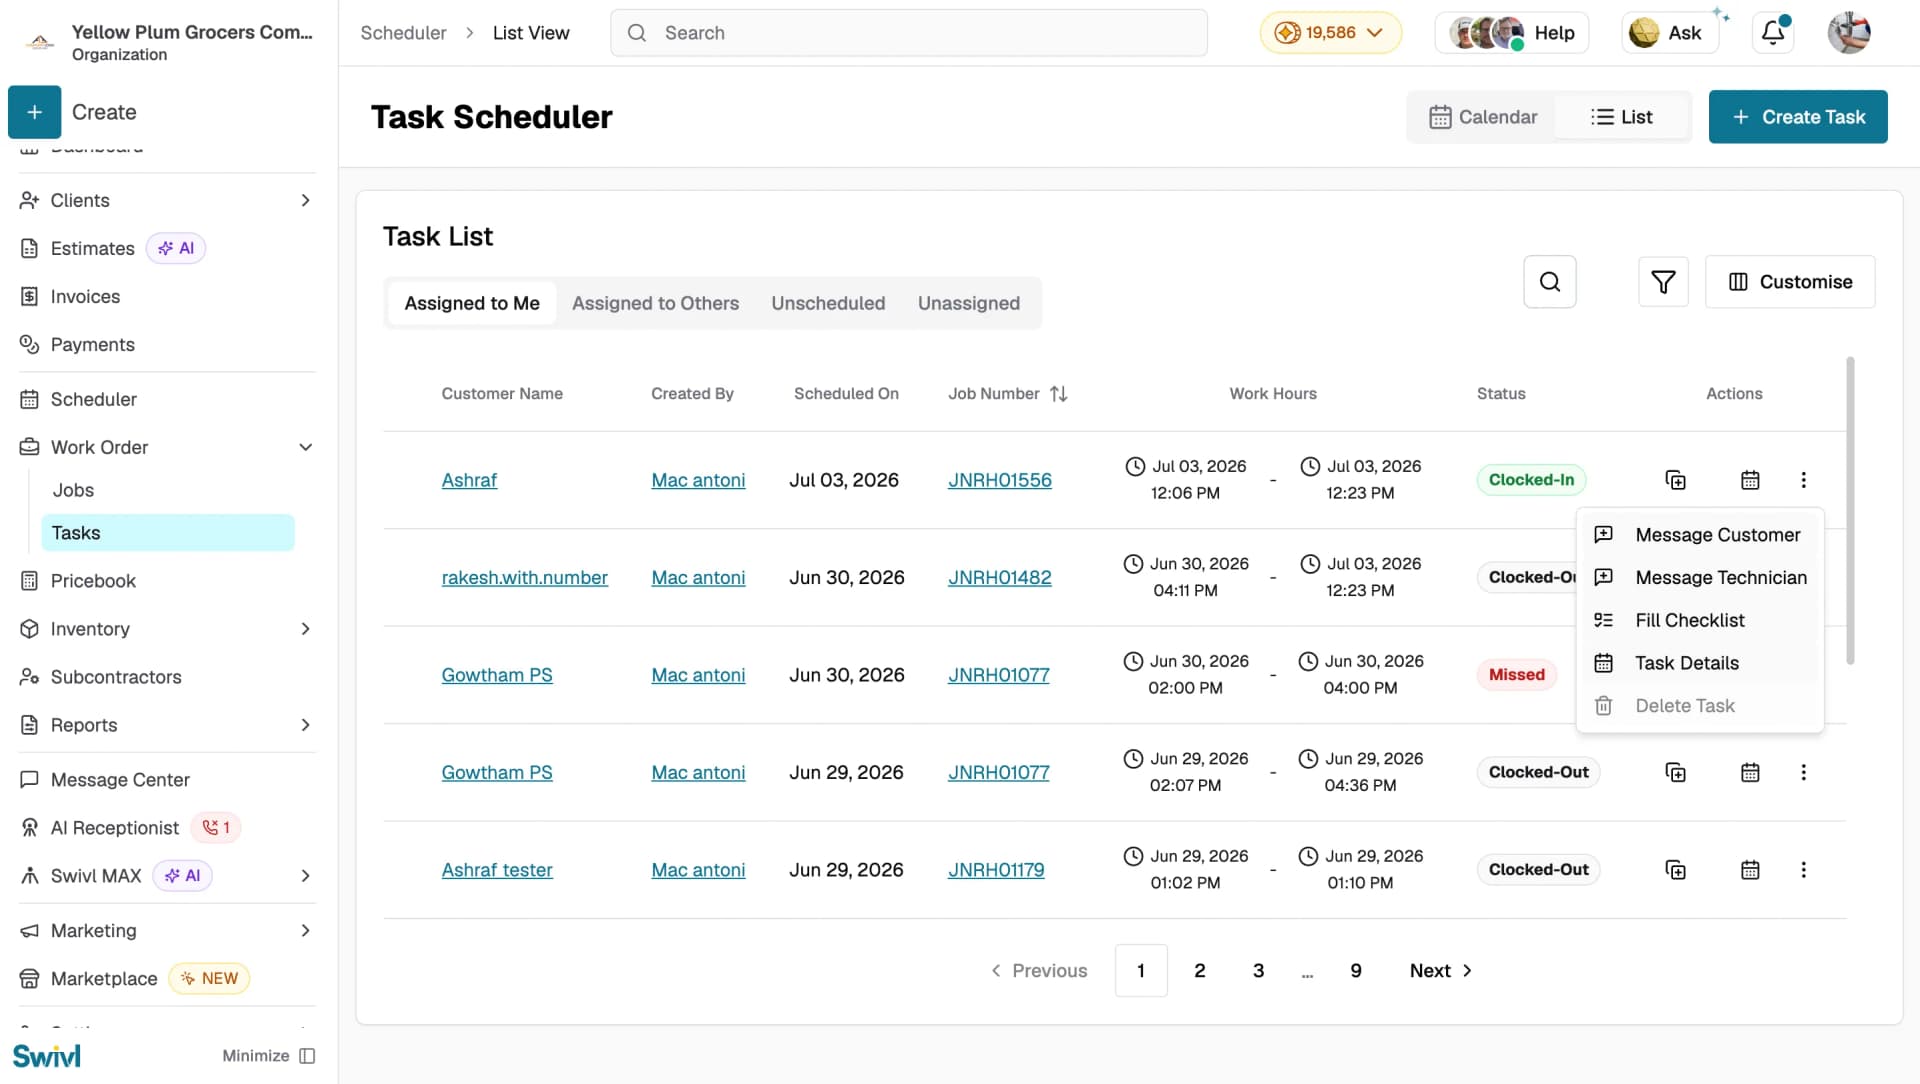
You can also message a customer directly from a task without leaving the page.
- Open the task — click its customer name or job number, or choose Task Details from the ⋮ menu next to it in the list — from Work Order → Tasks or from the Task Scheduler.
- Click Message Customer from the ⋮ menu (next to Clock-In / Clock-Out). The same menu also has Message Technician, if you want to message the assigned technician instead of the customer. You can also click the ⋮ menu directly next to any task in the Task List (Work Order → Tasks) and select Message Customer without opening the task at all.
- Choose SMS, Email, or Note, type your message, and click Send.
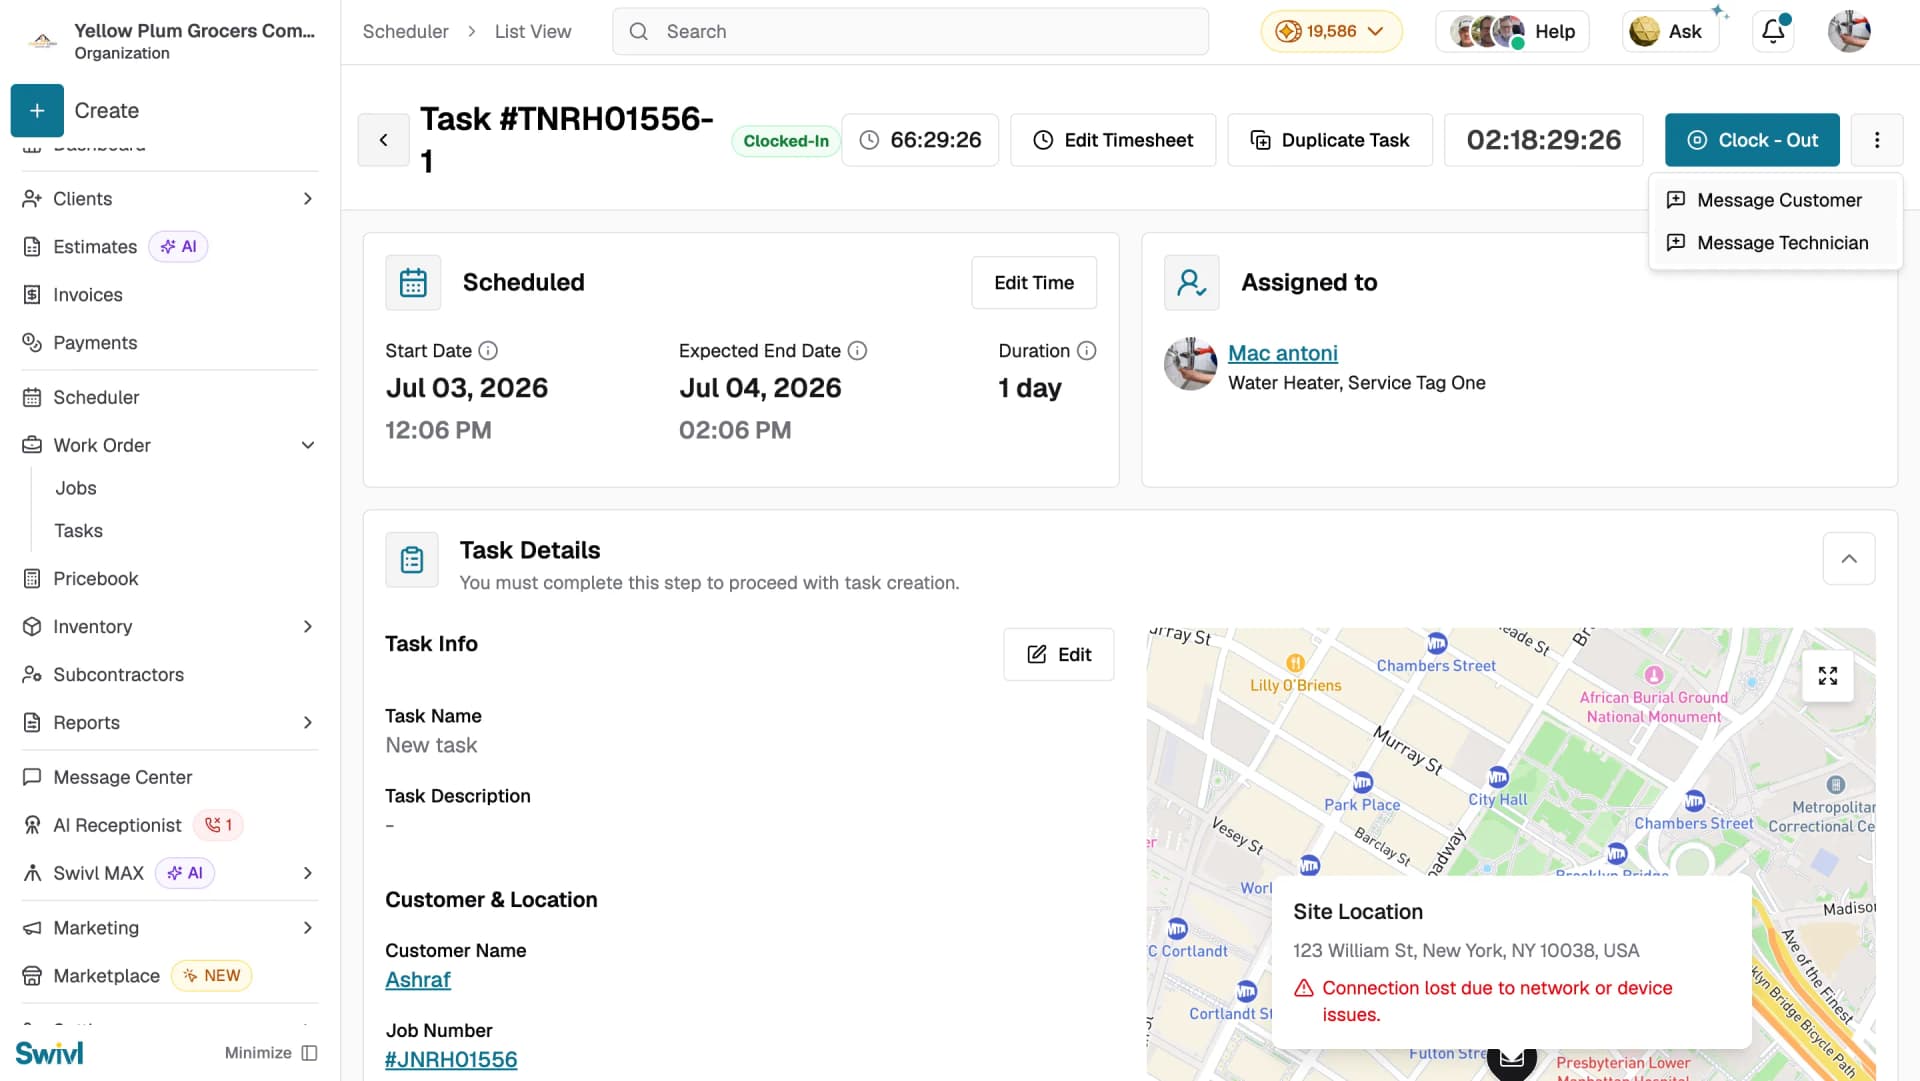
The conversation opens in Message Center and is linked to the customer's record automatically.
From a Job page
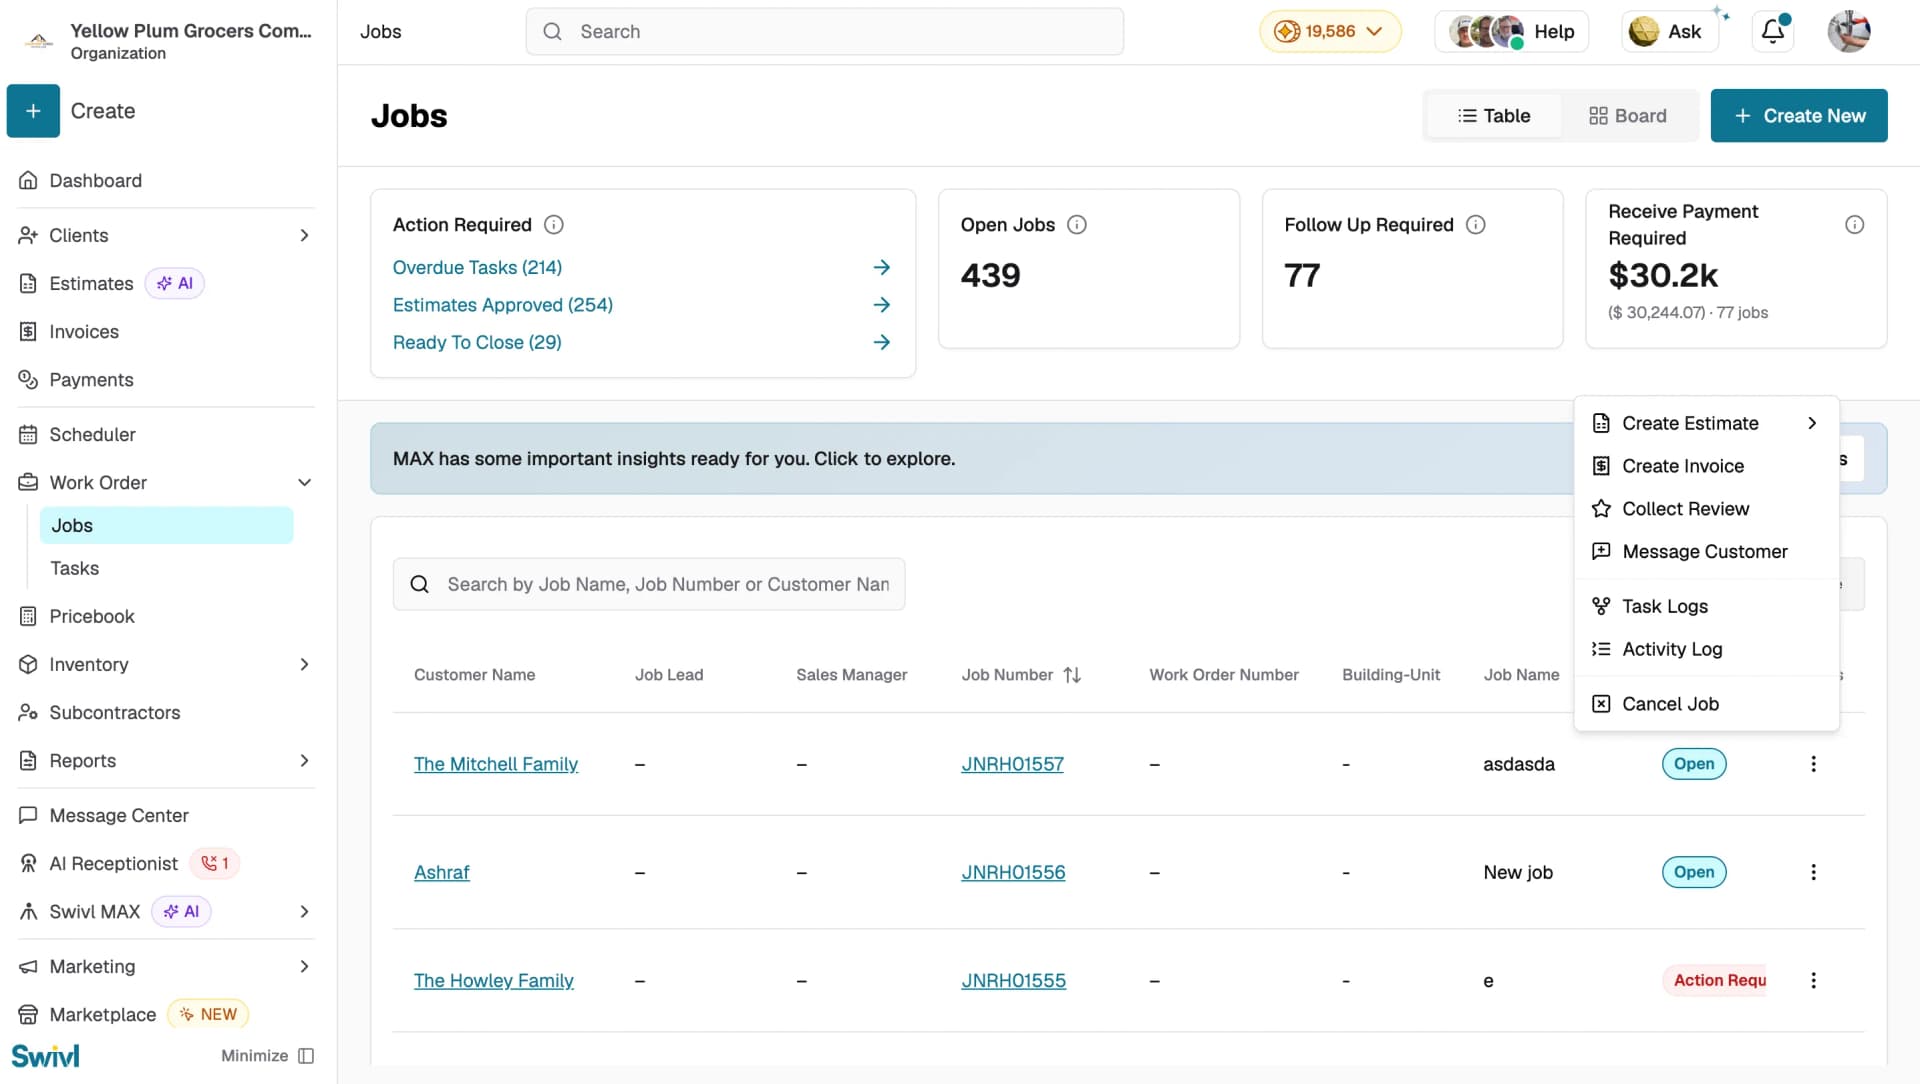
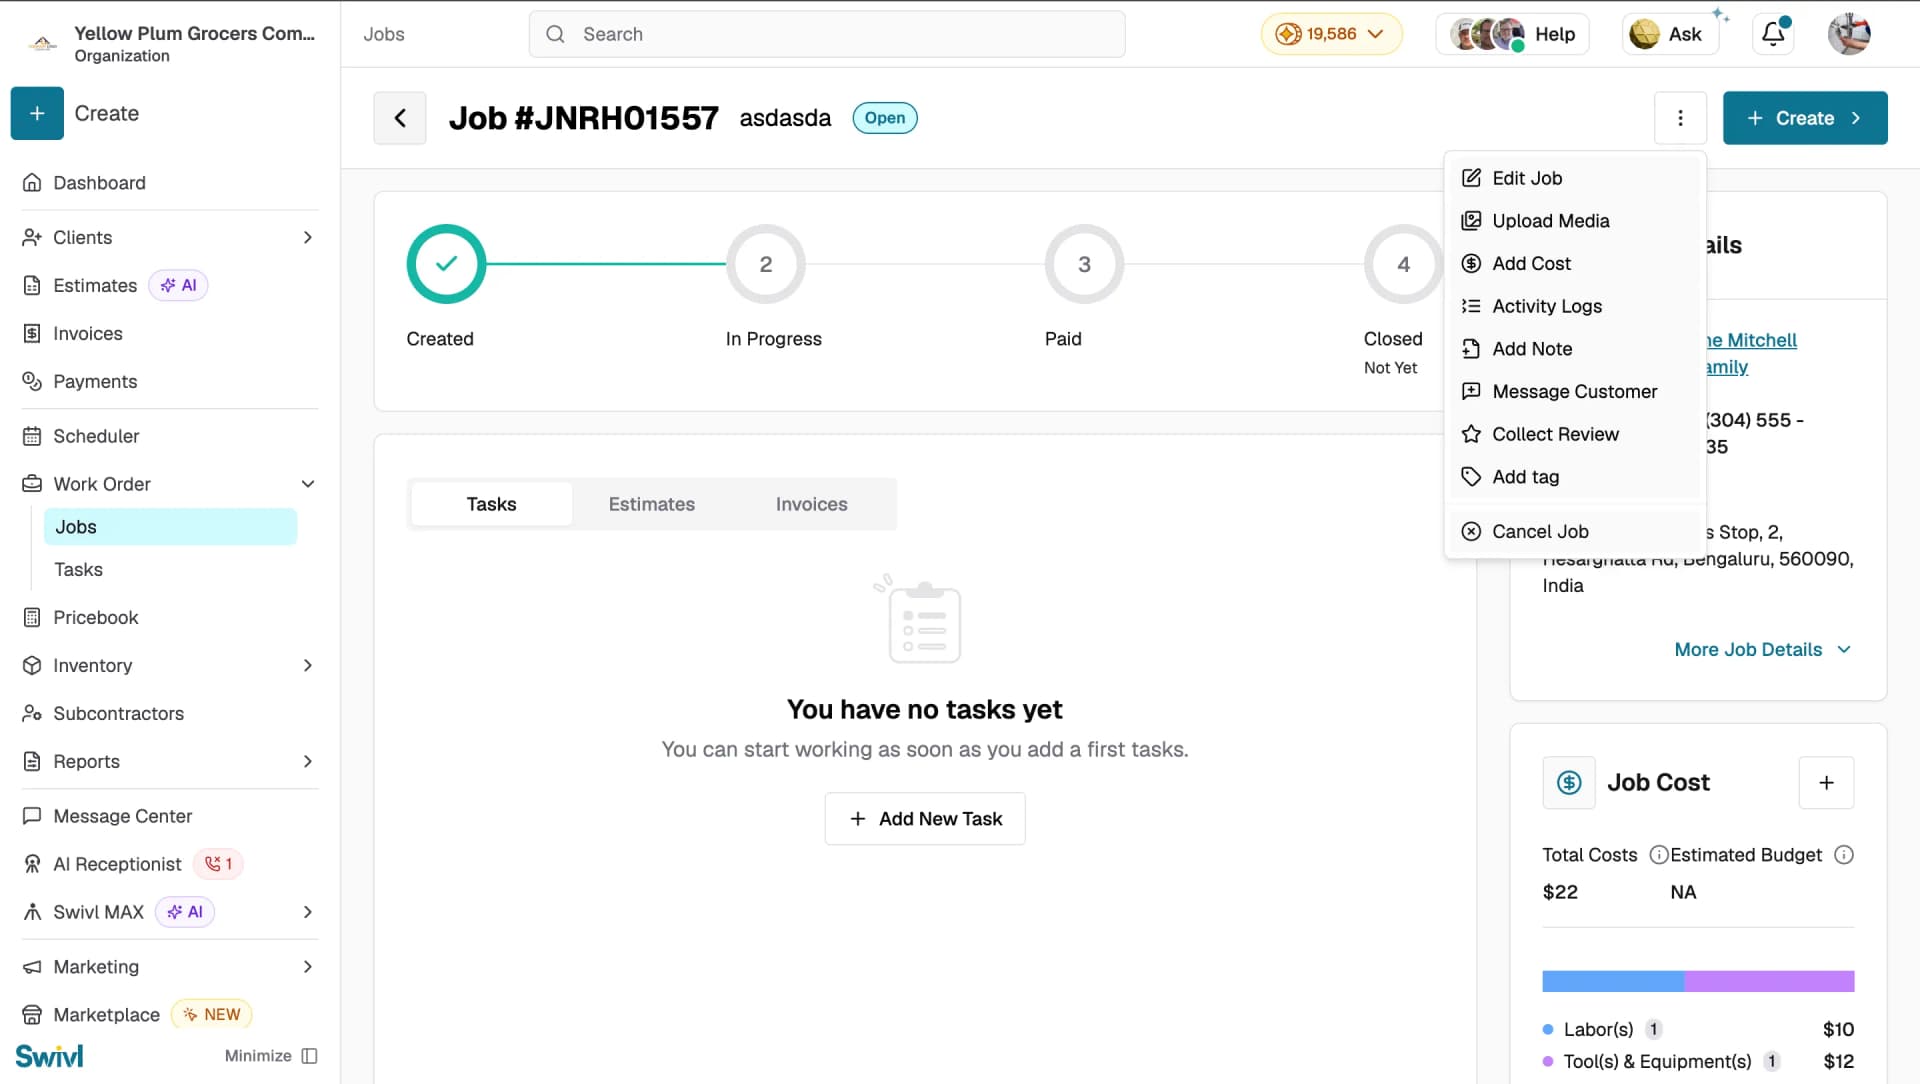
You can also message a customer directly from a job without leaving the page.
- Go to Work Order → Jobs.
- Click the ⋮ menu next to any job in the list and select Message Customer or open the job and click the ⋮ menu next to Create at the top and select Message Customer from there.
- Choose SMS or Email, type your message, and click Send.
From an Invoice Page
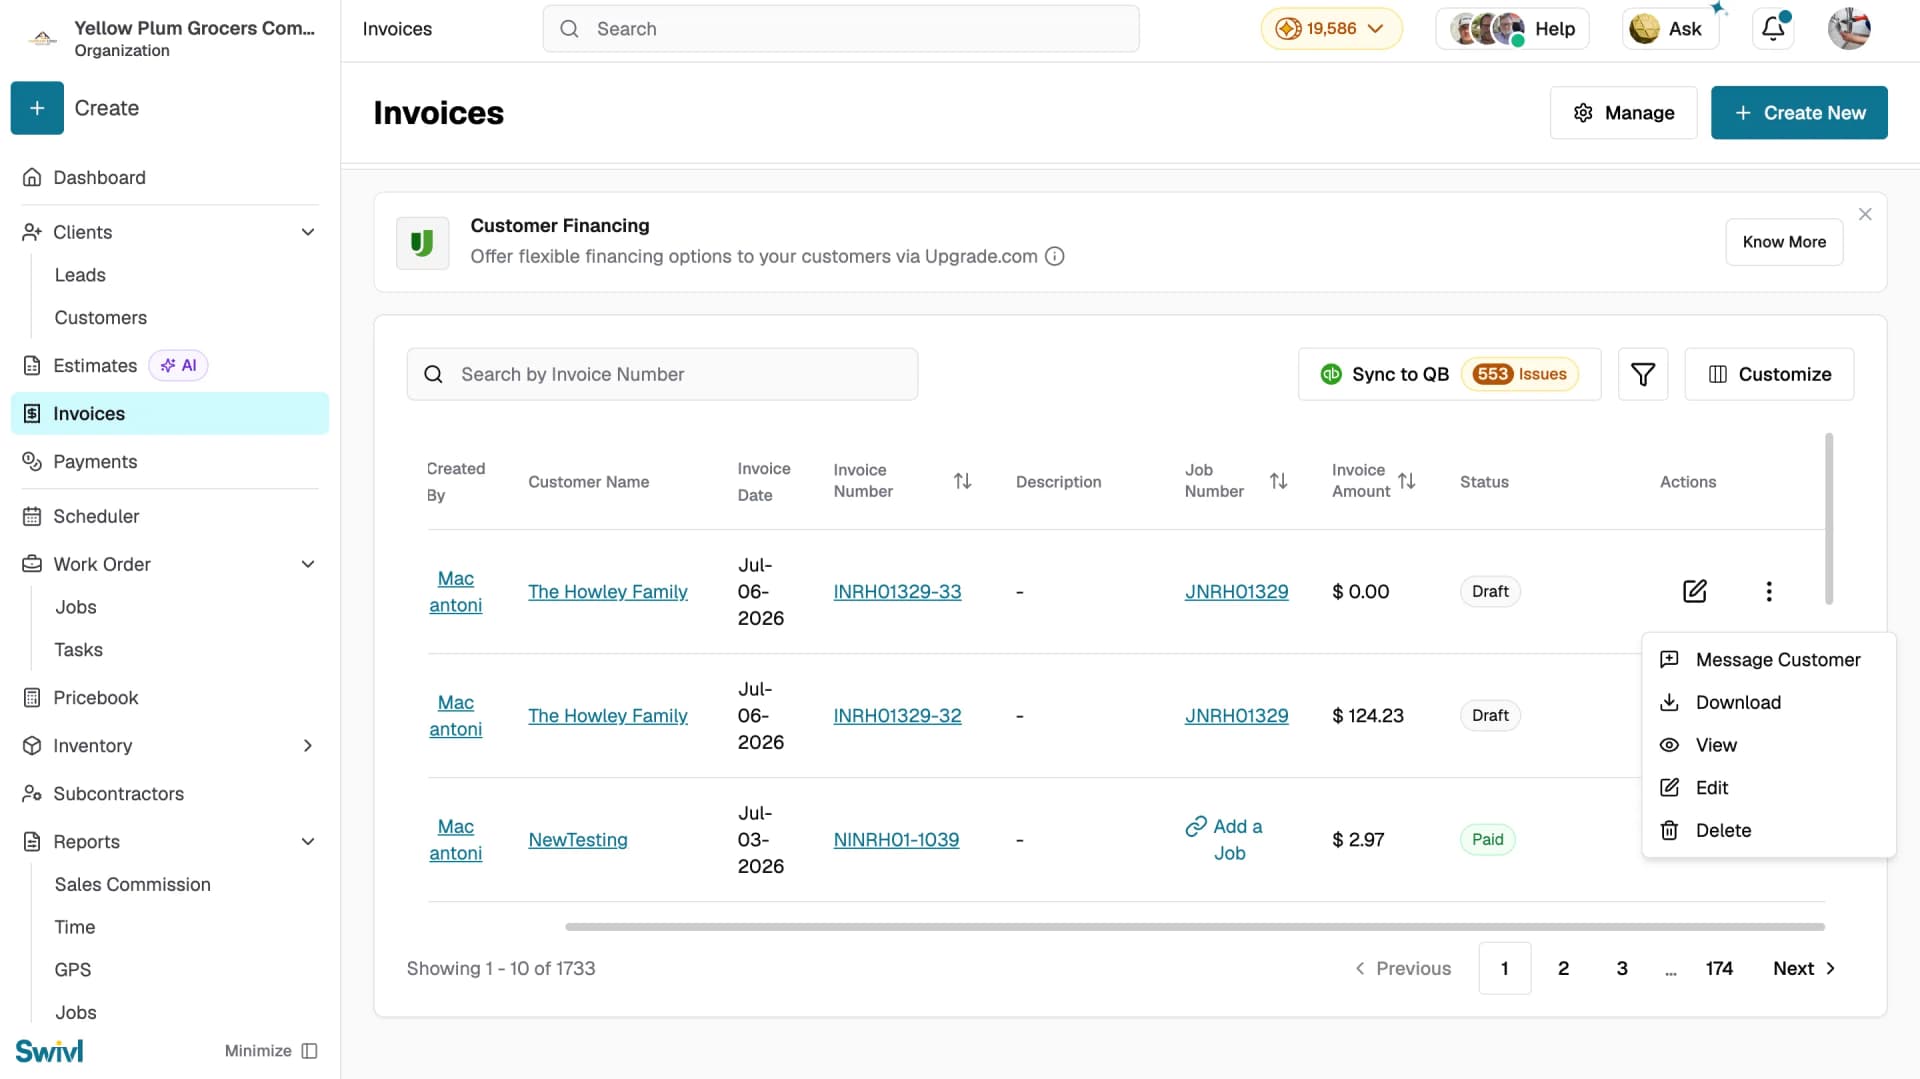
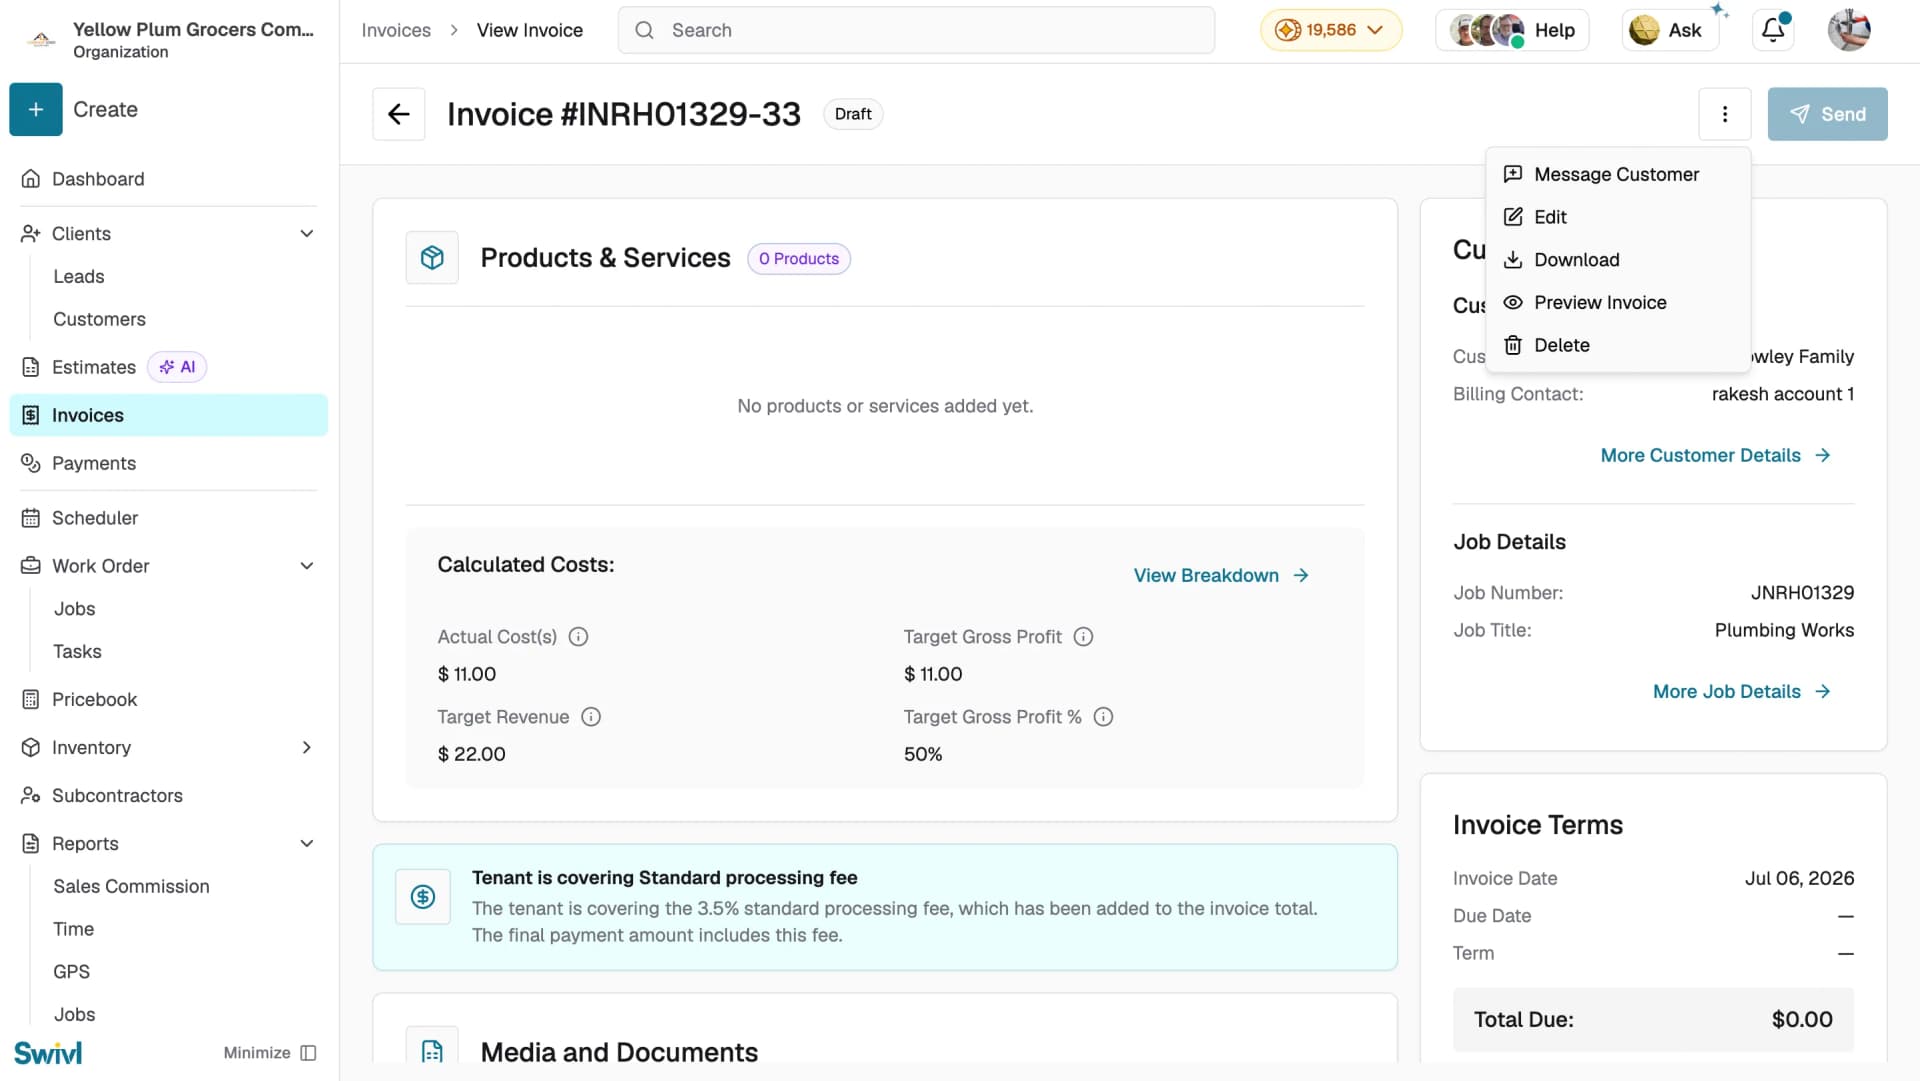
You can also message a customer directly from an invoice without leaving the page.
- Go to Invoices.
- Click the ⋮ menu next to any invoice in the list and select Message Customer or open the invoice and click the ⋮ menu next to Send at the top and select Message Customer from there.
- Choose SMS or Email, type your message, and click Send.
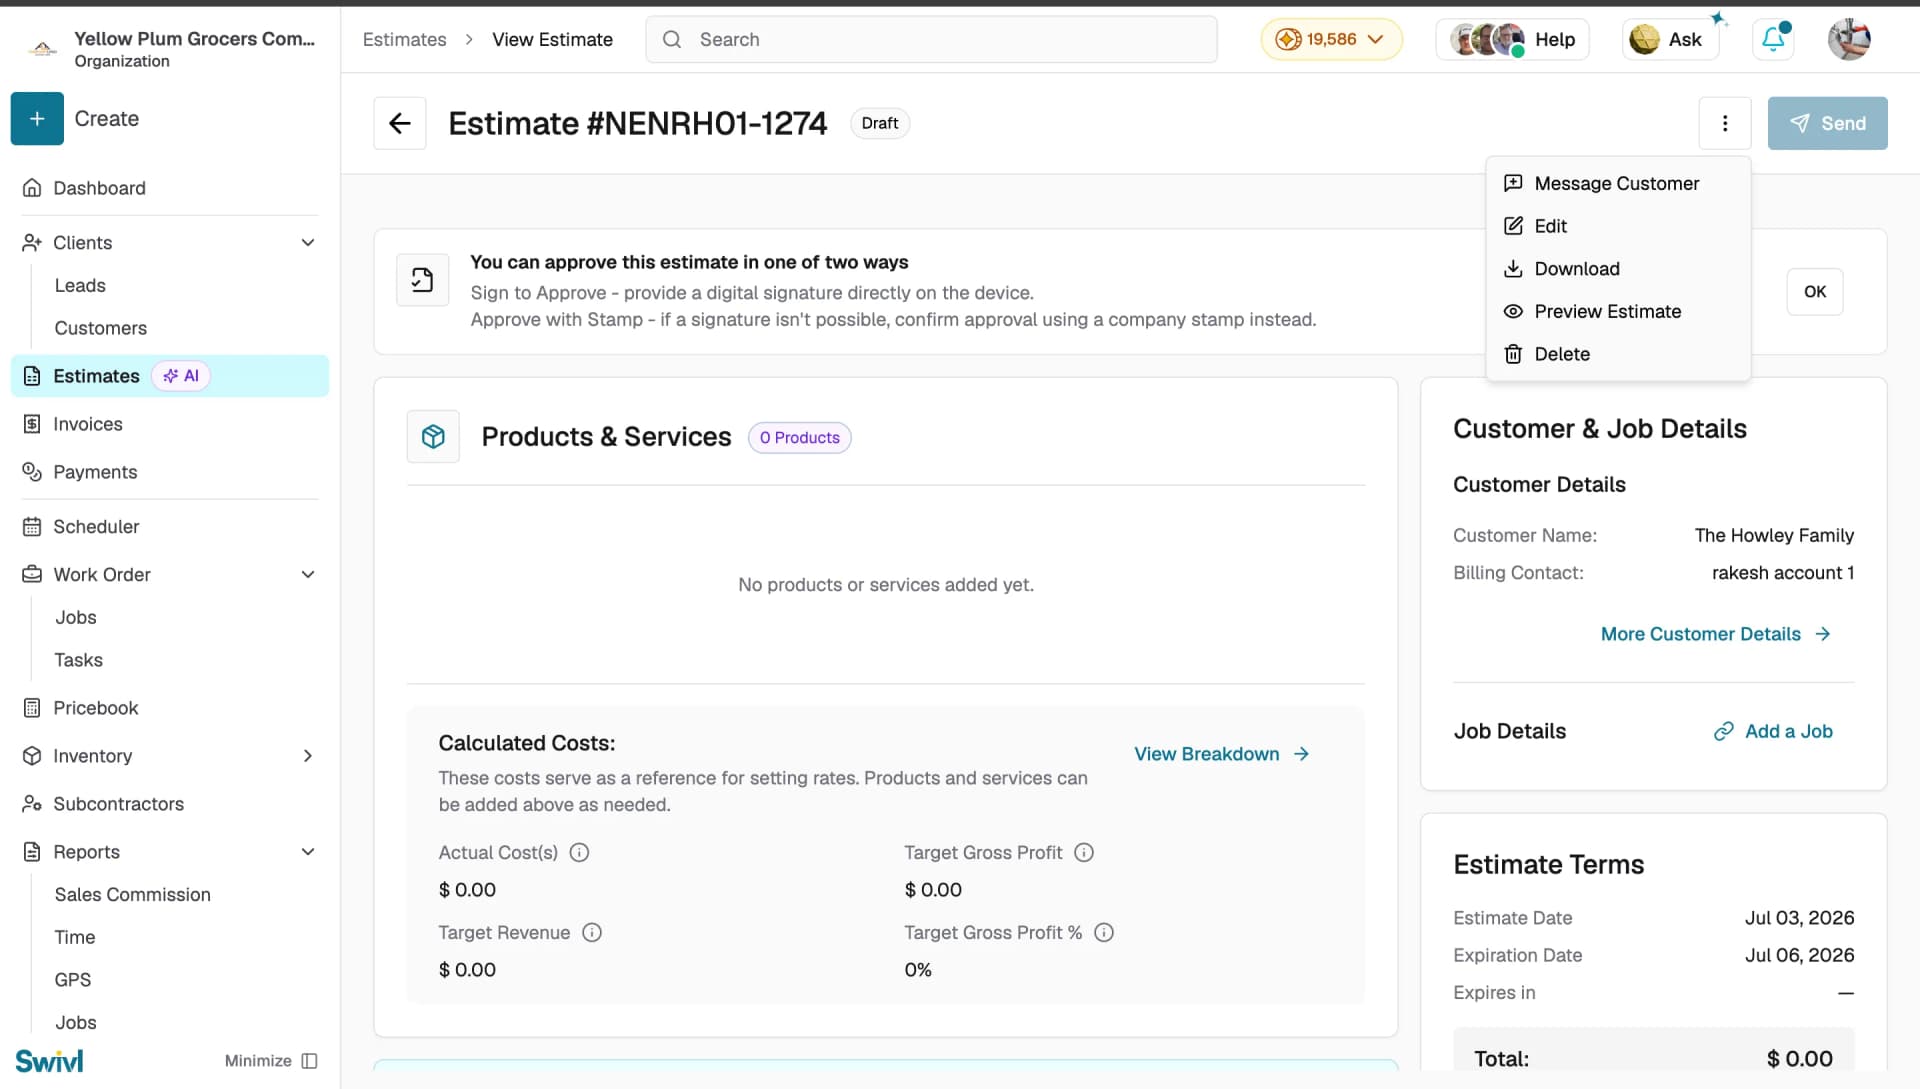
From an Estimate Page
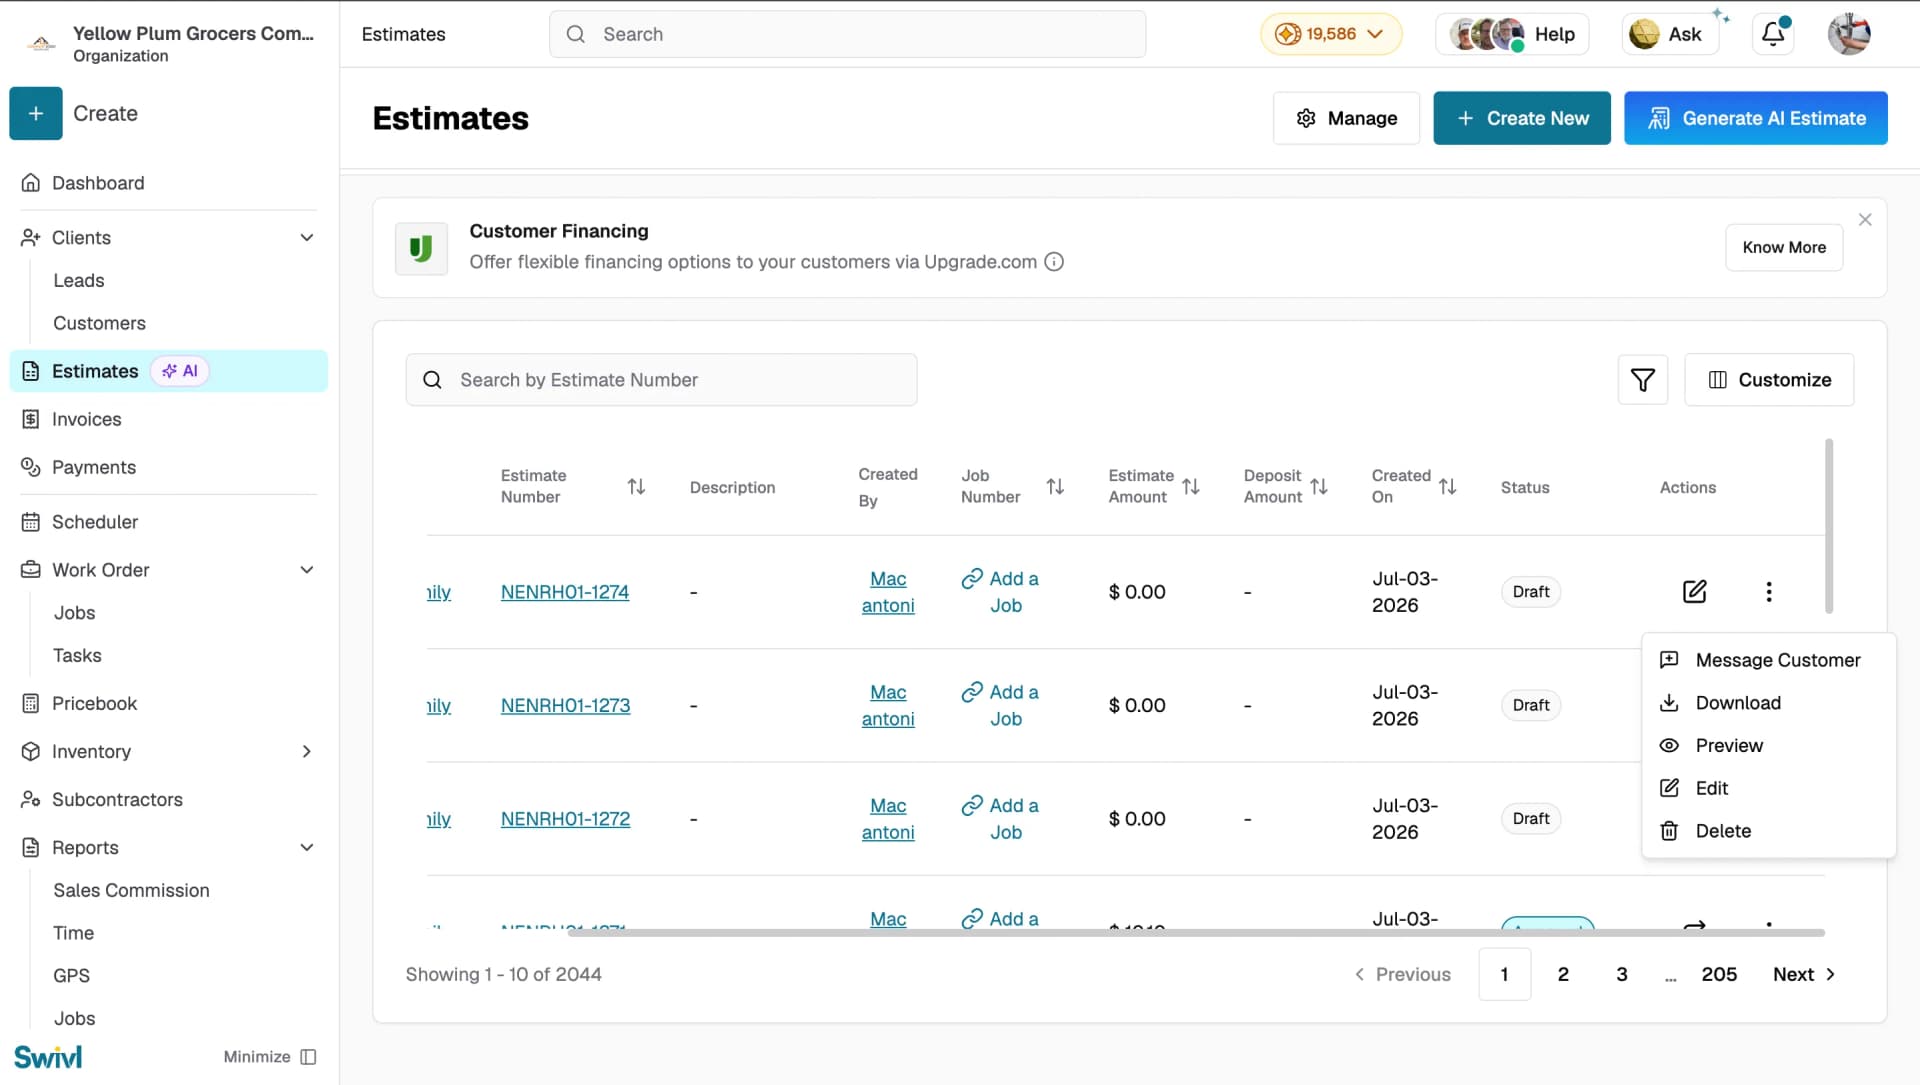
You can also message a customer directly from an estimate without leaving the page.
- Go to Estimates.
- Click the ⋮ menu next to any estimate in the list and select Message Customer or open the estimate and click the ⋮ menu next to Send at the top and select Message Customer from there.
- Choose SMS or Email, type your message, and click Send.
Linked Entities
The Linked entities panel appears on the right side of a conversation. It shows any estimates, invoices, or jobs connected to that customer, giving your team quick context on what has been shared or is currently in progress without having to leave the conversation.
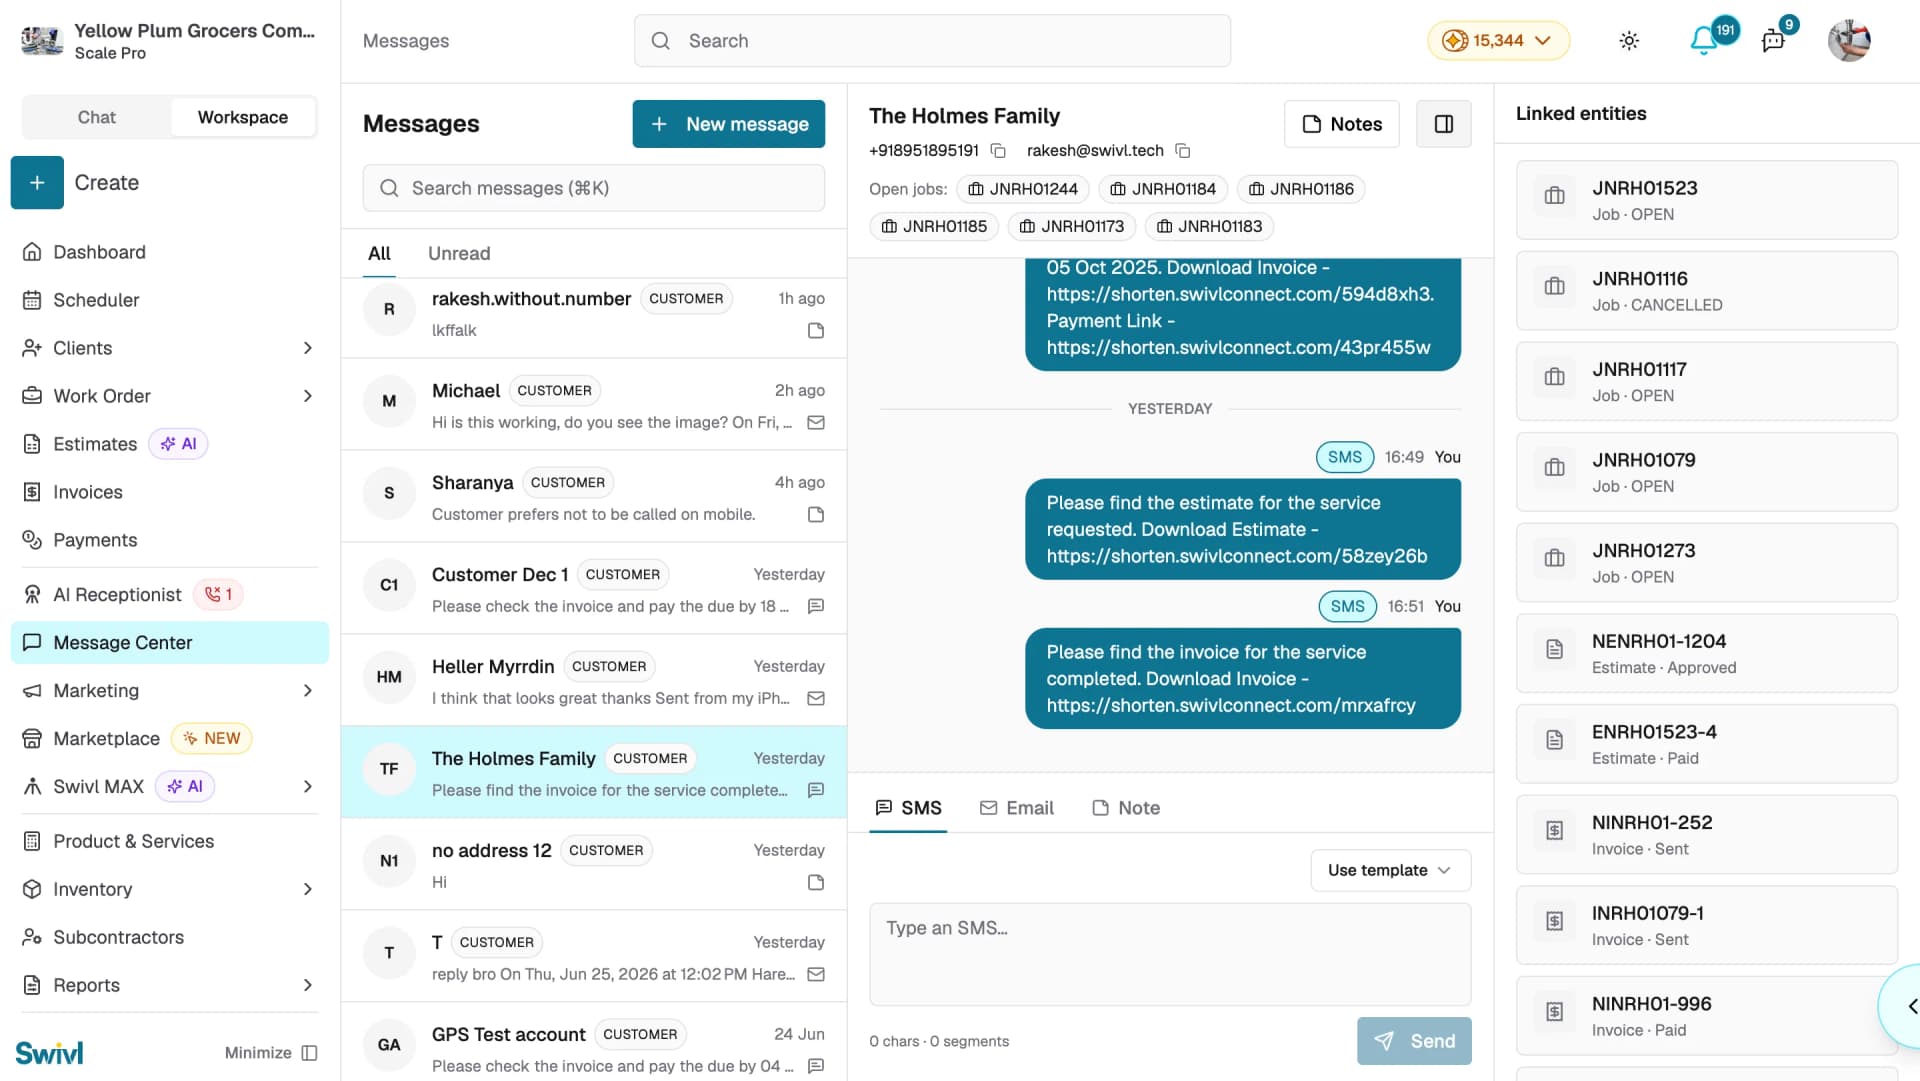
At the top of the conversation you can also see the customer's Open jobs listed. Click on any job number to go directly to that job page.

Conclusion
Stay connected with your customers, keep your team in sync, and never lose track of a conversation all from one place. Start using Message Center today and bring every customer interaction into Swivl.
Tips
- Use the Unread tab to quickly catch up on any customer replies you haven't seen yet.
- Use Search messages to find a specific conversation without scrolling through the inbox.
- Add a Note to any conversation to leave important context for your team such as a customer preference or a follow-up reminder. Notes are never visible to the customer.
- Use templates to save time on messages you send frequently the message is pre-filled and ready to send in seconds.
- Click on any Open job number in the conversation header to jump directly to that job without navigating away.
- Use the copy icons next to the phone number and email address to quickly copy customer contact details.